
By Scott Hudson and Sadhana Mandala
Introduction
For our first true Experimental Archaeology lab project in Week 2, our class attempted to better understand the chaîne opératoire of pre-industrial pastoral cheese-making by setting the weighty goal of making 5 cheeses over open flame in 4 hours. While we were unable to make one of these cheeses (mysost) we did succeed at making the other four (paneer, slow cultured curds, fast mozzarella, ricotta)!
We initially prepared for this lab through a series of readings on ethnoarchaeological studies of Cretan pastoralism, textual histories and primary sources on Anglo-Saxon rural living, a cheese-making guide that centered natural processes, and even an idyllic video of a modern Norwegian goat farm that blends traditional techniques with modern technologies. This diverse set of sources exposed us to a wide variety of techniques and approaches to cheese production that we could choose from in our own first attempt. In the end, a balance of naturalism and modernity prevailed; while we cooked over open fires and used rather fresh cow’s milk, we also utilized laser thermometers and precise measurements to make up for our lack of the knowledge through repetition any historical cheese-maker would have had.
Most groups ( C, D, E, F) were making a basic cheese by combining a warmed combination of milk and a culture with rennet. Group A were making a slow cultured cheese, adding kefir after the milk was warmed and Group B was making paneer, adding acid after the milk was boiled.
Mozzarella
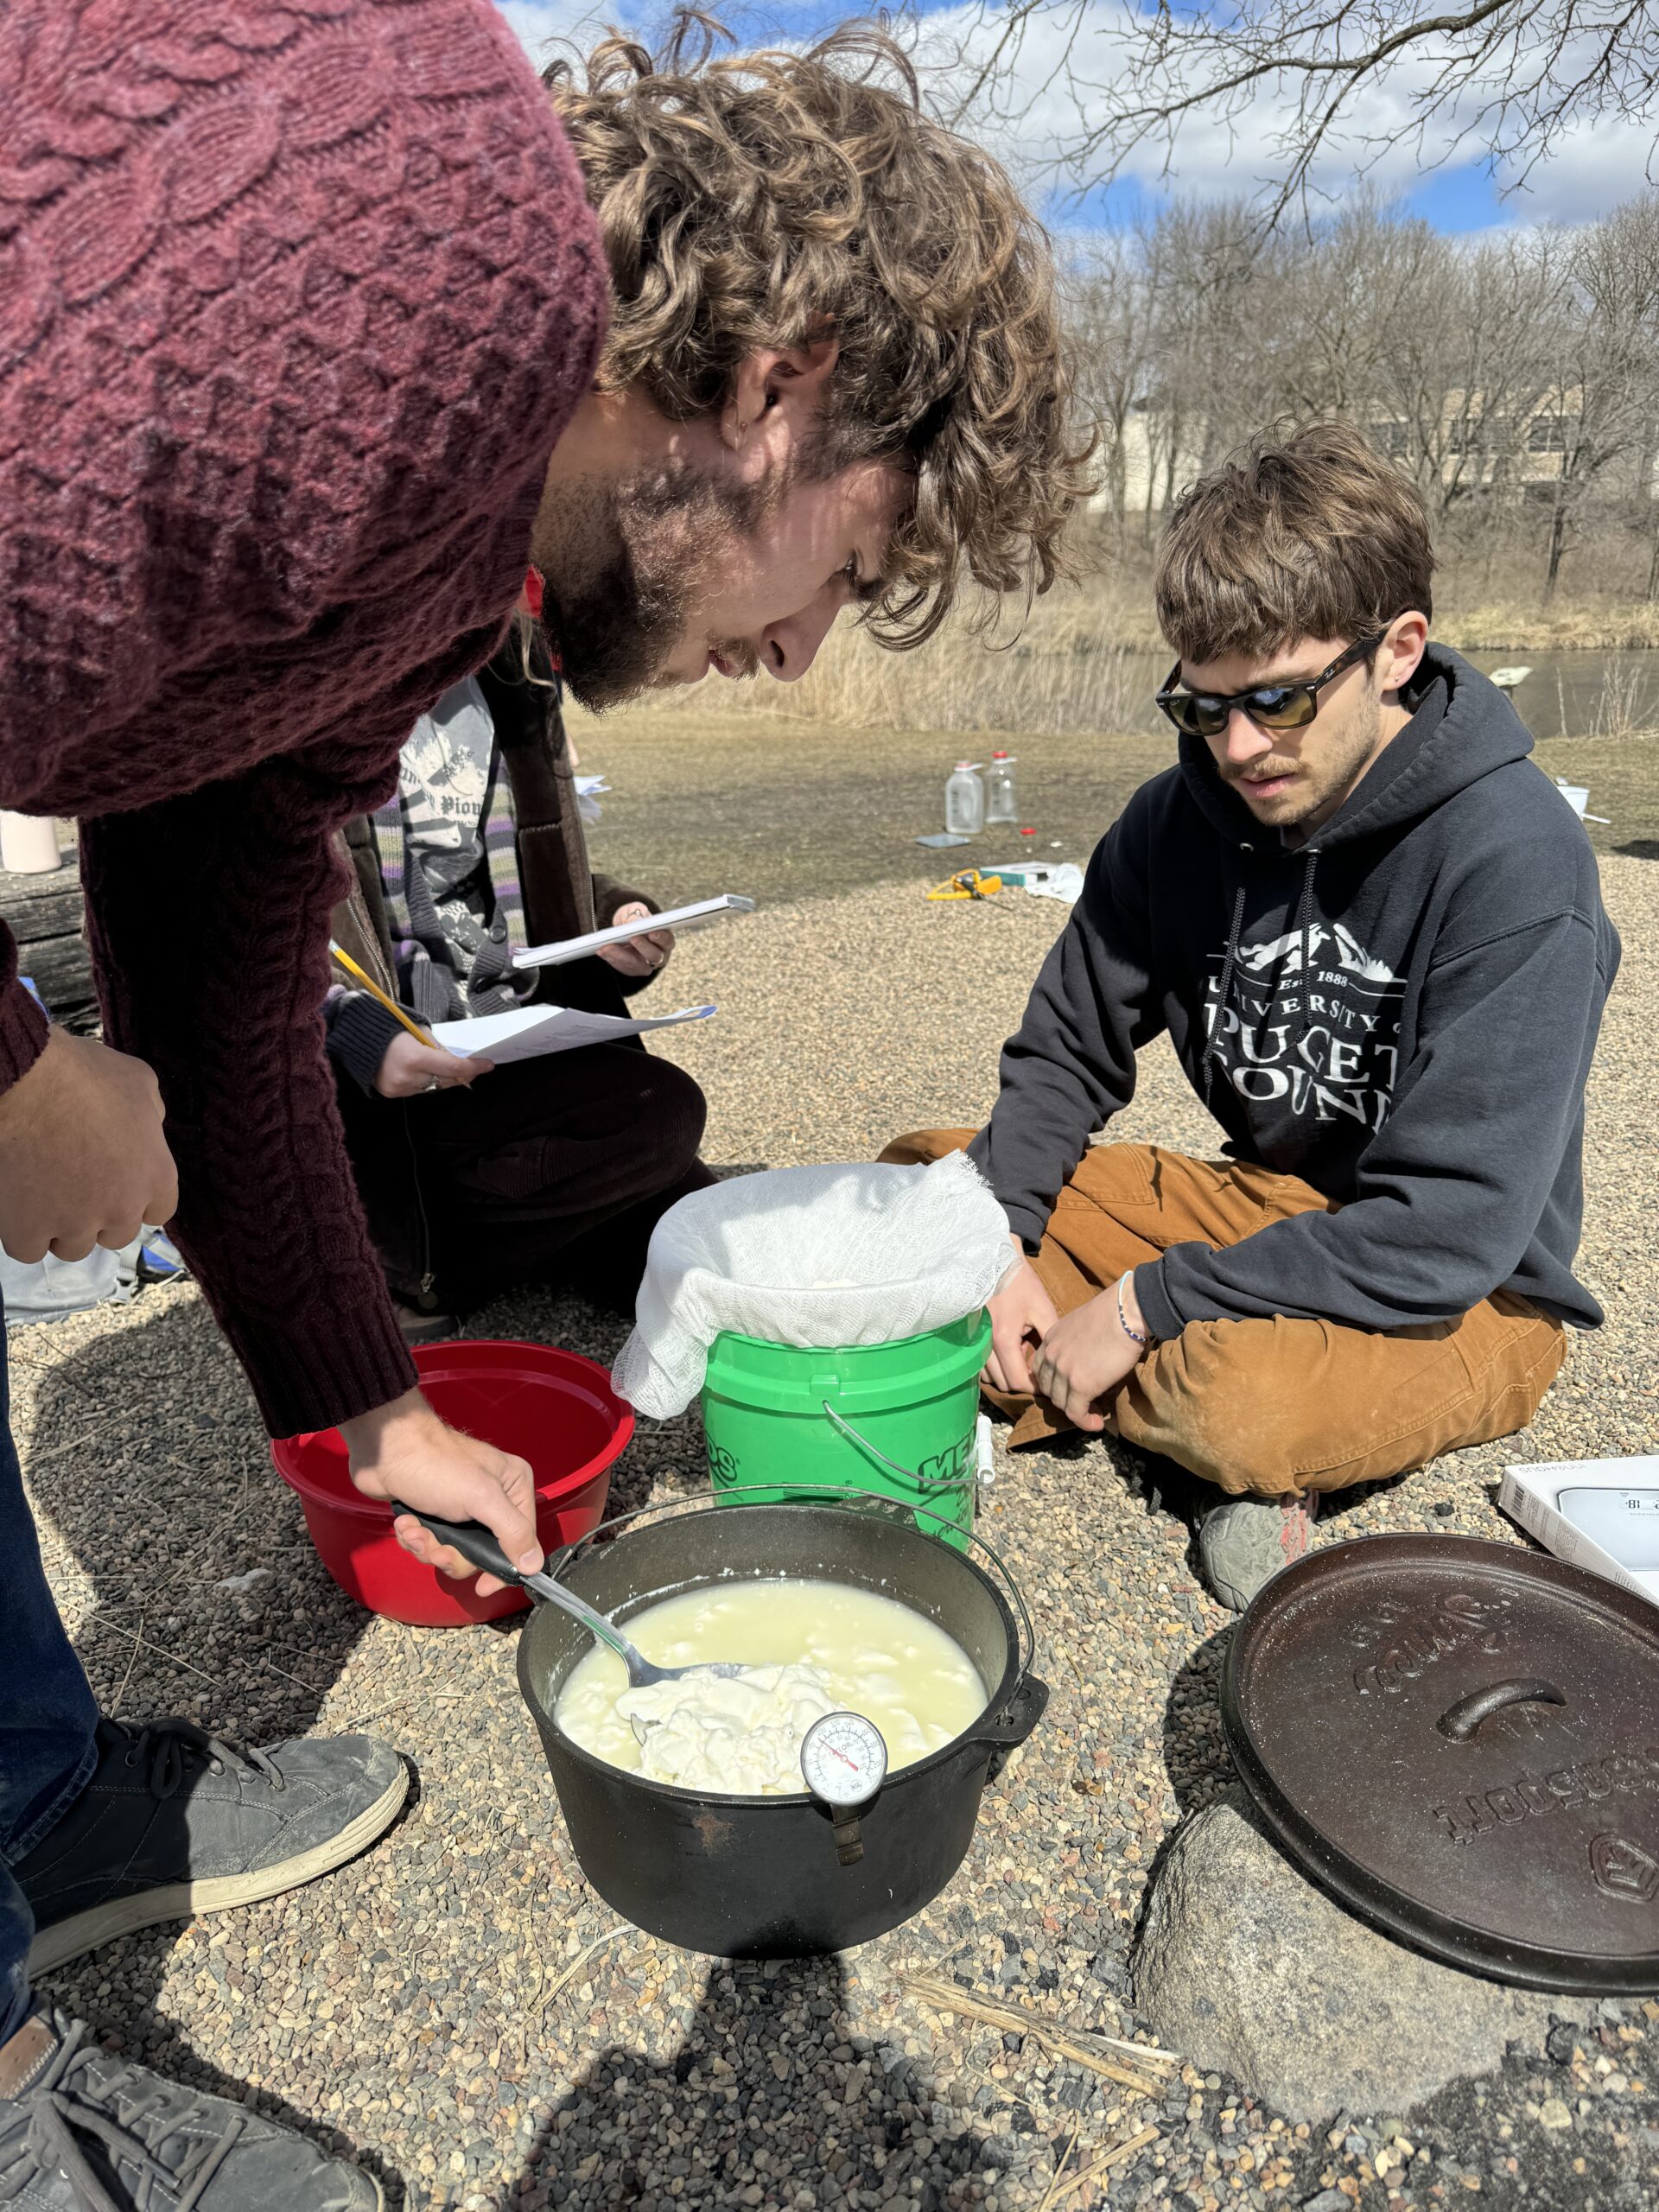
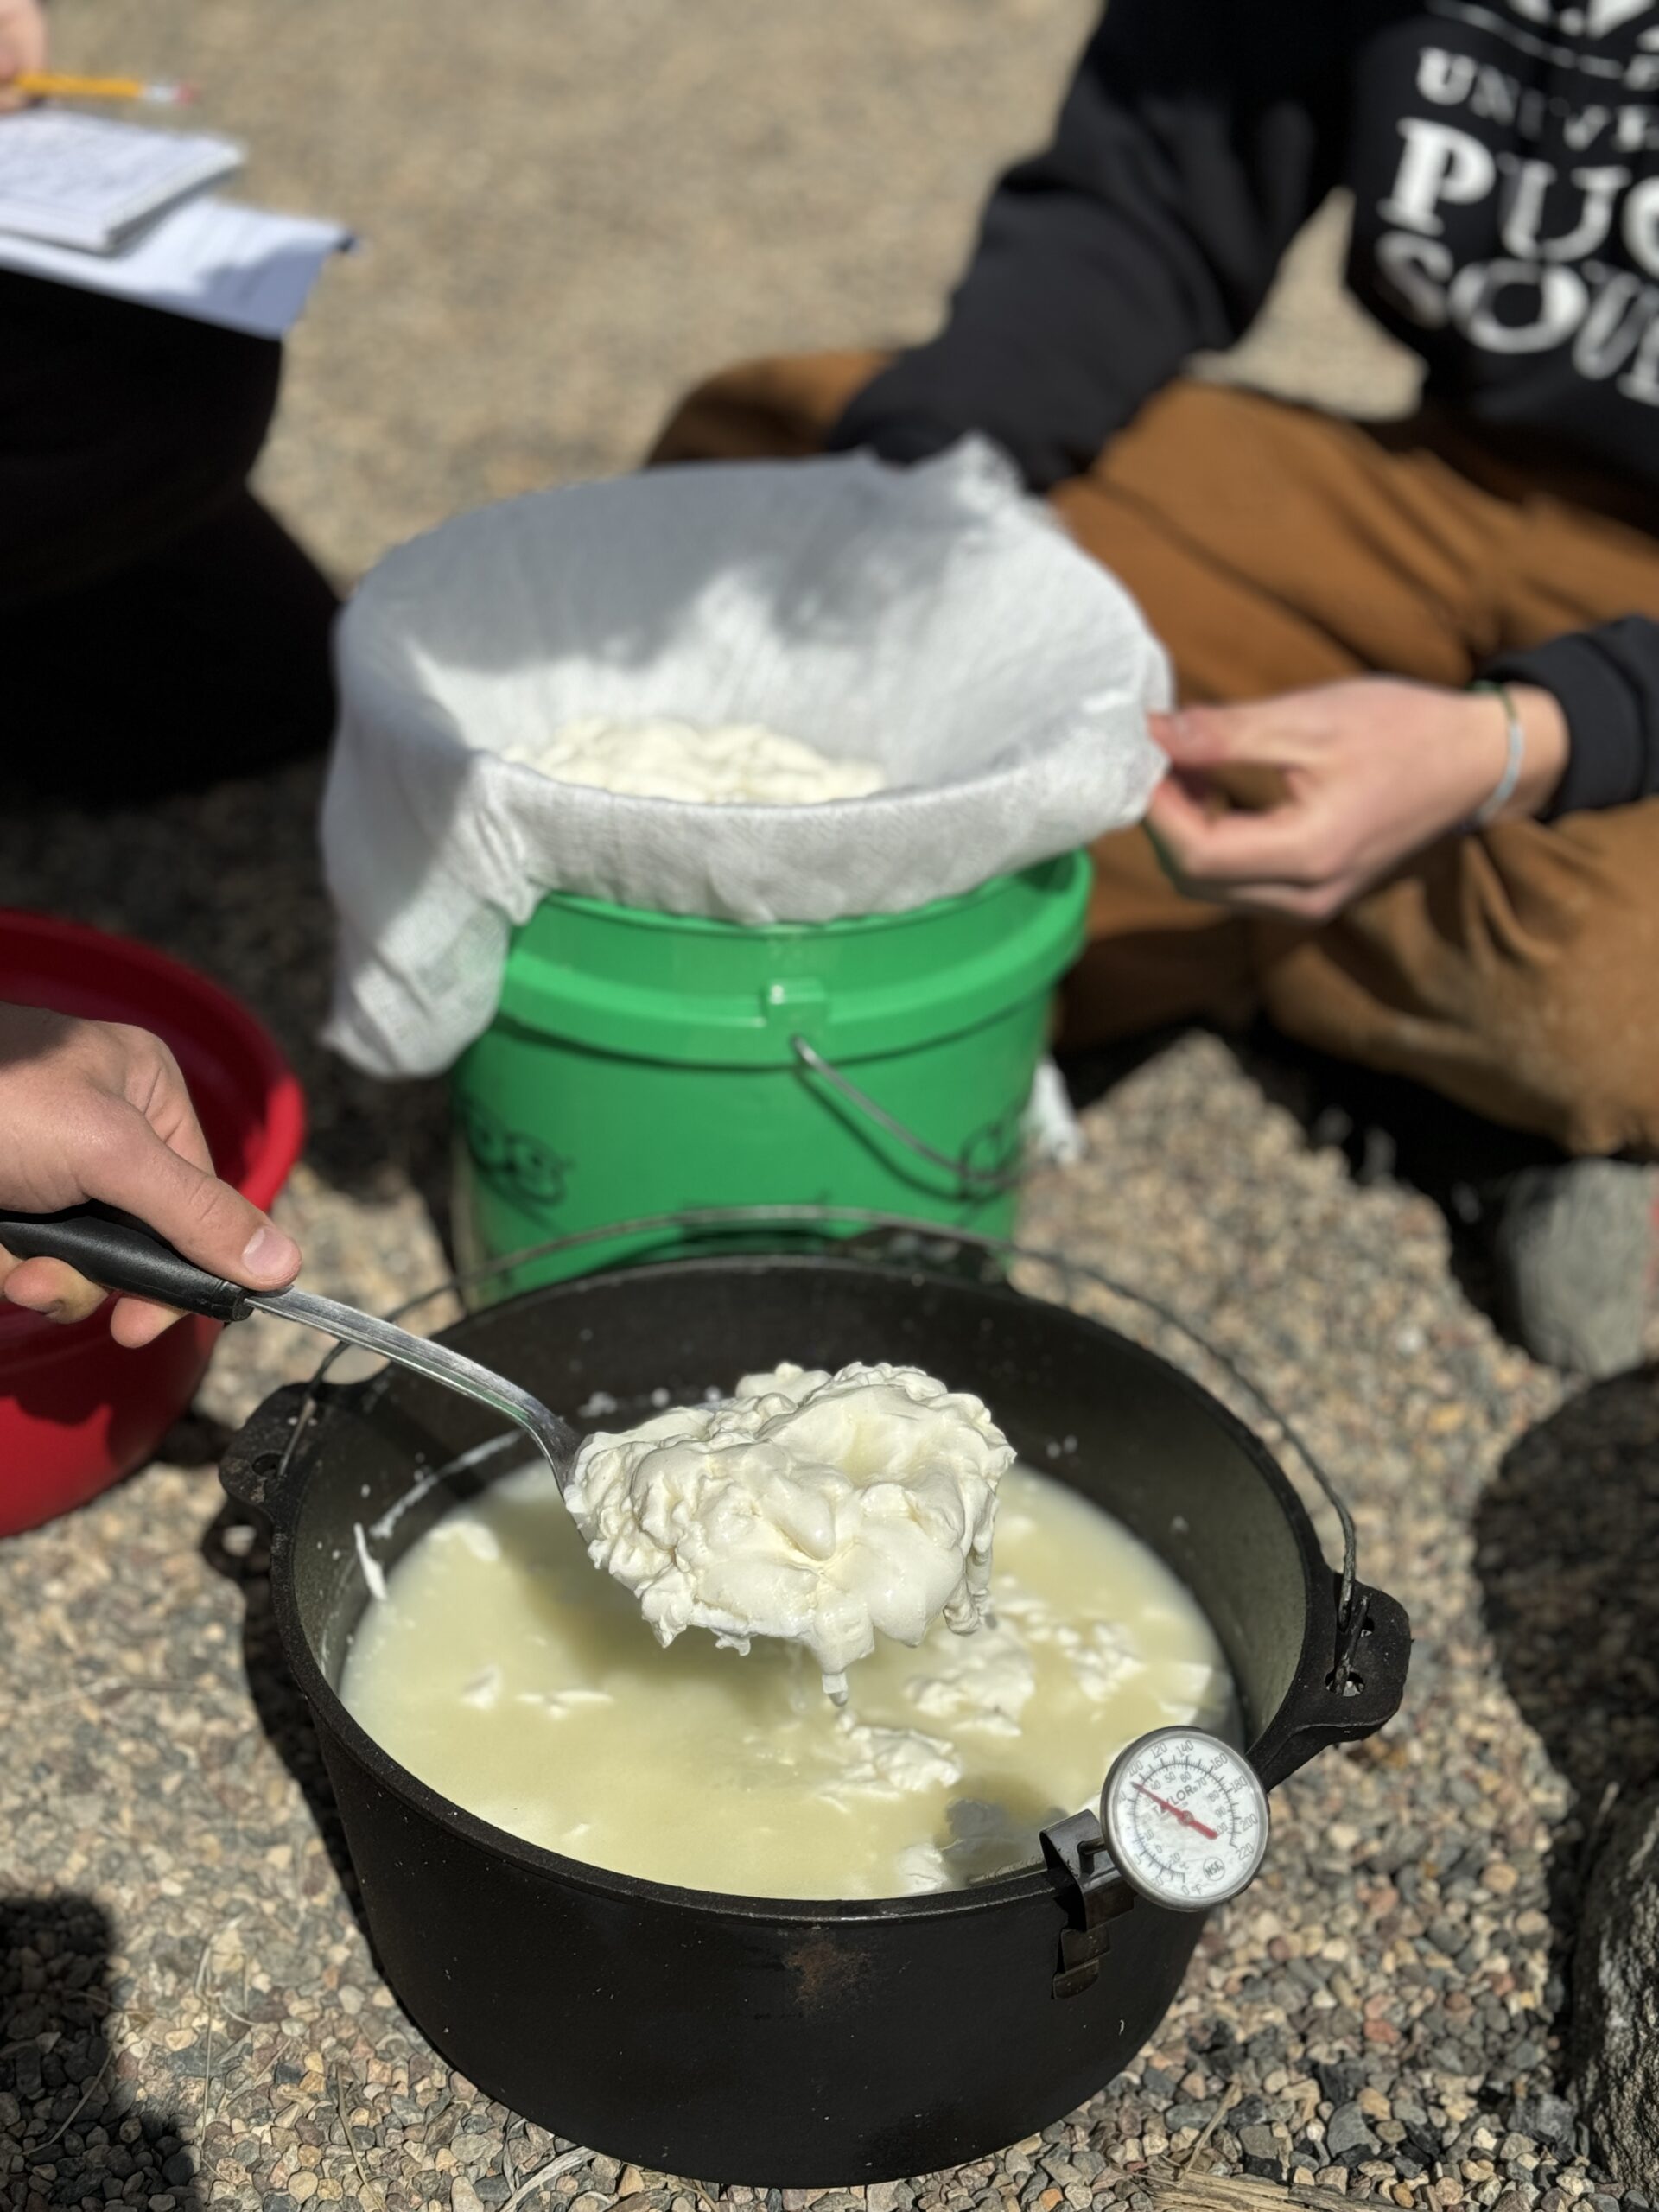
Groups C-F, which created mozzarella curds through a fast-acting process, began by combining 1 gallon of milk with a lemon juice-based culture. These groups then heated the milk-culture mixture to 90°F before pulling the pot off of the heat. At this point, some groups ran into problems. The goal of removing the mixture from the heat at 90° was to replicate the body heat of a mammal. However, in some cases, the cast iron pots we were using retained too much heat from the fire and continued heating the pot, in some cases well over 100°. This unexpected obstacle ended up ruining 1 of our 4 batches of cheese. After heating, the groups added rennet in capsule-form to the cheese and waited 30-45 minutes for a curd to form.
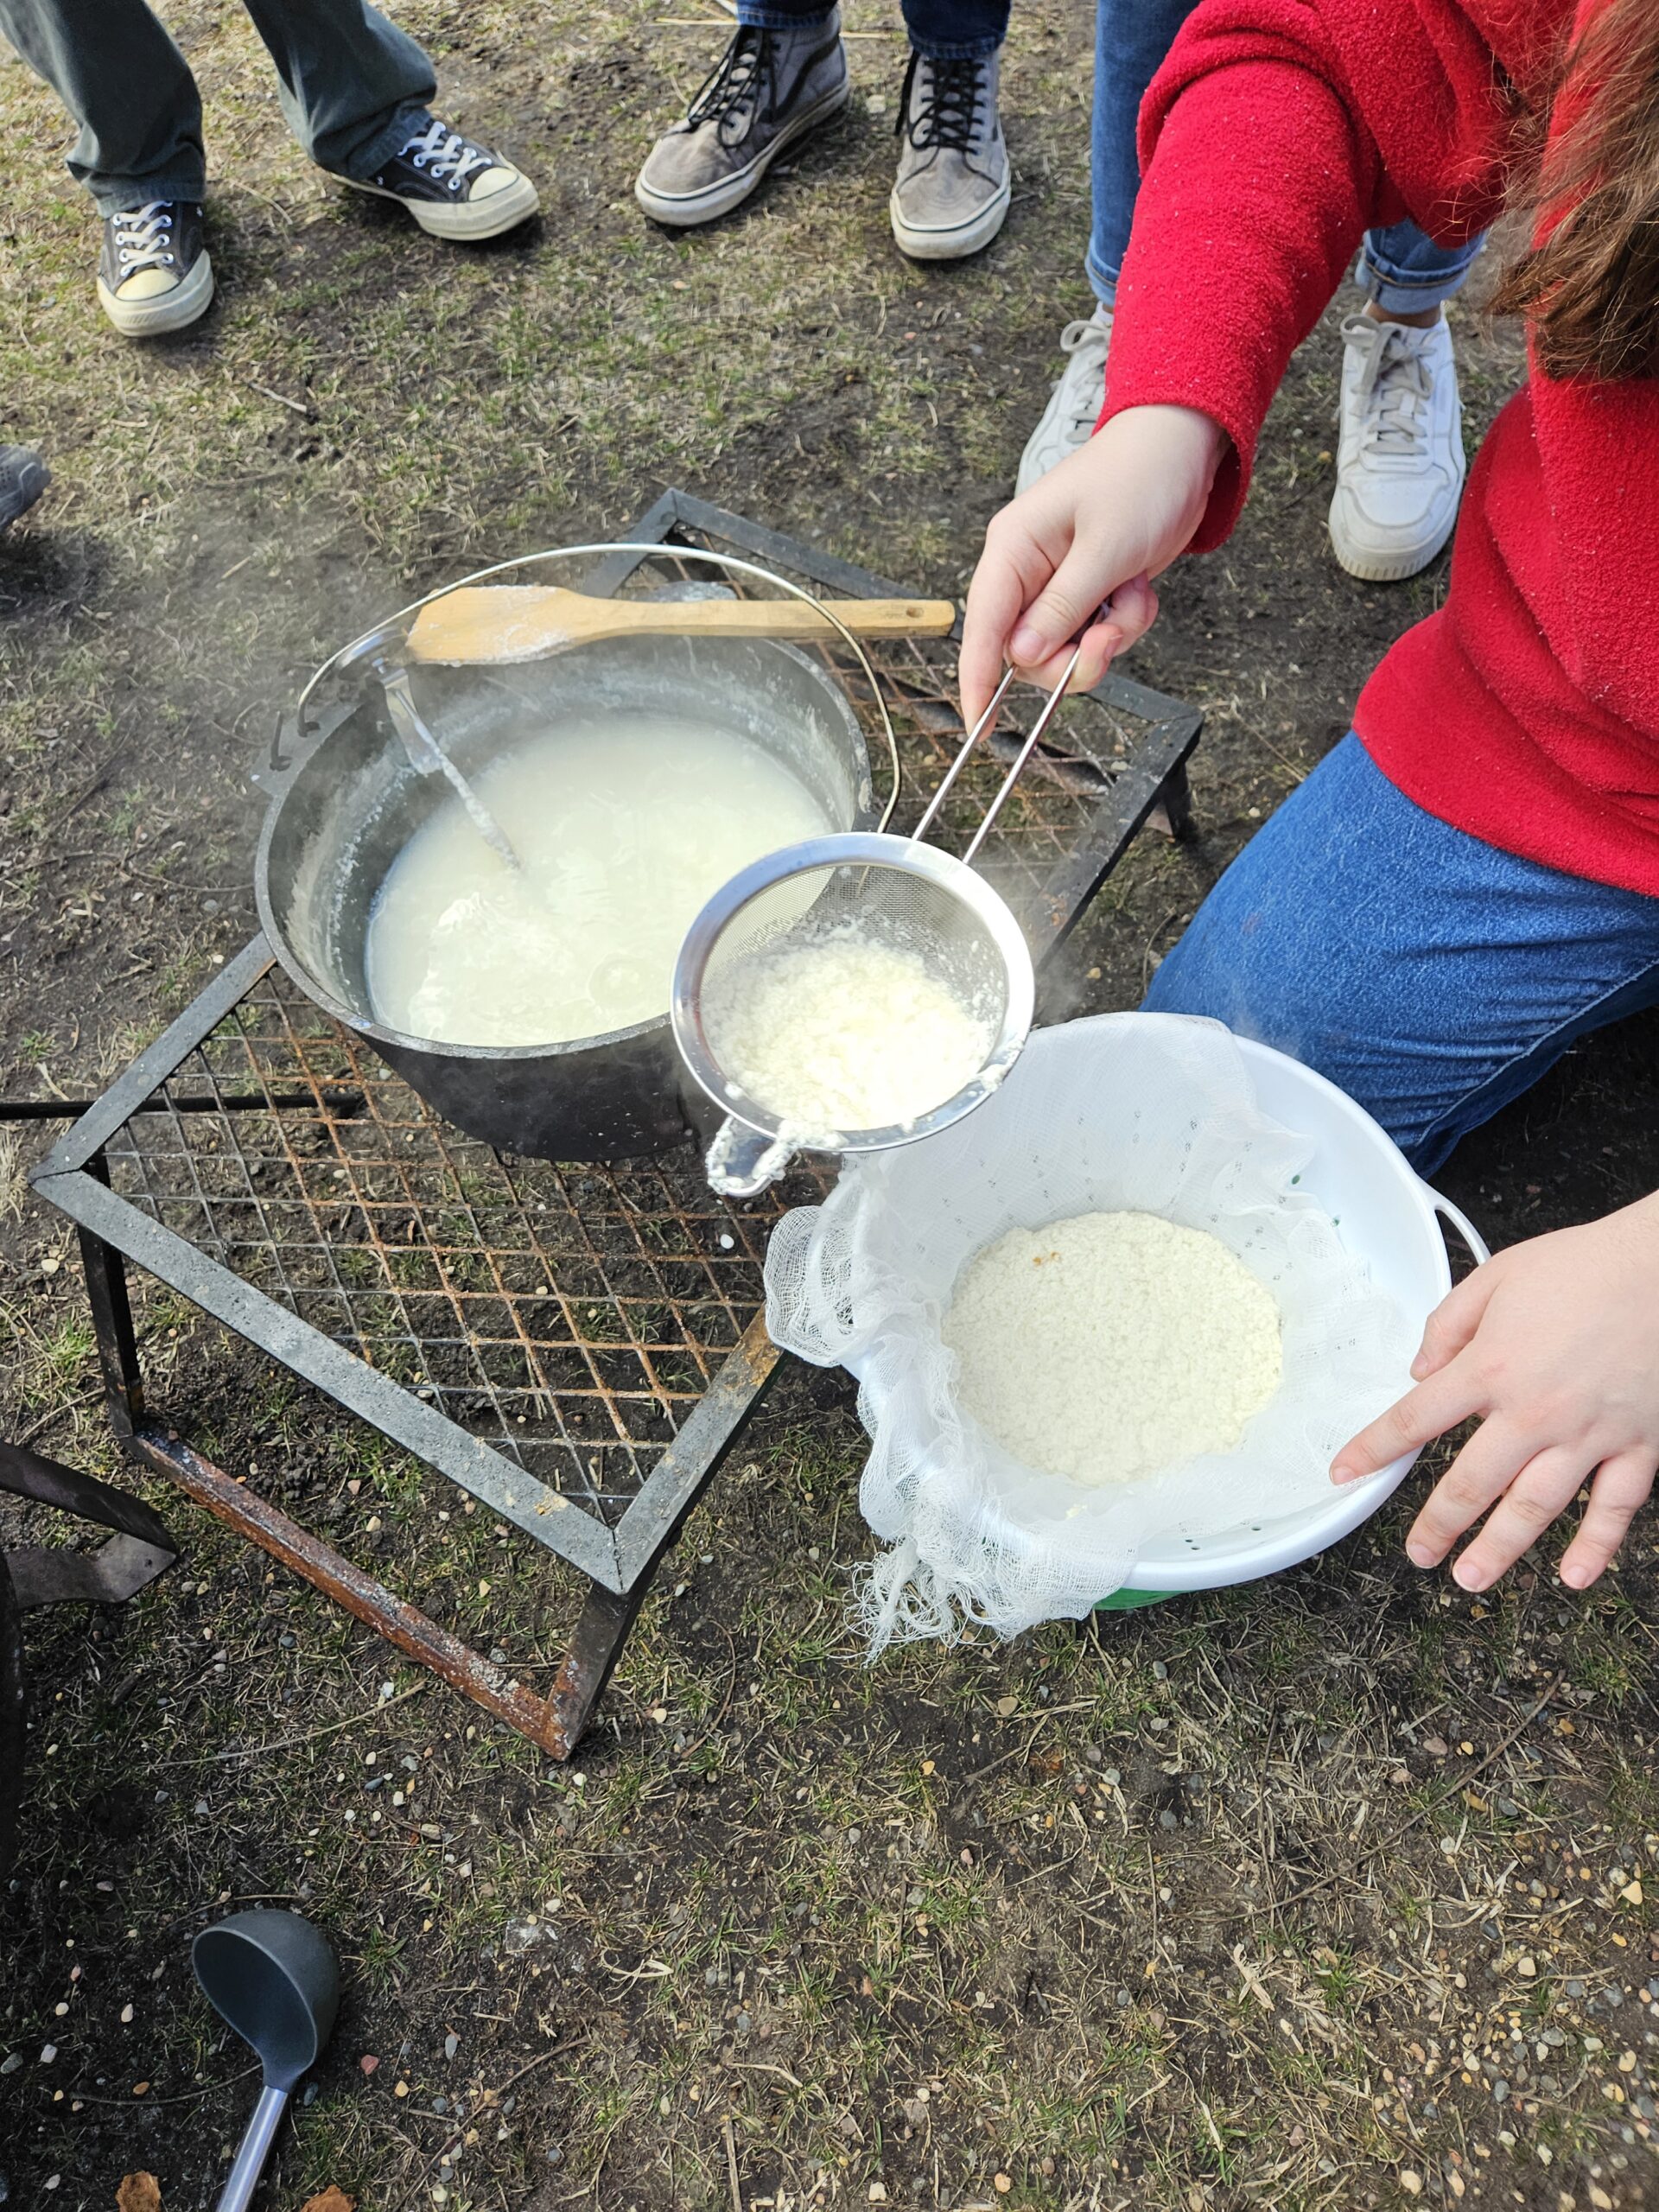
We could tell when curd formation was complete if our pots’ contents passed the “clean break test,” when a finger, inserted at a 45° degree angle and then levered upwards, could cleanly break through a floating cheese curd. At this point, we cut our curds into evenly sized squares and stirred them regularly until the curds were “done” – a point marked by a texture approximately that of a poached egg. When the curds were “done,” we “pitched” them by pouring the whole mixture into a cheese-cloth-lined colander to separate the curds from the whey side-product. Now, with curds in hand, we could form them into rounds using plastic cheese molds and leave them to dry!
Groups C and F used some of their curds to make mozzarella cheese, a type of pasta filata cheese created through a stretching process. They began by cutting their slightly dried, compressed curds into slices they then submerged into 150°F water for 5 minutes.
Slow-cultured Cheese and Ricotta
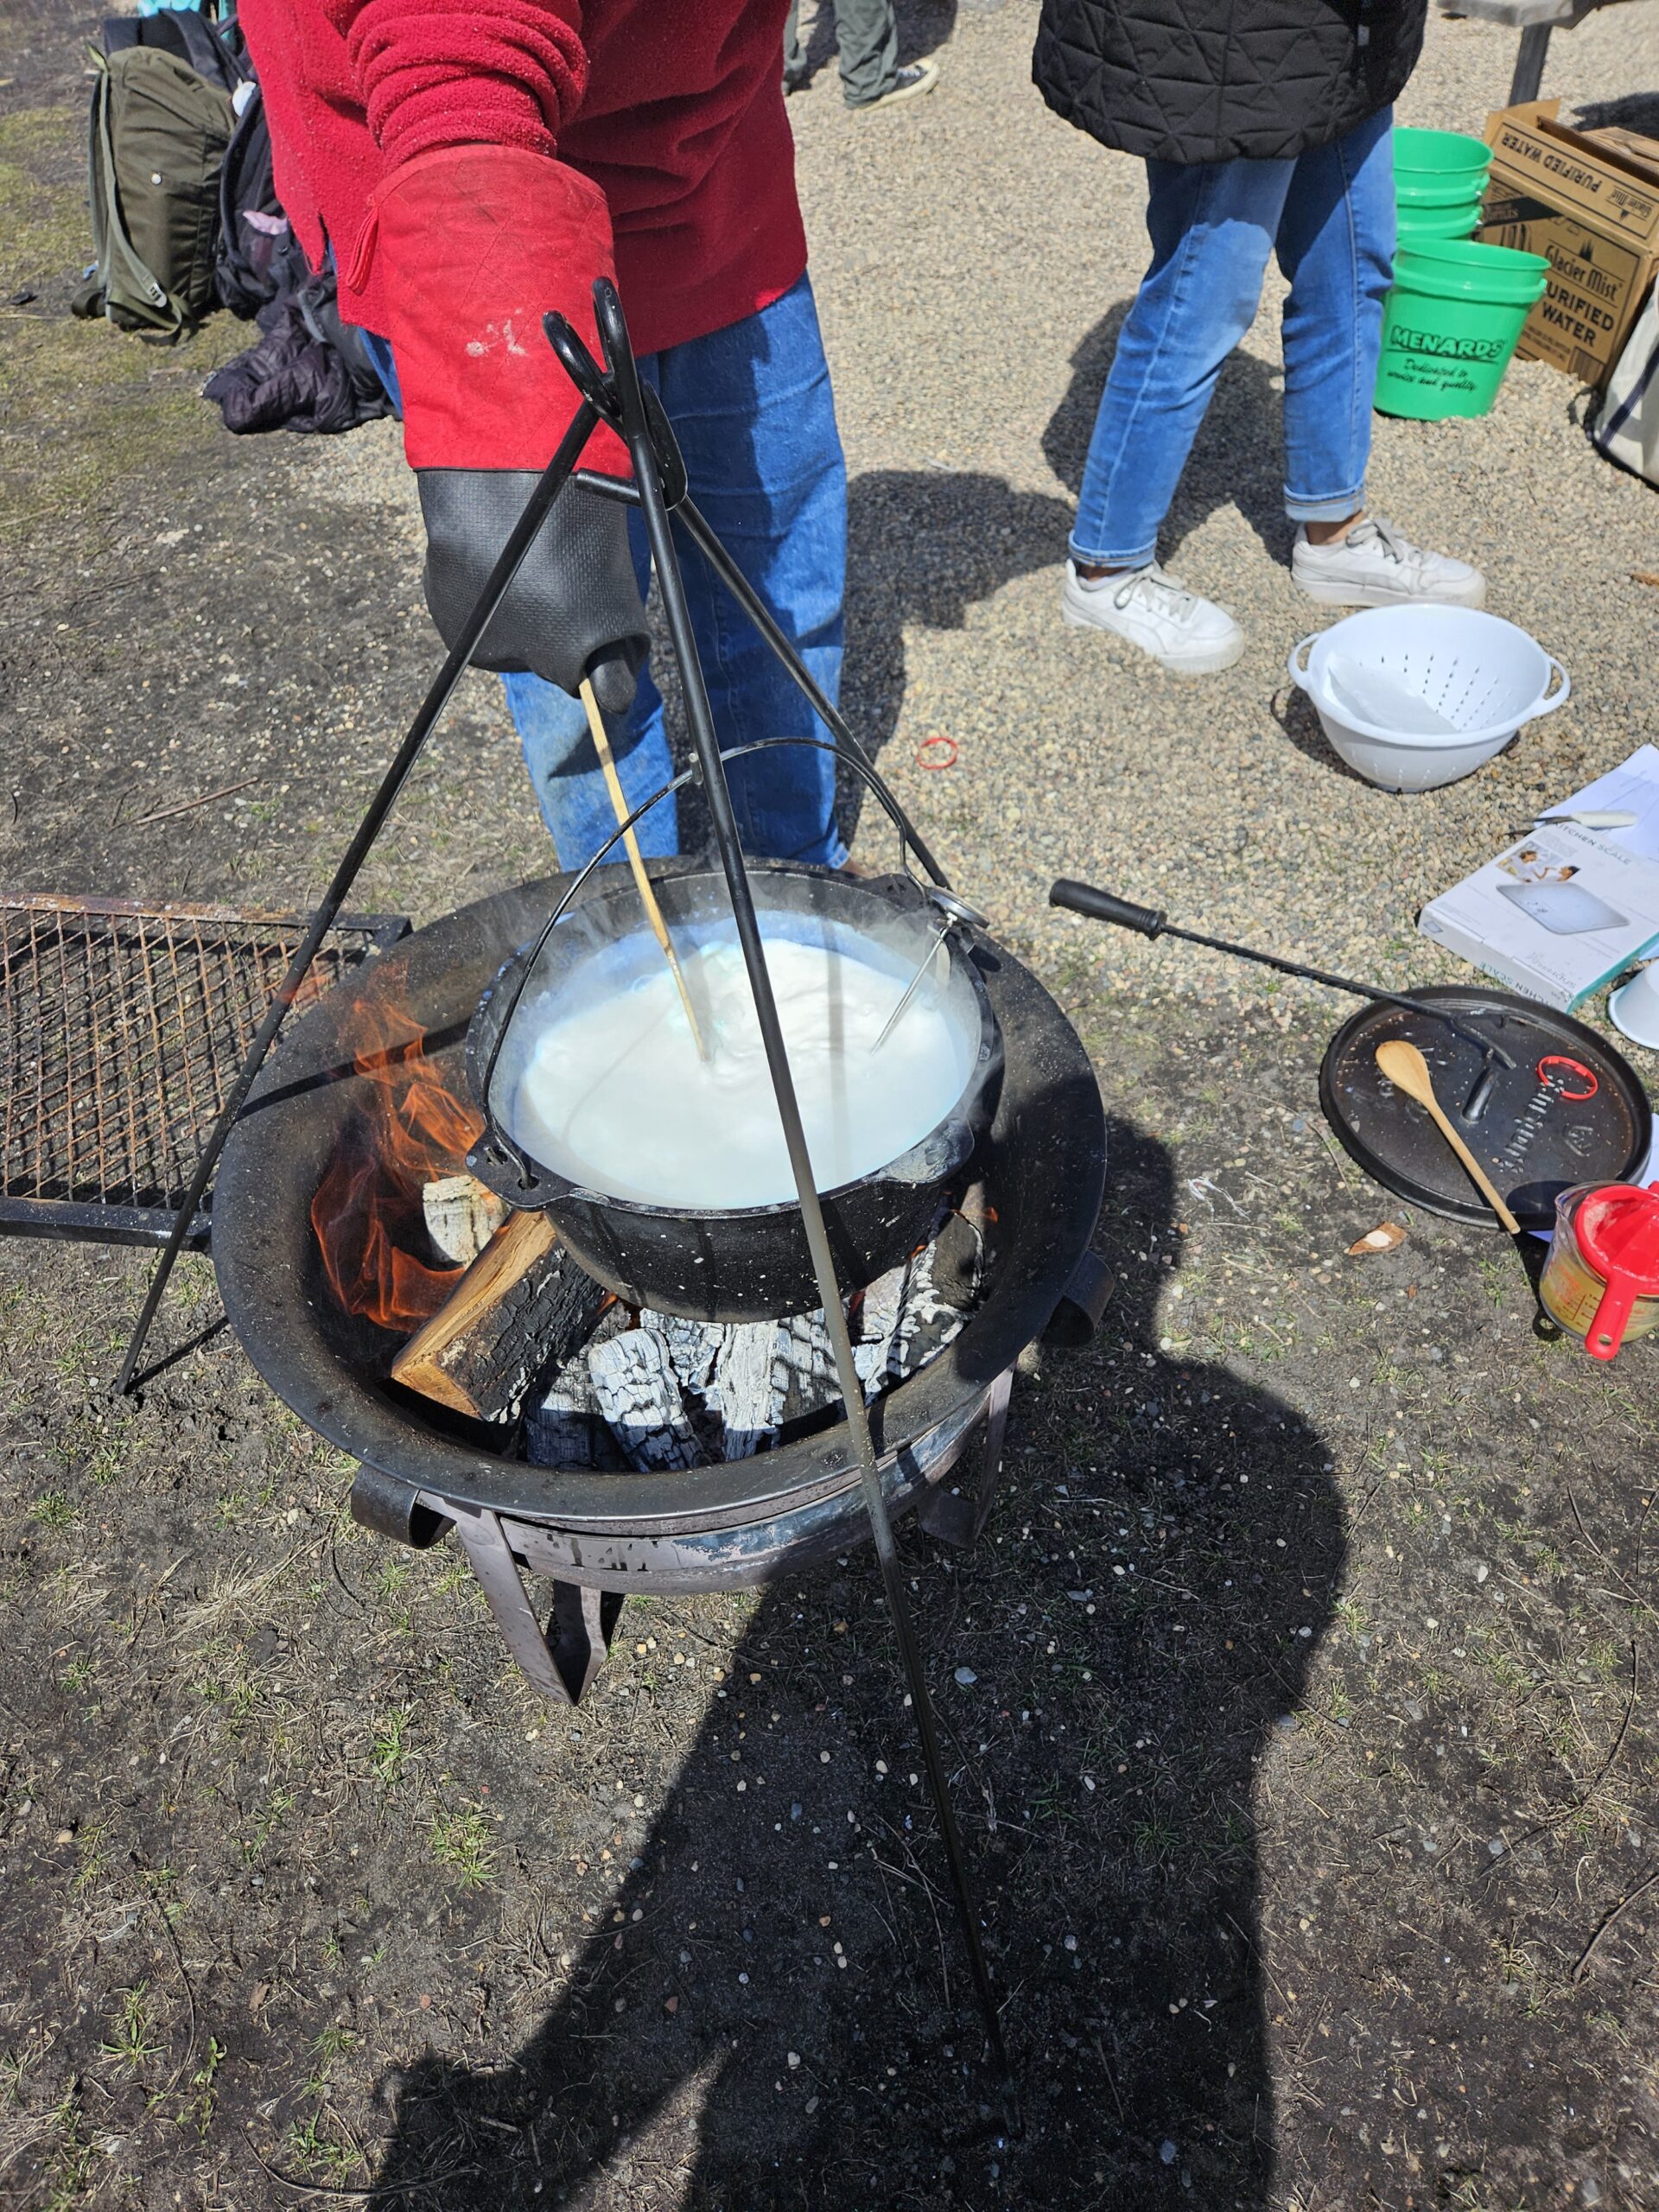
Group A made a slow-cultured cheese by slowly adding a ¼ cup of kefir into the milk mixture when it reached 90 degrees Fahrenheit. The mixture was then covered and kept between 85-95 degrees for the next hour. Next, a dissolved rennet tablet was added and the milk mixture was left for another 45 minutes to allow the kefir and rennet to work into the mixture, forming the cheese.
After this, it was time for the “clean break test”. This consisted of putting a finger at a 45-degree angle into the mixture to see if your finger makes a clean break through the curds which indicate the curds have formed. After achieving the curdled cheese consistency, we gently stirred the cheese and cut into 2cm strips lengthwise and then widthwise creating cubes. These cubes were then placed in a cheese-cloth lined colander to drain the whey, which was then used in the next steps to make ricotta.
The cheese caught in the cheese-cloth was pressed into cheese containers, while the remaining whey was returned to the pot and brought to a boil. After boiling, a ¼ cup of lemon juice was added, which immediately prompted further curdling. The mixture was stirred as the cheese curdled and formed clumps. Once curdled, the mixture was removed from heat, and the curds were gently broken apart. The ricotta that had risen to the top was collected in a cheesecloth to drain and cool the cheese.
Paneer
Group B was making paneer which began by adding 1 cup of lemon juice to the milk mixture when it reached boiling temperatures. The milk was kept at boiling temperatures while being constantly stirred and scraping down the bottom of the cast iron pot. Afterward, the cast iron was removed from the heat, and acid-water was added and stirred in to ensure thorough mixing.
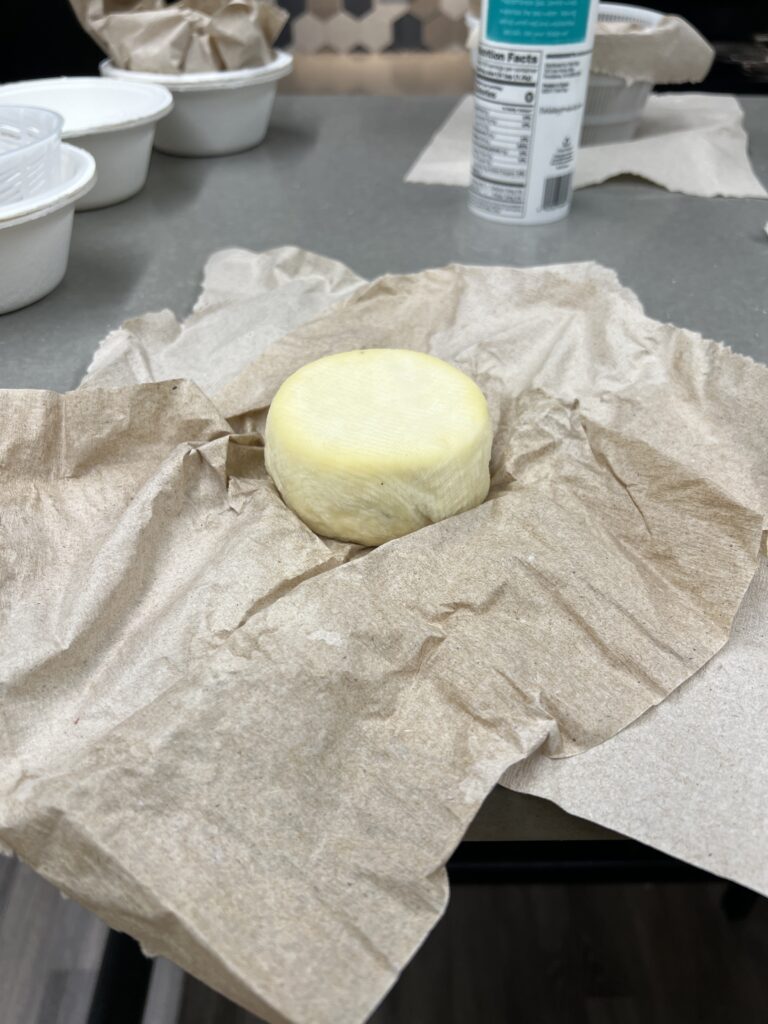
The pot was then set aside for 5 minutes to allow the cheese to form. Following this, the curds were pitched, which involved placing a cheese-cloth lined colander over a container to catch the whey. Then the whey was poured off, and the curds were collected in the cheesecloth. This process was the fastest process among all the cheeses produced because the milk was heated to boiling temperatures, and acid was added after heating, and no rennet was used. Once collected, the cheese was pressed into cheese containers and then pressured to form a block of paneer, which was then fried.
Data Summary
This cheese-making lab was, in many ways, a practice lab that was less designed to test a single theory and more designed to give students experience with re-creating a practice that an Experimental Archaeology project might entail, and in the meantime also allowing us to practice working in groups in an archaeological lab setting. So, the data collection was not as central a component as in our future labs; however, we did still capture some!
Many groups measured the temperature of the whey as they heated it to form the curds, and the steady heating and cooling is captured in the graphs below:
Other groups, however, had to reheat their whey and curds to keep it at the optimal temperature for cheesemaking, ~90°F. However, when reheating, they quickly discovered the dangers of making cheese over an open fire; that is, that flame heats quickly and unevenly, a fact captured in some of the spikes in whey temperature. It was these temperature spikes that ruined one group’s batch of mozzarella curds.
In addition, many groups measured the volume of their ingredients as the cheese-making process progressed. One particularly well-visualized example of the ingredient change is the flow chart below, measured in grams.
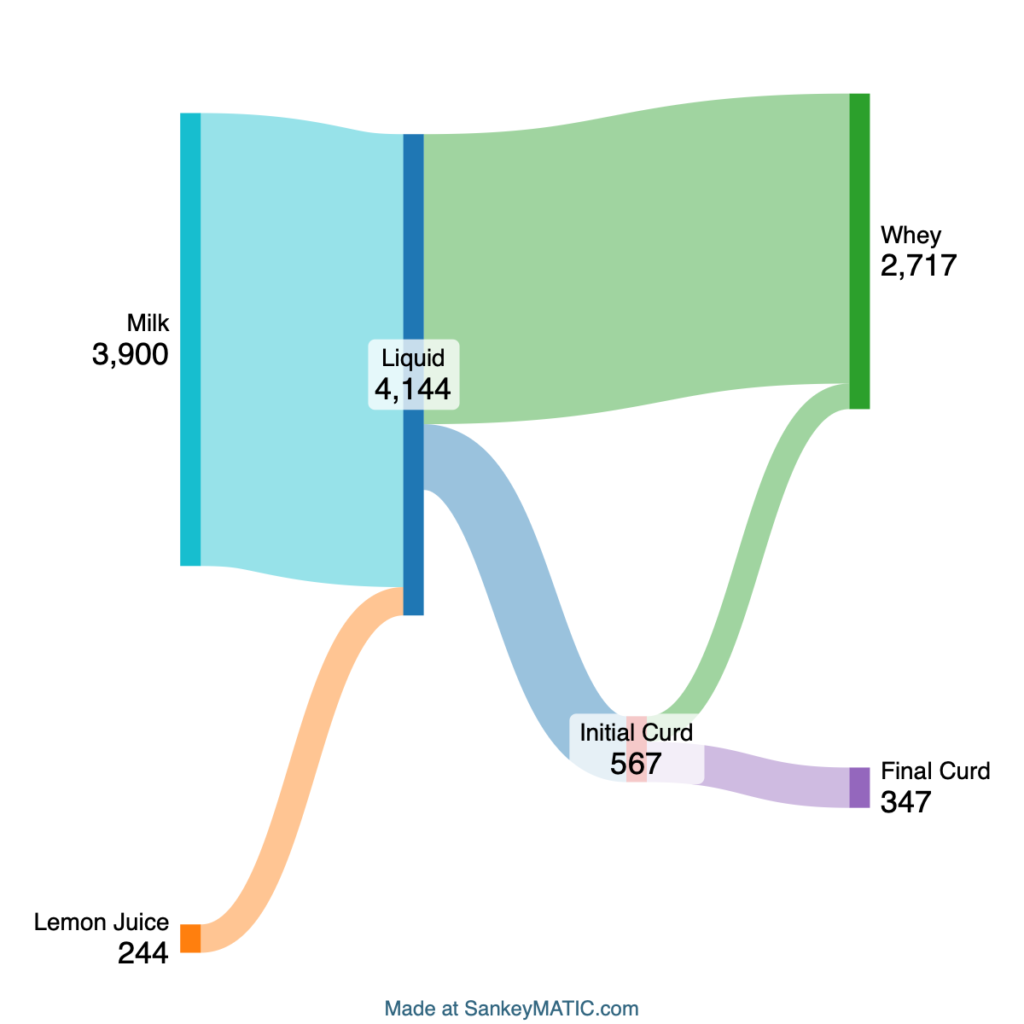
In this visualization, we can clearly see not only the fact that whey outweighed curd by a substantial measure, but also that a not-insignificant amount of material was lost throughout the process.
Conclusion
In sum, it was a wonderful experience to make the various forms of cheese that we did. We certainly hit some bumps along the way (and some groups more than others), but it was still great to get outdoors and have a first experience re-creating a traditional food-making technique that has formed a key component of the nourishment of countless cultures and generations. Our research questions may have been less focused than in other labs, and our data collection techniques less defined, but the process itself was still a hugely instructional one that seems to have taught every member of the class the value of technique and practice, as well as the value of Experimental Archaeology in helping us uncover the techniques and practices of cultures we no longer have access to.


0 thoughts on “Lab Summary Week 2: Making Cheese”