Introduction:
All lab groups met with Carleton ceramics professor Kelly Connole for a pottery-making workshop. Each individual had two types of clay – manufactured, “perfect” clay and unprocessed clay collected from the Carleton Arboretum. Starting as a powder, this was mixed with water to create a workable clay, with water or powder each being added as necessary to make a workable balance. As the clay was created, temper in the form of tiny bits of pre-fired ceramic was added to the clay to aid in the firing process. From here, two to three pinch pots were crafted per person. To do so, a lump of clay approximately spherical with a 1-2 inch diameter was pinched into a vessel. This created the starting point for the pot, which could be stretched and manipulated into different forms. After the initial body was formed, rows of clay could be added to add height. The size of these rows would control the shape and function of the completed pottery.
Clay Properties:
| Property | Arb Clay | Processed Clay |
| Texture | Coarse, can feel many individual grains within less stable body | Uniform and smooth, playdoh like |
| Strength | Struggles to take and hold form very quickly | Holds form well and quickly |
| Malleable | Easy to move and bend, but often breaks or does not hold form | Manipulatable and maintains changes |
| Inclusions | Many inclusions, appx. .25-1mm; feels like small rocks | Uniform without clear inclusions |
| Moisture | Holds on to moisture much longer; slow to dry | Quick to dry or wetten |
Pot Measurements:
Due to separation during the making process, my groupmates and I each had different methods of measuring and describing our work, some more qualitative and some more quantitative. I will include here as best a summary of each person’s findings as possible.
Pottery Assemblage One:
- Pot 1
- Height = 3 inches
- Shape = bowl
- Time till completely dry = 5 hrs
- After 5 hrs too dry to make changes to in texture or shape, even when adding a small amount of water
- Thickness not uniform
- Off balance base due to position during drying
- No change in shape over time
- Pot 2
- Taller due to added coil
- Coiling created thinner section where finger marks of smoothing are visible
- Extensive cracking during coiling step, but smoothed over with extra clay and water
- No change in shape over time
Pottery Assemblage Two:
- Pot 1
- Processed clay
- Height = 2 inches
- Radius = 1.5 inches
- Attempted to add two coils, but done too quickly and clay was too wet – collapsed on self and only foundational form was savable
- Pot 2
- Processed clay
- Height = 1.5 inches
- Radius = 3 inches
- Decorated with pencil marks in EME styles
- Designed as a wider, open shaped pot
- Pot 3
- Arb clay
- Height = 1.5 inches
- Radius = 2 inches
- Decorated with pencil marks in EME styles, but inclusions prevented long continuous lines or created pockmarks
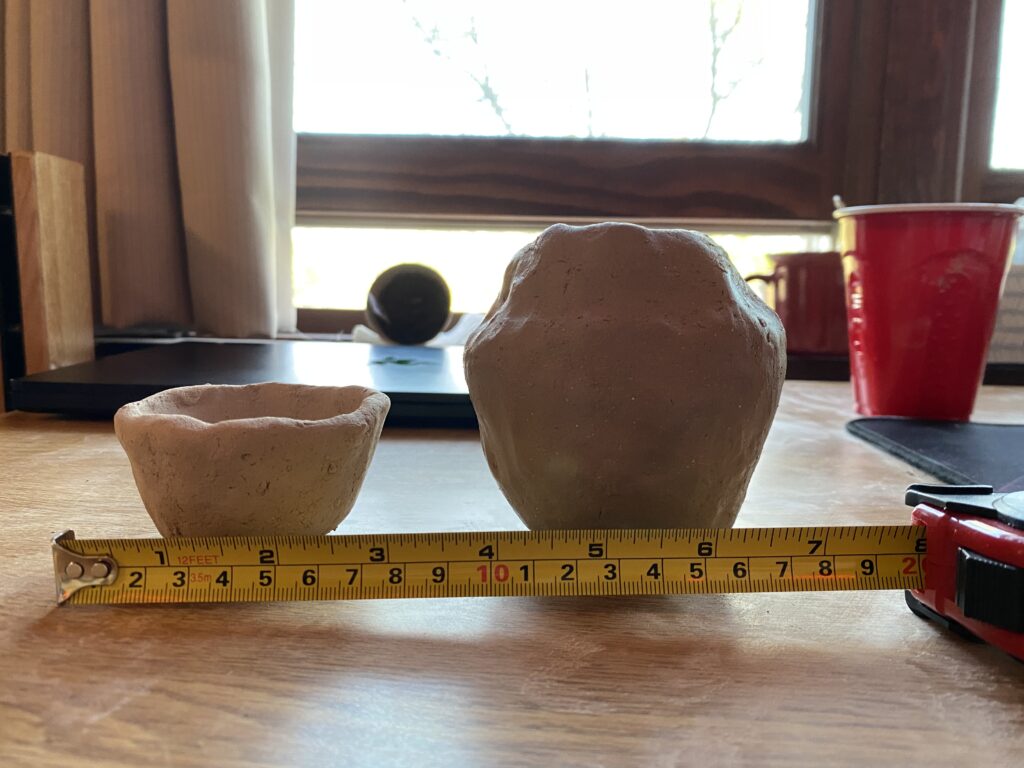
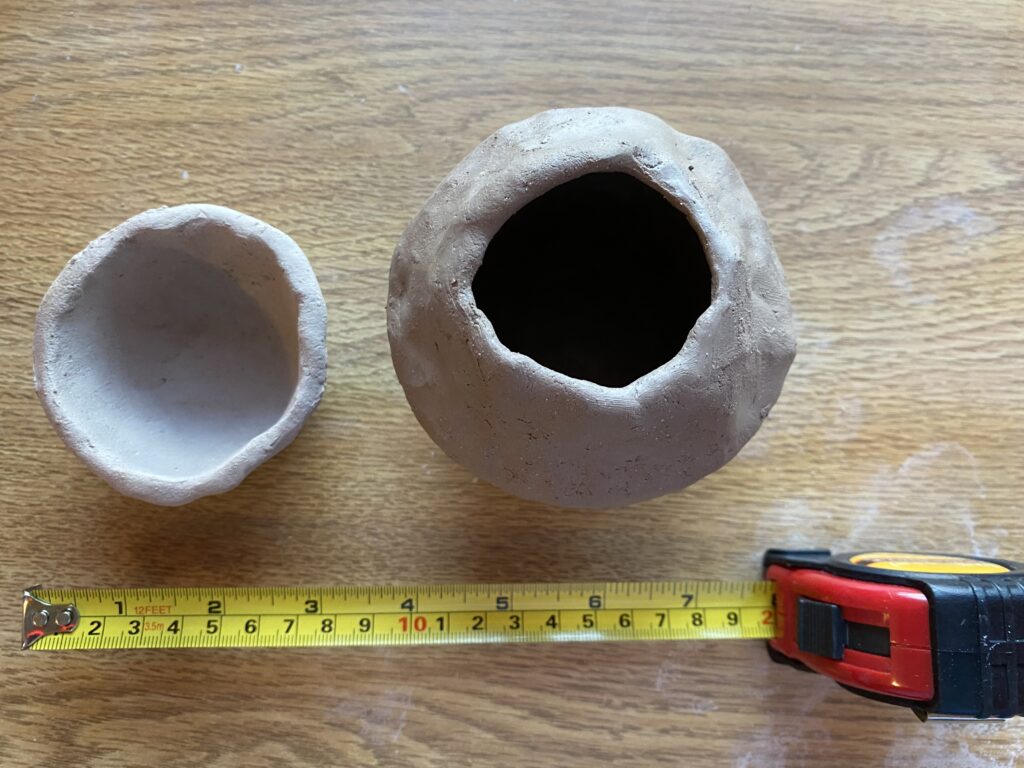
Pottery Assemblage Three:
(Please note: Pot 1 was only measured after completely dry as it was made during the course of the lecture with Kelly and I failed to take measurements as we were going in class; 2A, B, etc. are all the same pot at different times, where t=0 is the time of the completion of the pinch pot foundation. All measurements are in mm except for time, which appears in hours:minutes).
| Pot | Clay | Height | Rim width | Diameter | Depth | Base | Time | Shape | n Coils |
| 1 | Processed | 41 | 9 | 75 | 37 | 4 | 0 | Bowl – Open | 0 |
| 2A | Processed | 44 | 10 | 85 | 40 | 4 | 0 | Bowl – Open | 0 |
| 2B | Processed | 63 | 9 | 91 | 48 | unchanged | 0:15 | Bowl – Open | 1 |
| 2C | Processed | 61 | 8 | 89 | 49 | unchanged | 1:00 | Bowl – Open | 1 |
| 2D | Processed | 94 | 4 | 92 (widest)/41 (mouth) | 89 | unchanged | 1:30 | Storage – Closed | 3 |
| 2E | Processed | 91 | 3 | 92 (widest)/39 (mouth) | 85 | unchanged | 2:00 | Storage – Closed | 3 |
| 2F | Processed | 91 | 3 | 92 (widest)/39 (mouth) | 85 | unchanged | 3:00 | Storage – Closed | 3 |
0 thoughts on “Week 7 Lab Group Data”