The following piece is a play-by-play breakdown of Group B’s activities during the Metalworking lab, including quantitative data of metal weights and temperatures, and qualitative experiences.
Danny introduces casting. Showing us what steps were done to prepare for our lab, specifically the creation of the mold. The steps for creating the mold were as follows
- Choose object to cast and create sprues, which are used so the metal can reach the entirety of the mold.
- Flash (a metal band) is put over the rubber base
- The “investment’ or a high temp plaster mold is created. This is equivalent to sand casting or lost-wax casting. Air bubbles are then vacuumed out.
- Mold is heated from room temperature to 300°F and left for a few hours, then heated to 1350°F and left, and then let cooled down to 1150°F and held there in a kiln until casting happens.
Danny demonstrated the casting steps. Which are:
- Measure out the metal necessary for casting. We used 32 pennyweights of Bronze. There is a specific ratio of wax (or mold) to metal for every metal. In our case it was 1:9 Wax: Bronze. So since out mold was 2 1/2 pennyweights we needed to use 3×9 pennyweights of bronze. Note: In metalwork it, the weight is always rounded up, so instead of using 2 1/2 pennyweights, we think 3. With that metalworkers are not super precise in the amount of metal used.
- The metal is than put in the crucible and super heated using a flamethrower. The flame was 1170°F to start and the metal was melted when we measured 1823°F.
- The mold (flask) is then placed behind the crucible and the metal is heated continuously. Note: The crucible took longer to heat up for this first run, since it was starting at room temperature. For every group after it happened much quicker since it was already heated. We measured 2046°F as we were ready to start the cast.
- The cast is then created by using centripetal force. The crucible and flask spin around very quickly so that the super heated metal is forced into the mold
- The flask is then quenched in water. It hissed and boiled as it cooled down. The plaster was dissolved and we could reach our casted item.
Important Data:
| Item | Measurement |
| Weight of Bronze | 32 Pennyweights |
| Temperature of Flask | 1150°F |
| Temperature of Metal at Melting | 1823°F |
| Temperature of Metal at Casting | 2046°F |
| Temperature of Flame at Start | 1170°F |
The brooch was then cleaned up. We cut the sprues and filed those spots down. The piece was then buffed using a machine.
Hannah did the casting for us. Here is the time breakdown of the cast:
| Time | Process |
| 2:20 | Weight out the metal |
| 2:22 | Put metal in the crucible and set the weights |
| 2:23 | Start the fire and get it super heated (flame was blue) |
| 2:25 | Heating the metal |
| 2:26 | Flask placed in the arm |
| 2:28 | Centripetal force used |
| 2:29 | Flask pulled out and cooled for a second |
| 2:30 | Flask put in water and quenched |
| 2:31 | Success!!!! |
Important Data:
| Item | Measurement |
| Weight of Bronze | 30 Pennyweights |
| Temperature of Flask | 1150°F |
| Temperature at Insertion of the Flask | 1626°F |
| Temperature of Crucible to Start | 825°F |
| Temperature of Metal at Casting | 1752°F |
| Temperature of Metal after Pulled from Centripetal Force | 964.5°F |
| Temperature of Metal when quenched | 700°F |
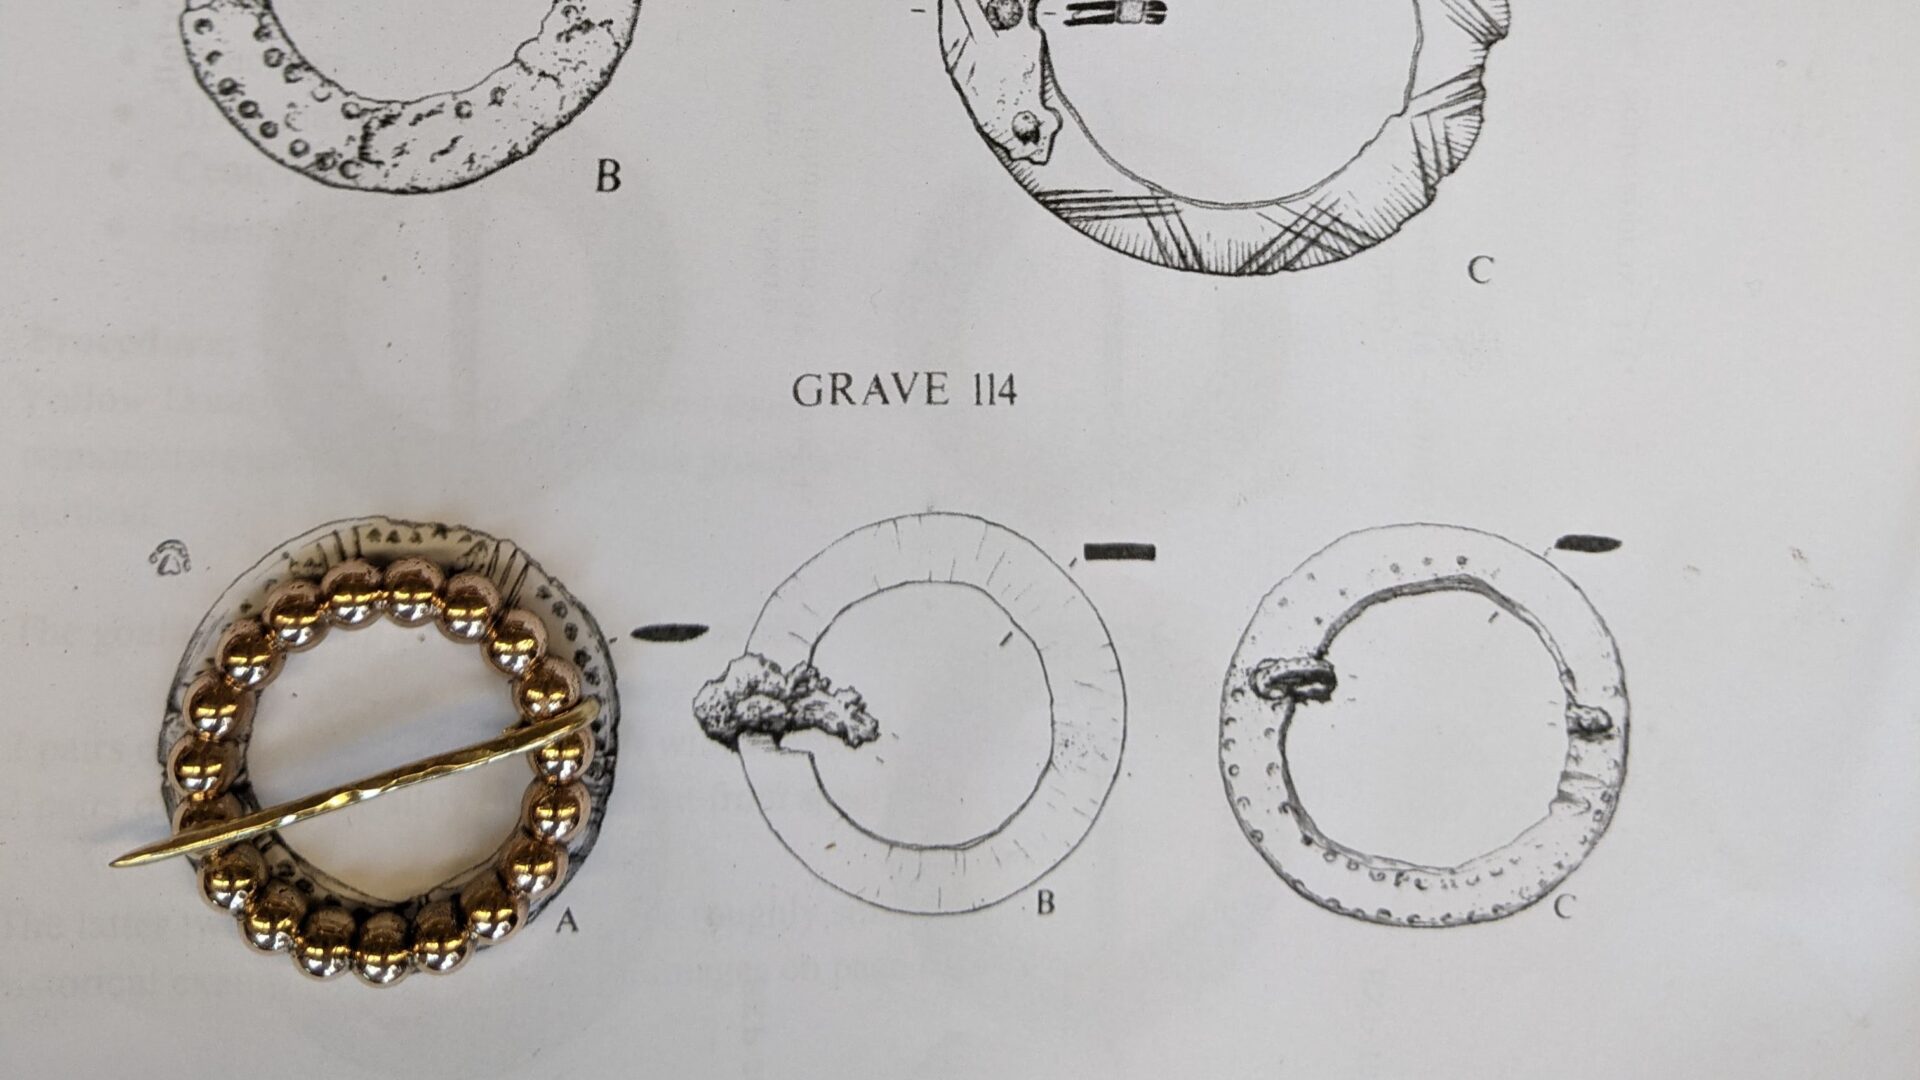
Danny then showed us how to make a fabricated/forged brooch. The steps were as follows:
- Find center point of small square sheet metal piece
- Inscribe two circles, the larger one about the size of the whole brooch and the smaller one the size of the center.
- Saw the outside circle and cut the inner circle out
- Decorate the brooch using different hammers and punches. It was then possible to ‘dome’ the brooch and make it look more 3D
- We then cut out a small hole or carved divots in the brooch so we could insert a pin. We made the pin by using 10 gauge brass wire, cutting it to the desired length and sharpening one end using a file. You then hammered one end flat and fixed it in the hole cut earlier or wrapping it around the one side of the brooch. We had varied results and it was a bit loose/some of us didn’t get the actual pin part finished.
Some data that we didn’t get, but I wish we had was the mass or our fabricated brooches, the diameter, the diameter of the hole, and the width of the ‘sides’.
On average it took us about 15-25 minutes to cut out our brooch, and we spent about an hour and a half decorating, filing, and creating the pin.
0 thoughts on “Metalworking Lab: Group B Data”