On Thursday, May 16 and Friday, May 17 of Week 8, our Experimental Archaeology/Experiential History course reconstructed the Viking-era tent found at the Oseberg archaeological site. This week, we focused on constructing the wooden supports of the tent, and we will experiment with the feasibility of creating turf walls for the tent to craft the Viking booths mentioned in various textual sources.
Cutting
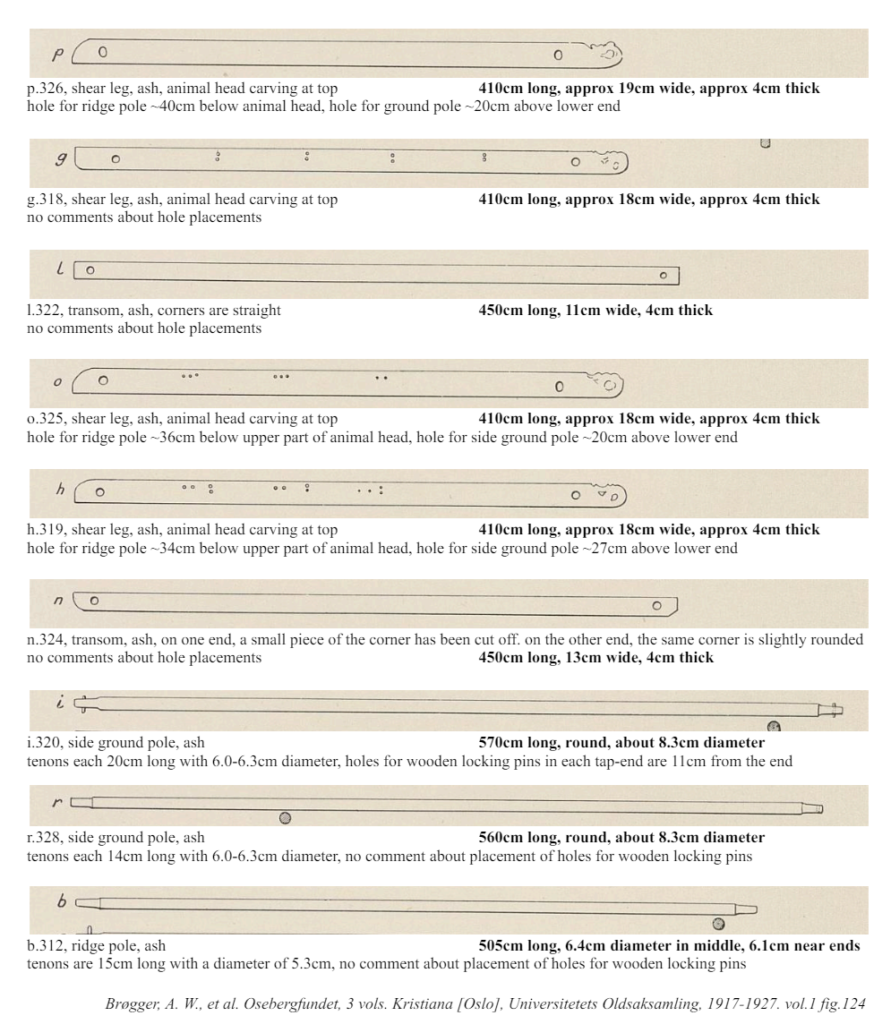
We used 5 aspen trees with diameters between 3 and 4 inches and lengths varying from 14 and 21 feet to create the poles and transoms for the tent, and used four pre-shaped basswood planks for the verge boards/shear legs. The lengths and shapes of the wooden remains we were modeling our wood off of are pictured in the diagram below:
However, because we were working in a two-day classroom setting, we only created our tent to 60% scale. The adjusted lengths are in the table below, as length is the variable we controlled for:
| Tent Segment | Adjusted Length |
| p.326, shear leg | 246cm |
| g.318, shear leg | 246cm |
| l.322, transom | 270cm |
| o.325, shear leg | 246cm |
| h.319, shear leg | 246cm |
| n.324, transom | 270cm |
| i.320, side ground pole | 342cm |
| r.328, side ground pole | 336cm |
| b.312, ridge pole | 303cm |
The combined Groups C&D began by cutting the five aspen trees into shape. The initial length of the trees, the pieces they were cut to labeled using notation from the above diagram, and the length we cut them to are noted in the table below. We did not cut them exactly to scale to give ourselves some working room in case of splitting or checking.
| Tent Segment | Starting Length | Cut Length | Target Length (Length Scaled) |
| i.320, side ground pole | 510cm | 364cm | 342cm |
| r.328, side ground pole | 675cm | 360cm | 336cm |
| b.312, ridge pole | 455cm | 319cm | 303cm |
Qualitatively, the experiential piece that stuck out the most to our groups was the fact that the longest aspen tree was not always the right choice for the longest tent segment. Often, a natural bend in the wood halfway along the tree’s length precluded it from use as a tent segment, and we could only effectively use a much shorter length from a very long tree.
Splitting
We split the largest aspen tree into the two transoms, then cut them down to the scaled lengths of 270cm. For transom boards, it was important to get two sides with approximately equal length while splitting, so great care is necessary to maintain a clean split down the center. However, not all of the resultant wood is usable. It is important to also remove the bark as well as the dark pith in the center of the split log. Luckily, both of these tasks were easily accomplished in later stages of the wood-working process.

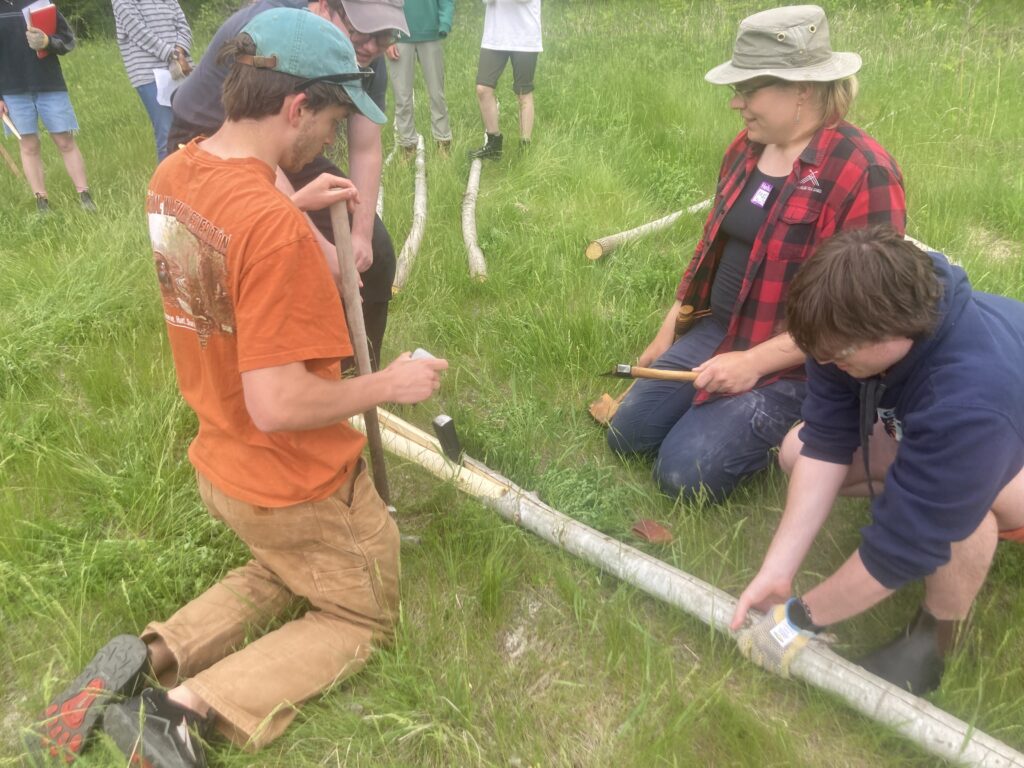
Debarking
All of the cut tent segments had to be debarked. This is a rather easy process when working with green wood, as we were. Much of the bark falls off of the tree into your hand with a gentle tug, and the rest, as well as the sap wood beneath, was easy to remove using a draw knife on a sawhorse. This was perhaps the easiest process to get used to, as the draw knife cut very smoothly through the green wood. Most participants described the process as an exceptionally satisfying undertaking, too. In my opinion, debarking was the clear fan favorite.
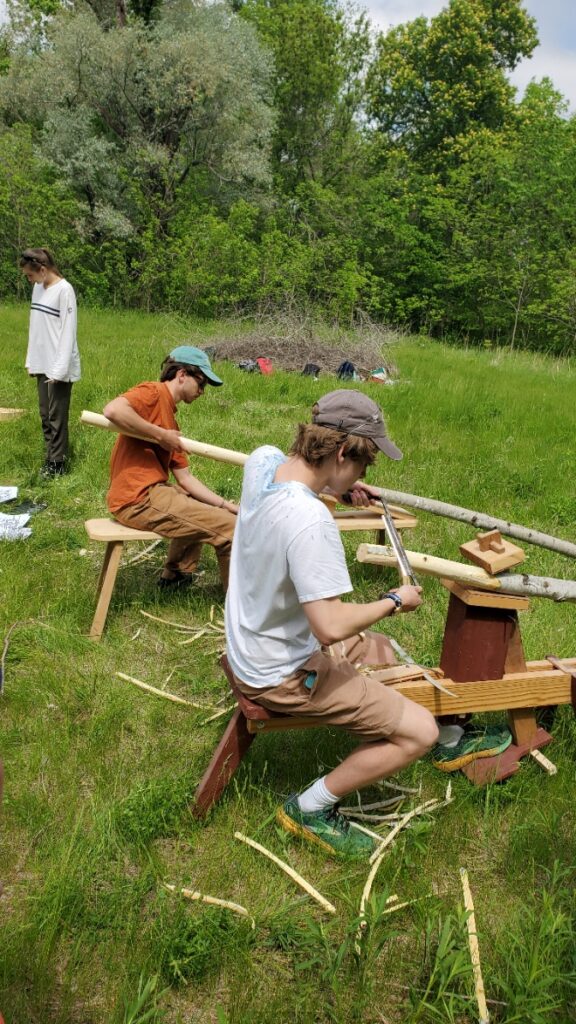
Shaping
Following debarking, we did the final shaping of the tent segments at hand. For some groups, this involved tapering the ends of the ridge and side poles to fit into the transom and shear legs. Groups C&D, however, worked on planing the transform boards with a hatchet. This work was the most noticeably difficult task we undertook; getting clean, uniform cuts into the wood and then cutting them straight with the hatchet took a large amount of skill that our instructor Maeve made look easy, but which every student struggled with.

In addition, we crafted six pegs to secure the ridge and side poles into the transoms and shear legs.
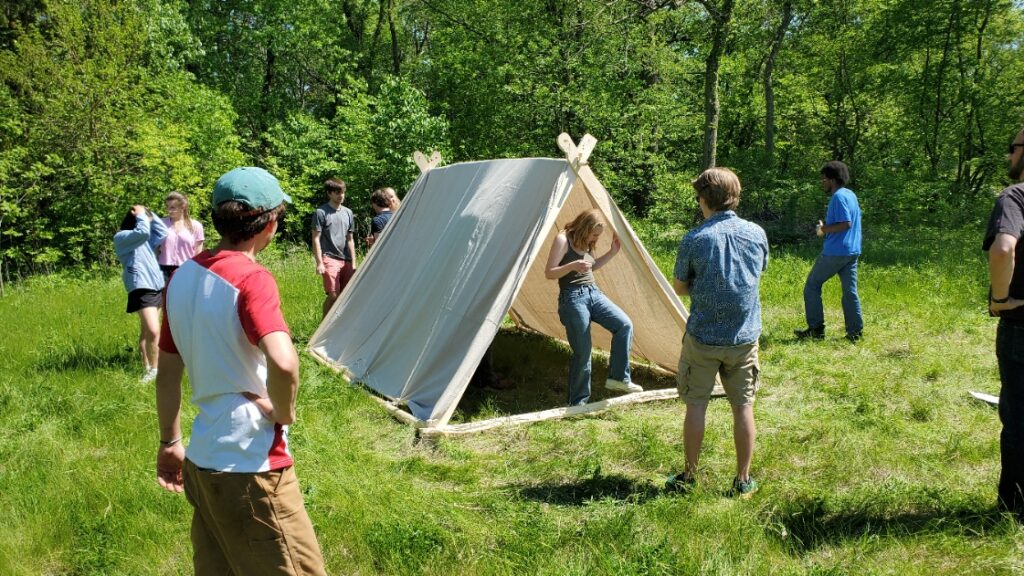
Assembly
With all of the wood cut, debarked, and shaped, we completely assembled the tent in class on Friday, when we also had a canvas sheet with which to cover the structure. While the crafting took a while, the assembly went fast – it took maybe 5 minutes to get the boards in place, pegs in, and canvas placed over the top once everything was prepared. It helped show the versatility of such mobile structures in the Viking way of life, especially considering how much faster everything would have gone with a lifetime of experience behind us rather than 30 minutes of instruction.
0 thoughts on “Groups C&D Lab Data: Week 8 (Woodworking)”