
By Siddharth Srinivasan and Julia Tassava
| Word | Definition |
| adze | like an axe, but its blade is perpendicular to instead of parallel with the handle |
| chaîne opératoire | the systematic order in which an item, tool, or artifact is constructed |
| chest brace drill | a traditional-style drill used for boring holes in wood (see Fig 8) |
| draw knife | a long blade with two handle on either side, used for scraping away bark and wood (see Fig 5) |
| gable | triangular section at the top of the tent (see Fig 1) |
| planing | the process of making the surface of wood flat and smooth |
| sapwood | a layer of wood beneath the bark, removed during debarking |
| shave horse | a structure used during the debarking process; gets its name because it has a seat one mounts like a horse (see Fig 5) |
| tjald/tjöld | Old Icelandic word for tent, found in several Icelandic written sources |
| verge-board | wood planks used to hold the gable in place |
| Viking Age | period of the Middle Ages characterized by Scandinavian Norsemen exploring, settling, conquering, and raiding Europe and the North Atlantic |
Introduction
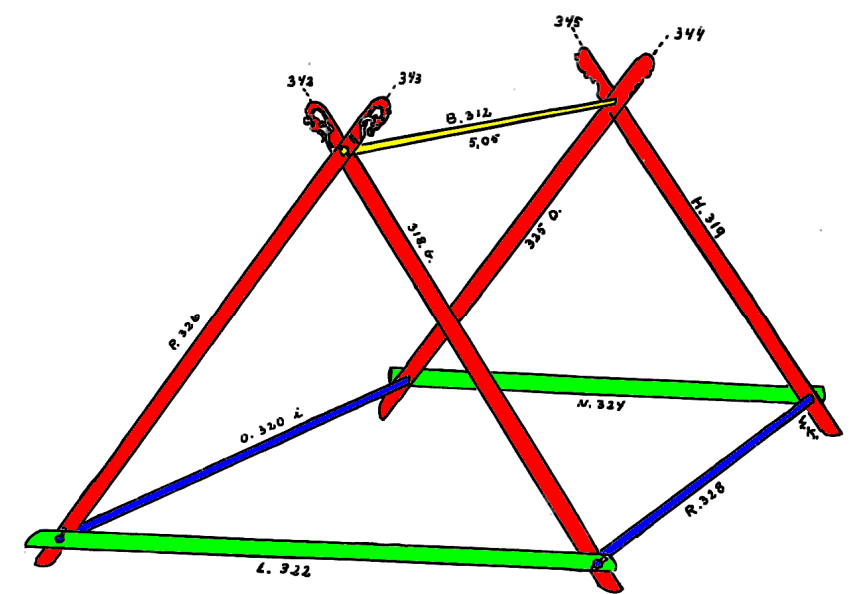
For our seventh lab of the term, we practiced woodworking. Our end goal was to debark, shape, and cut minimally processed timbers (cut down from our Arboretum) in order to experimentally construct a tent using archaeological evidence from Viking age ships and Icelandic written sources. Additionally, our work this week was intended to get us started on our lab for next week, in which we will construct turf walls to turn the tent into a booth. Our tent frame was primarily inspired by the Oseberg tent, a diagram of which is pictured below:
Our research goals were more than just to build an accurate reconstruction. In addition to the what, we wanted to understand (or at the very least, attempt to understand) the how and the why. What purpose did each transom, pole, and shear leg serve in the tent frame? What was it like to use traditional hand tools? What techniques might people of the past used to make their craft easier, safer, or more refined? How do the inherent properties of natural materials shape the process? And, as always, we sought to inhabit the lives of people of the past and do our utmost to understand their mentalities, their joys, their struggles, their social lives, their economic positions, and whatever tidbits of humanity we can grasp onto in our effort to build a fuller and more empathetic understanding of those who walked this earth before us.
As always, special thanks to our guest expert, Maeve Gathje, for her help and insight throughout this lab!
Methods
As always, we were split up into six groups of three. Each group paired up with another (A & B, C & D, E & F) and rotated between the debarking, cutting, and shaping stations. Our materials, to be shared across groups, included tools (axes, adzes, draw knives, shave horses, chisels, chest brace drills, knives, saws), timber from five aspen trees (each between 3-4” in diameter and 14-21” in length), air-dried basswood planks planed and sawn into verge boards, and some spare roundwood that could be shaped into pegs.
The first two steps of the chaine opératoire – acquiring the necessary tools and felling trees for timber – had already been done for us. This left five steps: debarking, cutting, shaping, decoration and assemblage.
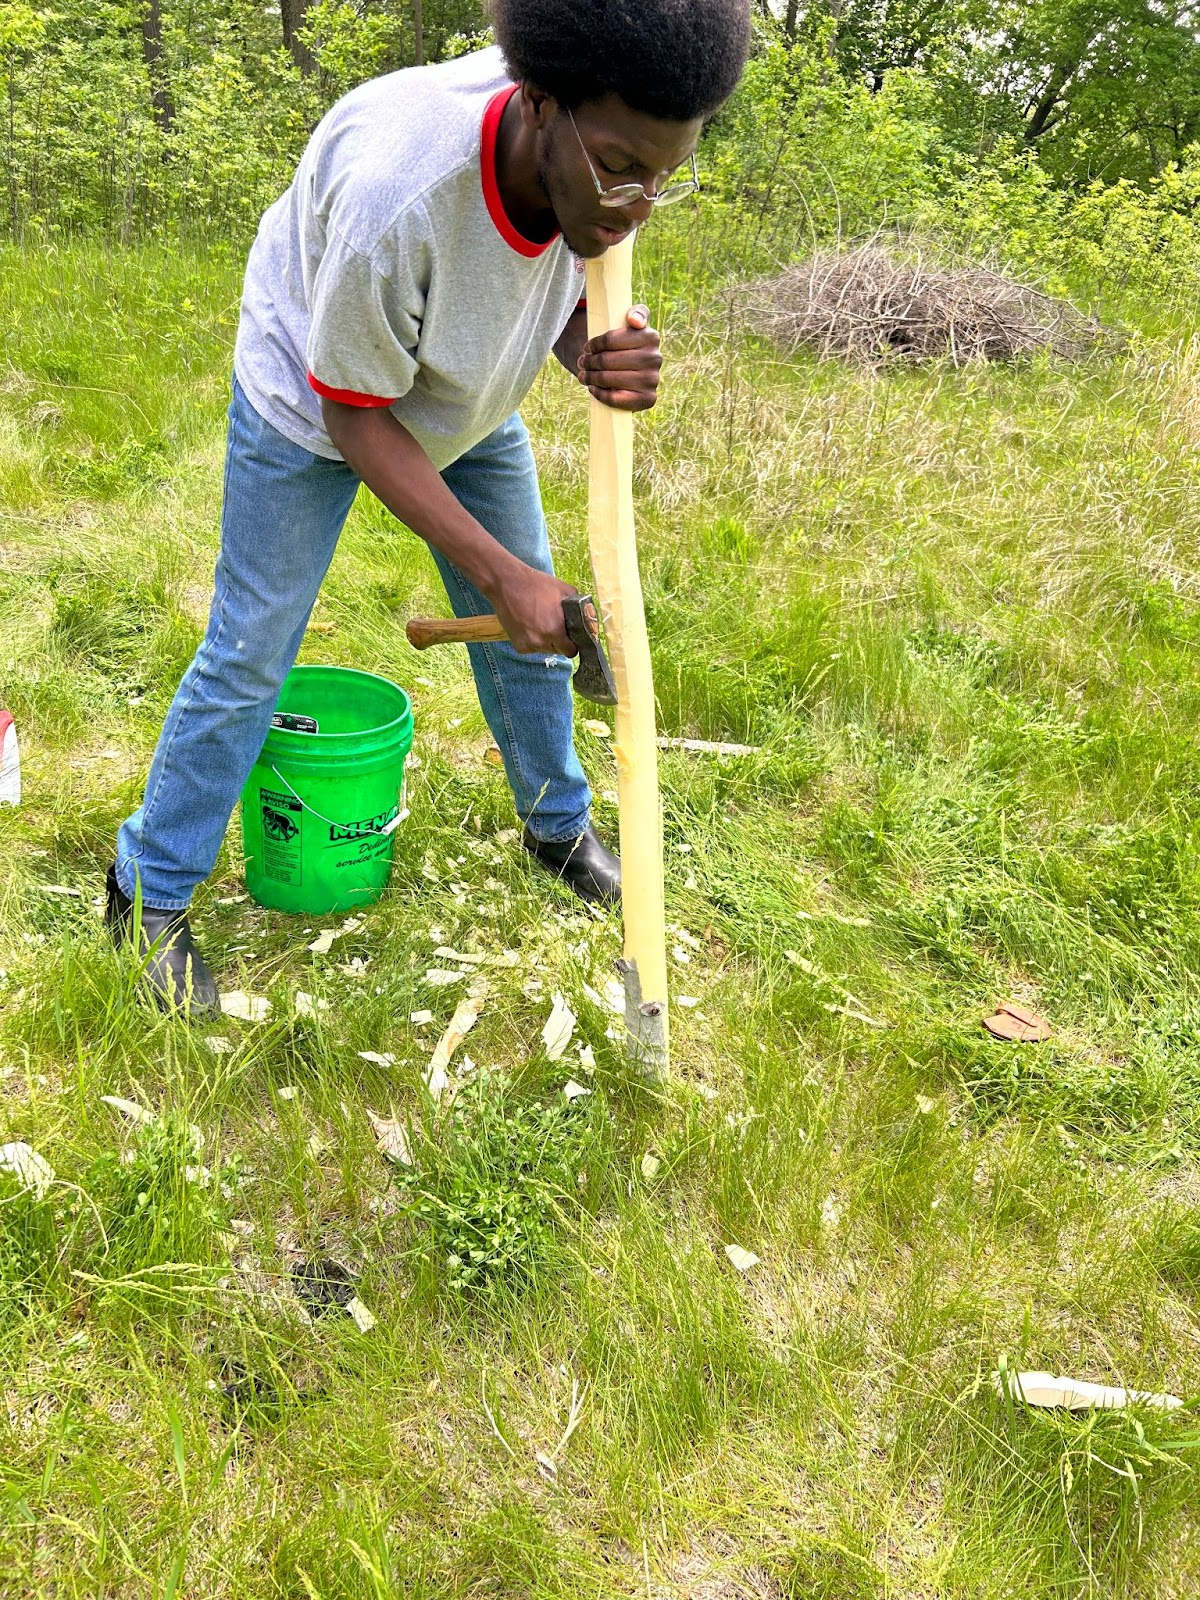
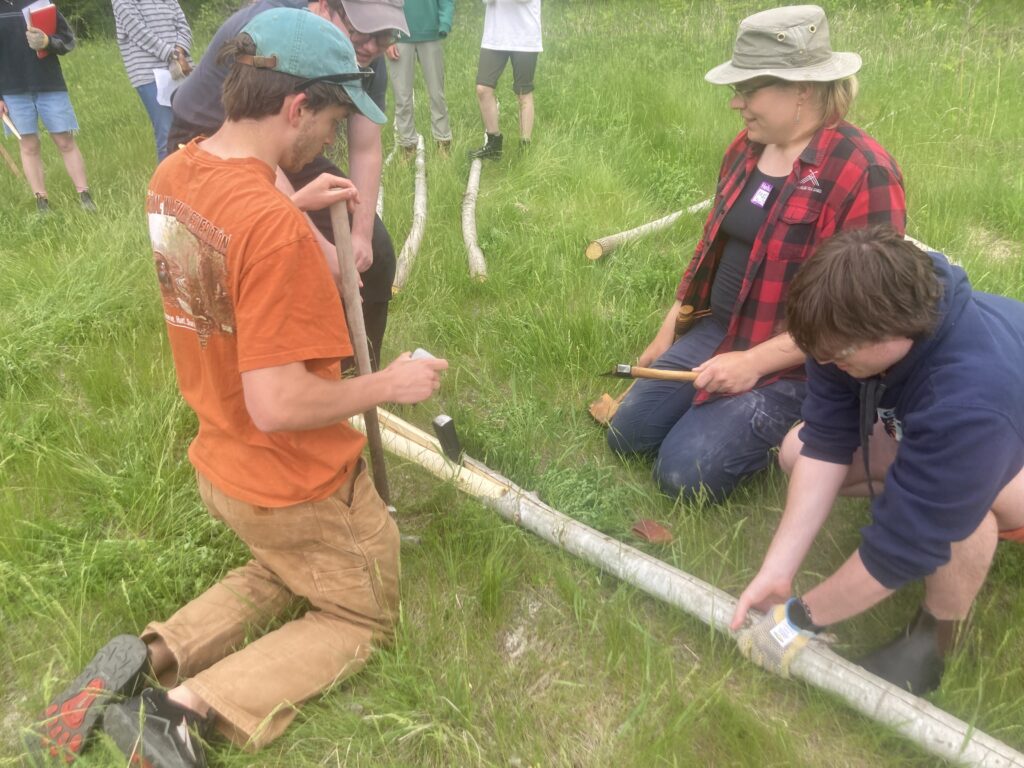
Debarking, as the name suggests, is the process of removing bark and sapwood from timber. To debark, we clamped a timber onto a shave horse, and used a draw knife to scrape the bark and sapwood toward us in a single, straight motion.
In the cutting station, we used tape measures to determine the sizes of the timbers before using saws and axes to get them to the appropriate length.
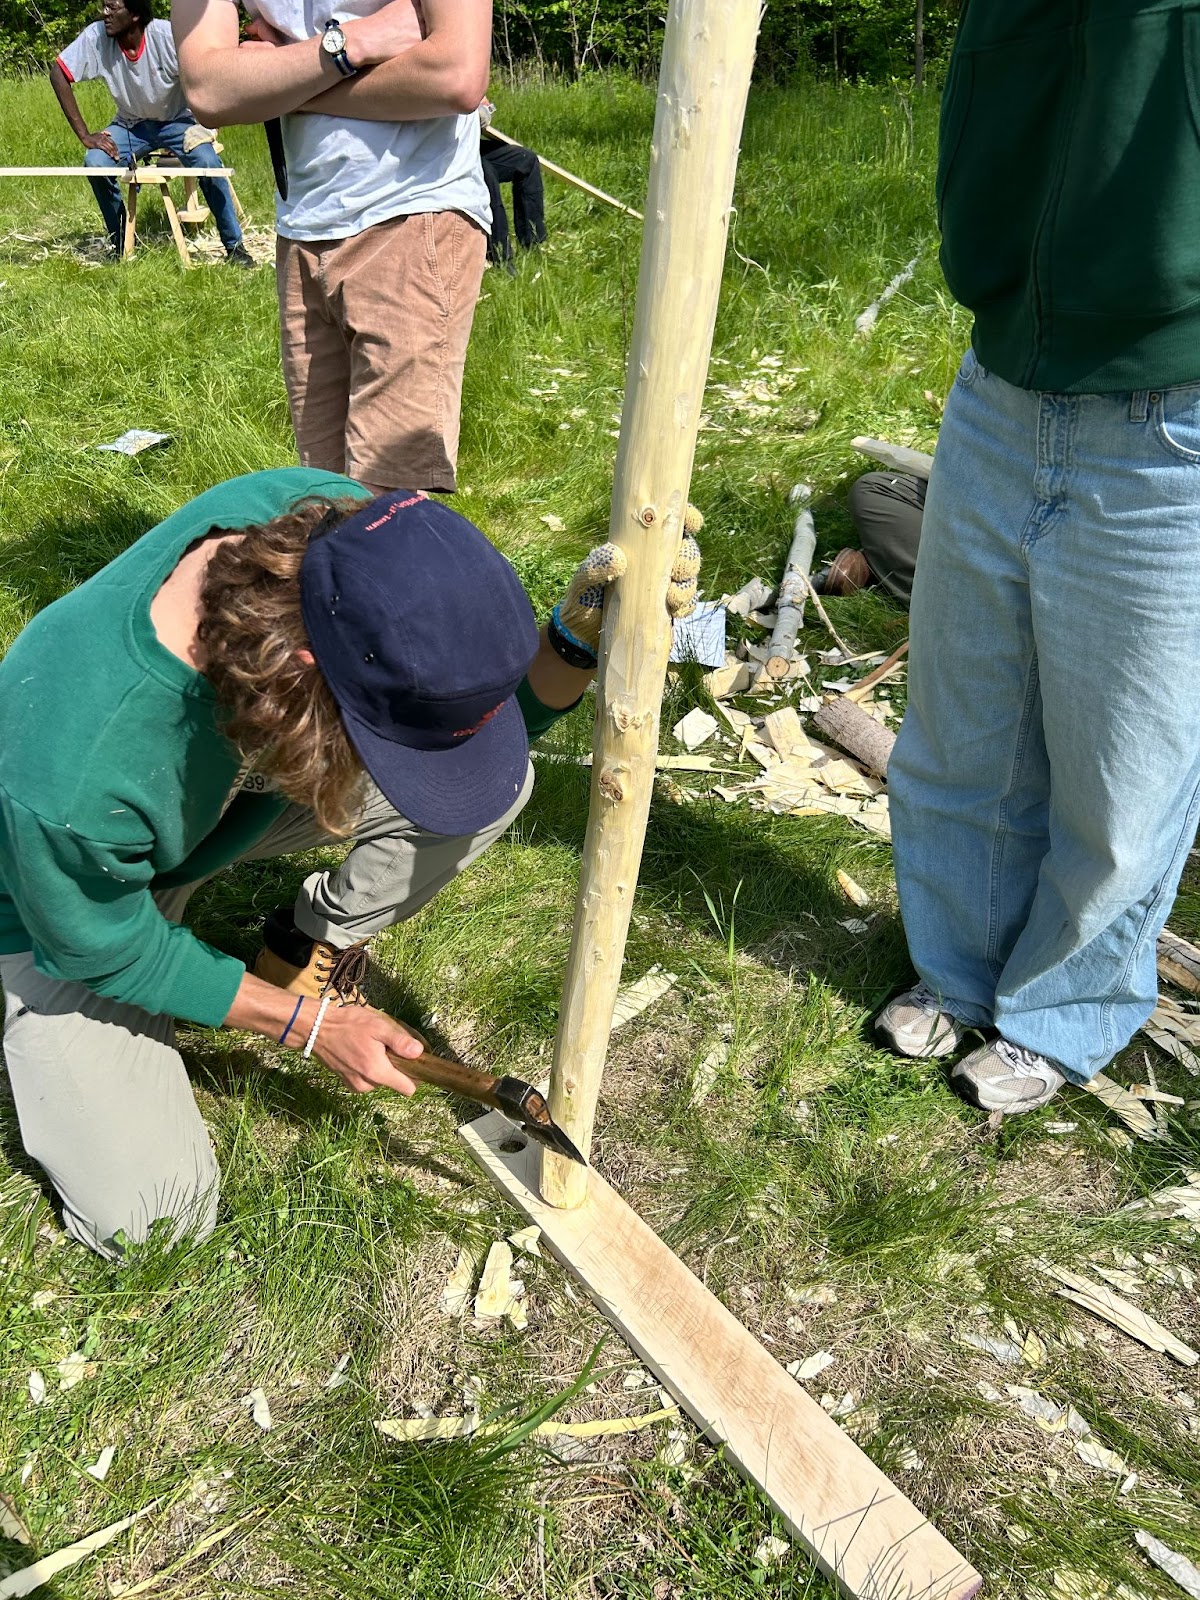
At the shaping station, we used axes, adzes, knives, and chisels to make further adjustments to the debarked and cut timbers, ensuring they had manageable lengths, diameters, and thickness.
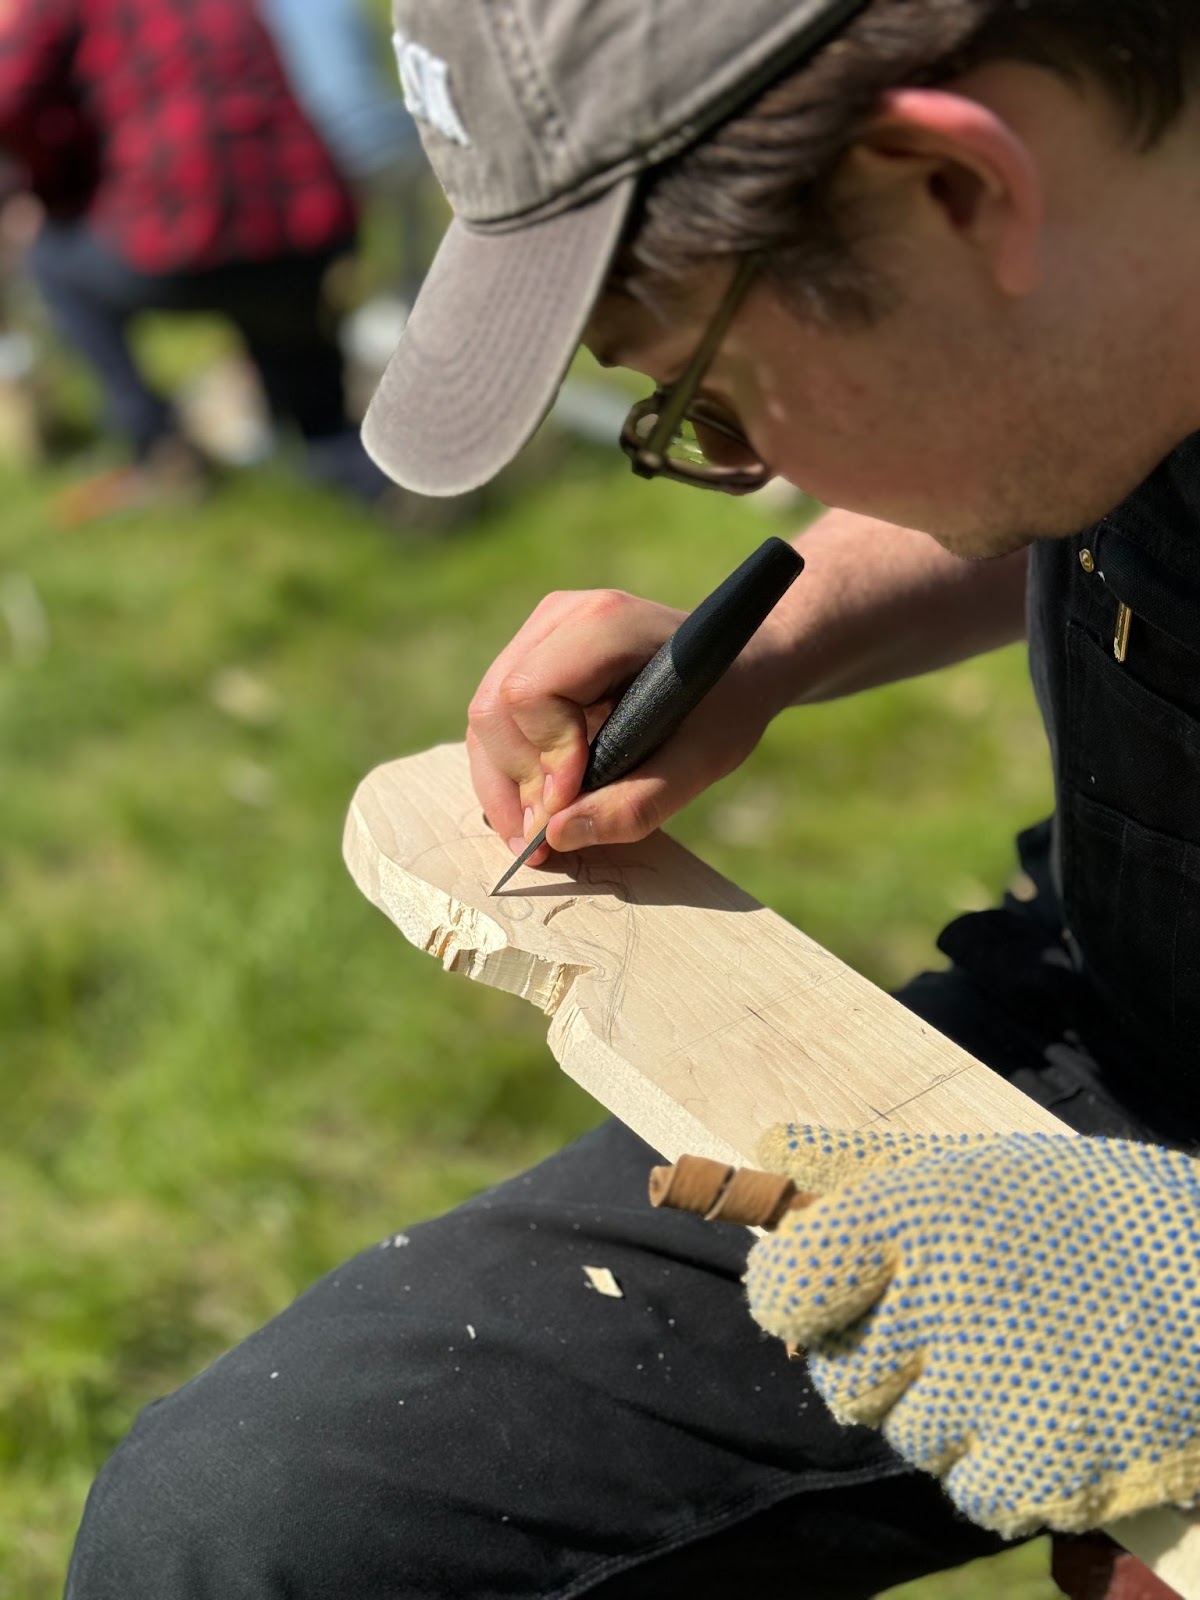
The decoration step occurred after all the timbers were processed. We used knives, chisels, and saws to carve dragon heads on our verge boards.
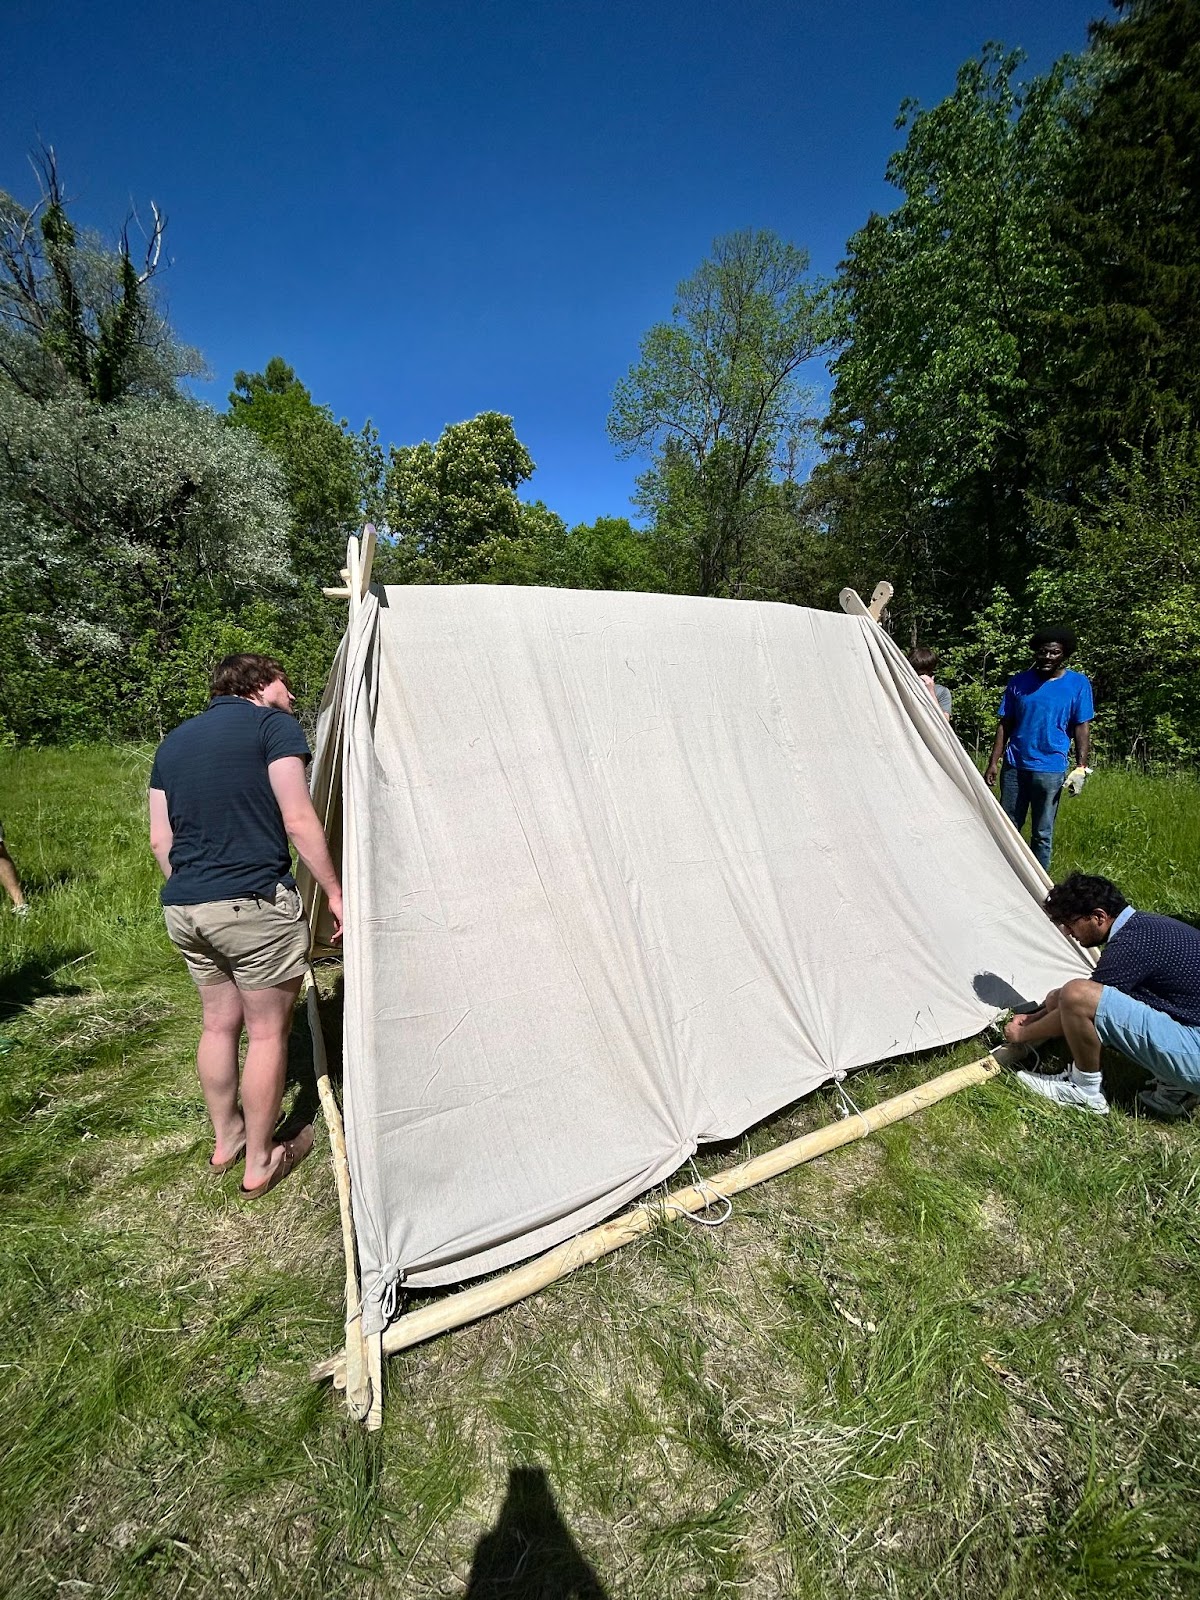
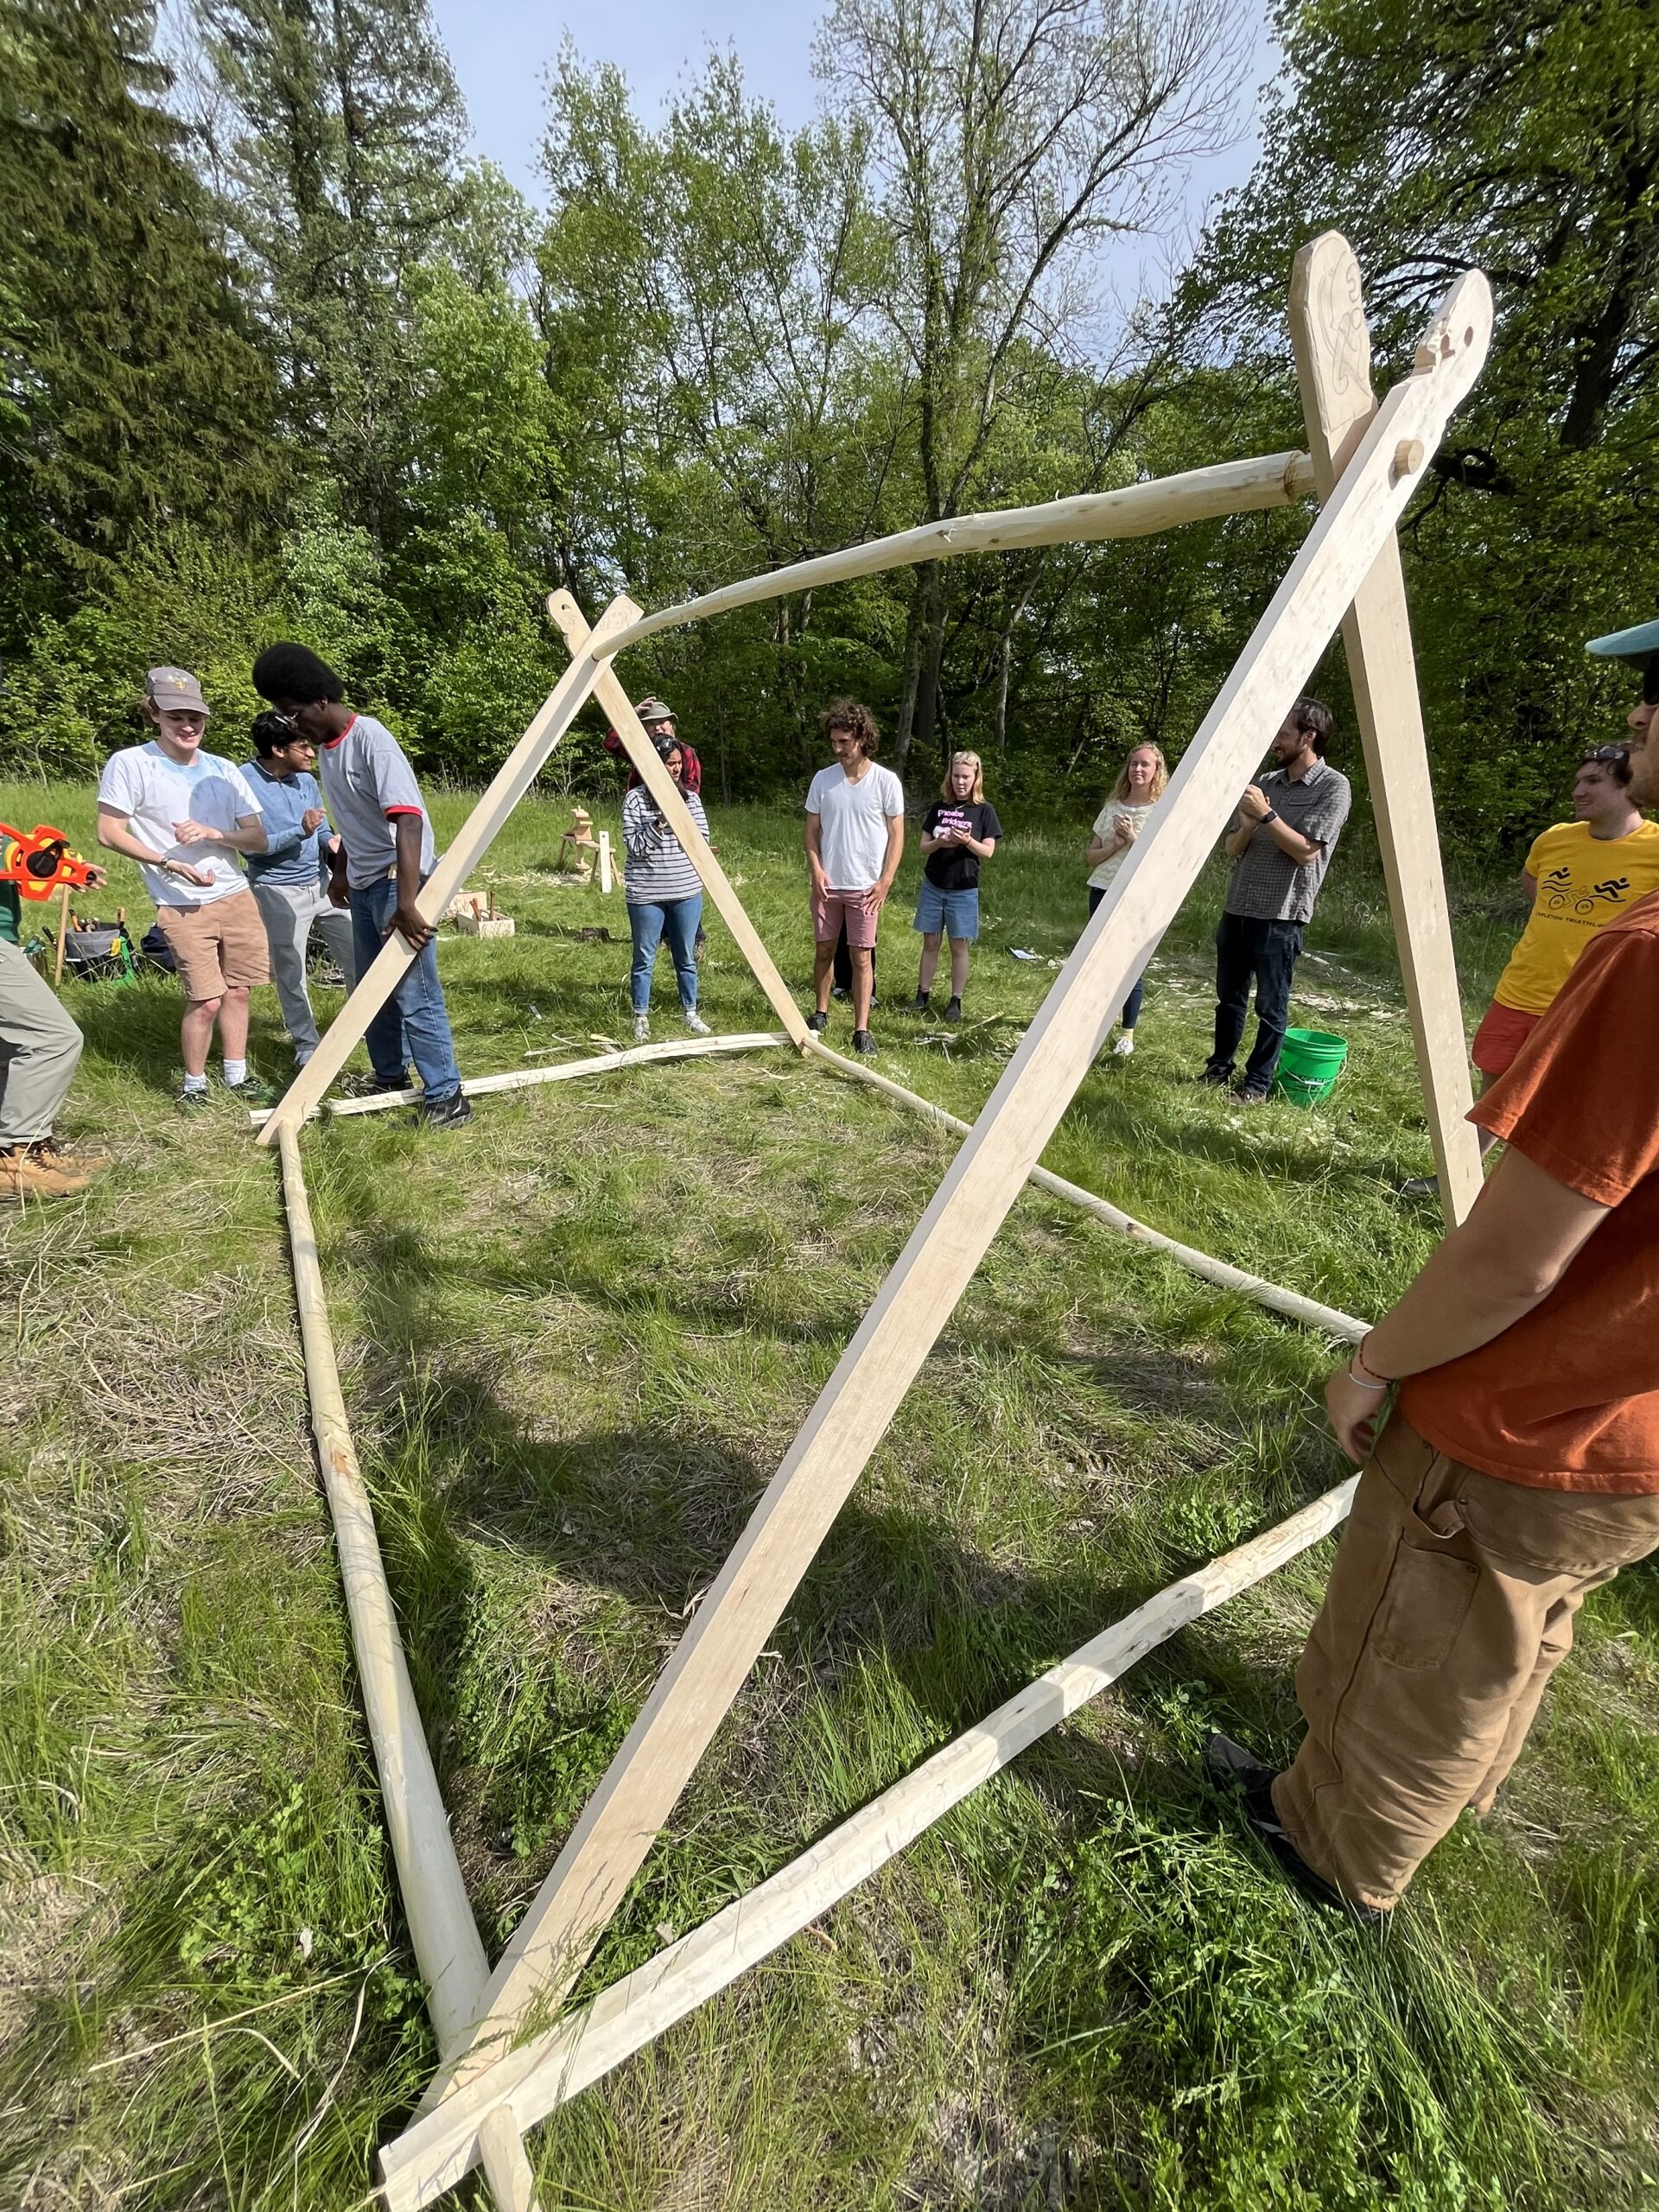
Finally, we all worked together to assemble the individual poles, transoms, shear legs, and pegs into a tent frame. The next day, we added canvas, and officially turned it into a working tent.
Data and Analysis
For this lab, much of our data centered around the dimensions of the components of our tent, and then the dimensions of the final tent, although each group took note of certain qualitative observations as well as more specific quantitative measurements. Given the different factors that each group chose to record and emphasize, it was difficult to come up with consistent data across the board besides simple dimension data.
Working off the dimensions of the smaller Oseberg tent, but scaled down to 60 percent of the original tent, we calculated the measurements that we would be using.

The wood that we constructed our tent with consisted of 5 aspen trees that were around 3 to 4 inches in diameter and 14 to 21 feet, some air-dried square basswood planks, and roundwood cuttings. The aspen was used for poles and transoms, the basswood for verge boards, and the roundwood for locking pegs.
Overall Tent Component Data
| Tent component | Original measurements | Our measurements (60 percent of original) |
| p. 326–Shear leg, ash, with animal head carving | 410 cm long, 19 cm wide, 4 cm thick | 246 cm long, 11.4 cm wide, 2.4 cm thick |
| g. 318–Shear leg, ash, with animal head carving | 410 cm long, 18 cm wide, 4 cm thick | 246 cm long, 10.8 cm wide, 2.4 cm thick |
| l. 322–Transom, ash, straight corners | 450 cm long, 11 cm wide, 4 cm thick | 270 cm long, 6.6 cm wide, 2.4 cm thick |
| o. 325–Shear leg, ash, with animal head carving | 410 cm long, 18 cm wide, 4 cm thick | 246 cm long, 10.8 cm wide, 2.4 cm thick |
| h. 319–Shear leg, ash, with animal head carving | 410 cm long, 18 cm wide, 4 cm thick | 246 cm long, 10.8 cm wide, 2.4 cm thick |
| n. 324–Transom, ash, corner cut off on one end and rounded on the other | 450 cm long, 13 cm wide, 4 cm thick | 270 cm long, 7.8 cm wide, 2.4 cm thick |
| i. 320–Side ground pole, ash | 570 cm long, round, 8.3 cm diameter | 342 cm long, 4.98 diameter |
| r. 328–Side ground pole, ash | 560 cm long, round, 8.3 cm diameter | 336 cm long, 4.98 diameter |
| b. 312–Ridge pole, ash | 505 cm long, 6.4 cm diameter in middle, 6.1 cm near ends | 303 cm long, 3.84 diameter in middle, 3.66 diameter near ends |
In practice, our tent components did not come out to the dimensions each time we cut and shaped wood. Length was easier to control than width or diameter, especially given the challenging practice of shaping and splitting wood. Throughout the process, we left extra wood when cutting and to avoid kinks or curves in the wood, so our cuts were a bit longer than the calculated target length. Once we began to fit the pieces together at the end of Thursday’s lab, we had to do a bit of extra shaping and tapering.
Cutting Data–Side ground pole and ridge pole

Groups C and D also gathered specific data on the process of cutting aspen trees, because they were the groups that cut them to size.
| Tent component | Starting length of log | Original cut length | Target length |
| i. 320–Side ground pole | 510 cm | 364 cm with 23 cm tenons on each side after debarking | 342 cm |
| r. 328–Side ground pole | 675 cm | 360 cm with 20.4 cm tenons on each side after debarking | 336 cm |
| b. 312–Ridge poles | 455 cm | Approximately 320 cm with 19.5 cm tenons on each side after debarking | 303 cm |
Shaping Data
Group A observed several points of interest regarding the shaping process. Through experimentation, they found that the best length between each ax hit was about 5 cm. It took the members of this group around 30 minutes to shape 675 cm around the tree trunk, therefore working out to be a shaping rate of 22.5 cm/minute. (Credit to Hope Yu)
Debarking Data
Groups A and B took data on the debarking process. Group A found that within the 30 minutes spent at the debarking station, they were able to debark 87 cm of the tree in total, which works out to an overall debarking rate of 2.9 cm per minute, although this varied between each group member.
| Person–Group A | Time | Length debarked | Rate |
| Hope | ~10 min | 25 cm | 2.5 cm/min |
| Elek | ~10 min | 30 cm | 3 cm/min |
| Glen | ~10 min | 32 cm | 3.2 cm/min |
Group B arrived at a different conclusion, per Evan Orjala’s data. He found that it took his group approximately 30 minutes (the length of time each group had at the debarking station) to debark an entire tree that was 342 centimeters long with a 10 centimeter diameter. Calculating out the surface area of the tree, which was 10,900 sq. cm, the overall debarking rate for Group B was 363 sq. cm per minute.
Both groups (and likely, all the others as well) had slow debarking rates. This can be attributed to several factors, included but not limited to the fact that this was our first time learning to do this, all groups had to allot time for switching our people and readjusting the trees, and there were times when the debarker had to stop working to deal with knots or imperfections in the wood.
Shear Legs and Drilling Data

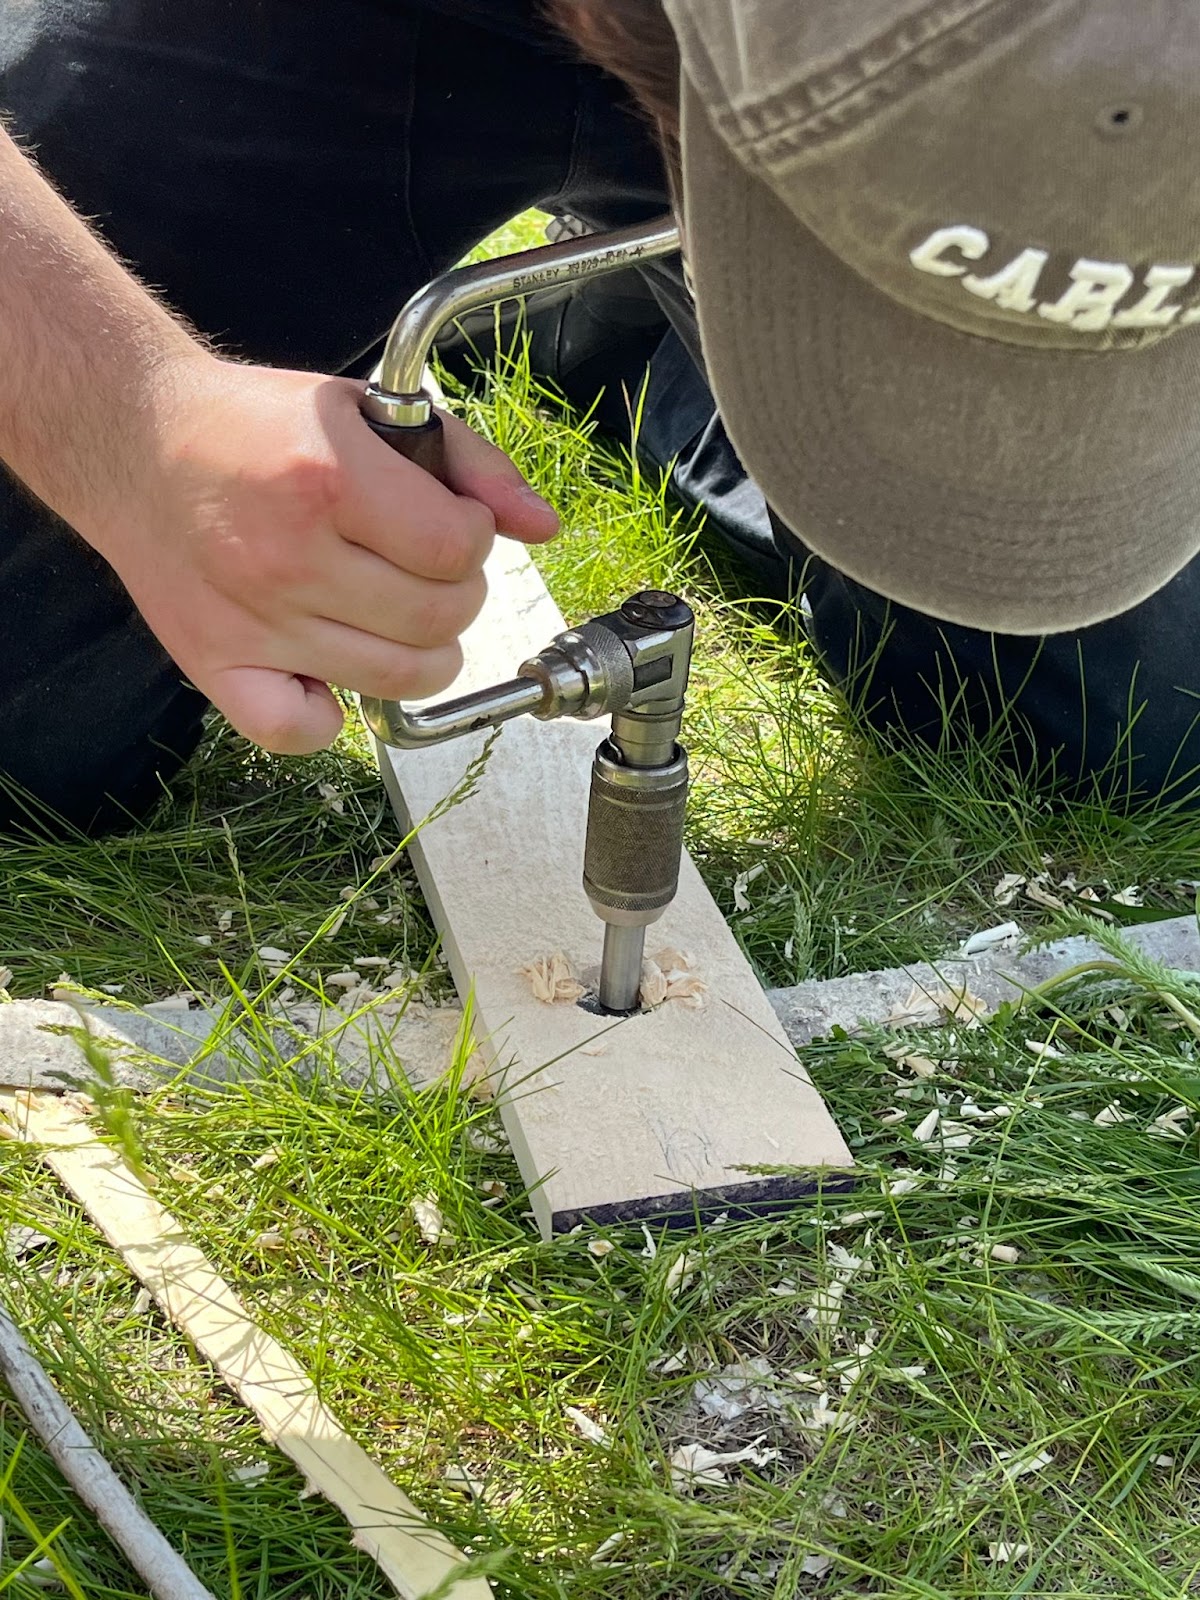
Our shear legs were around 244 centimeters long, two centimeters short of our target. Groups used an electric drill and a 1.5 inch drill bit to drill holes that were 1.5 cm in diameter, to fit our poles into the planks. Groups F and E took note of our target measurements for the drillings and carvings on our shear legs.
| Tent component | Original measurements | Our measurements (60 percent of original) |
| Upper hole on shear leg | 40 cm from top | 24 cm from top |
| Lower hole on shear leg | 20 cm from bottom | 12 cm from bottom |
| Animal head carving | No data | 19 cm long |
Group F also noted that according to the original instructions we worked off of, several shear legs were supposed to have the holes in different positions than 40 cm from the top and 20 cm from the bottom. However, we kept this consistent, and this did not present problems when it came to constructing the tent.
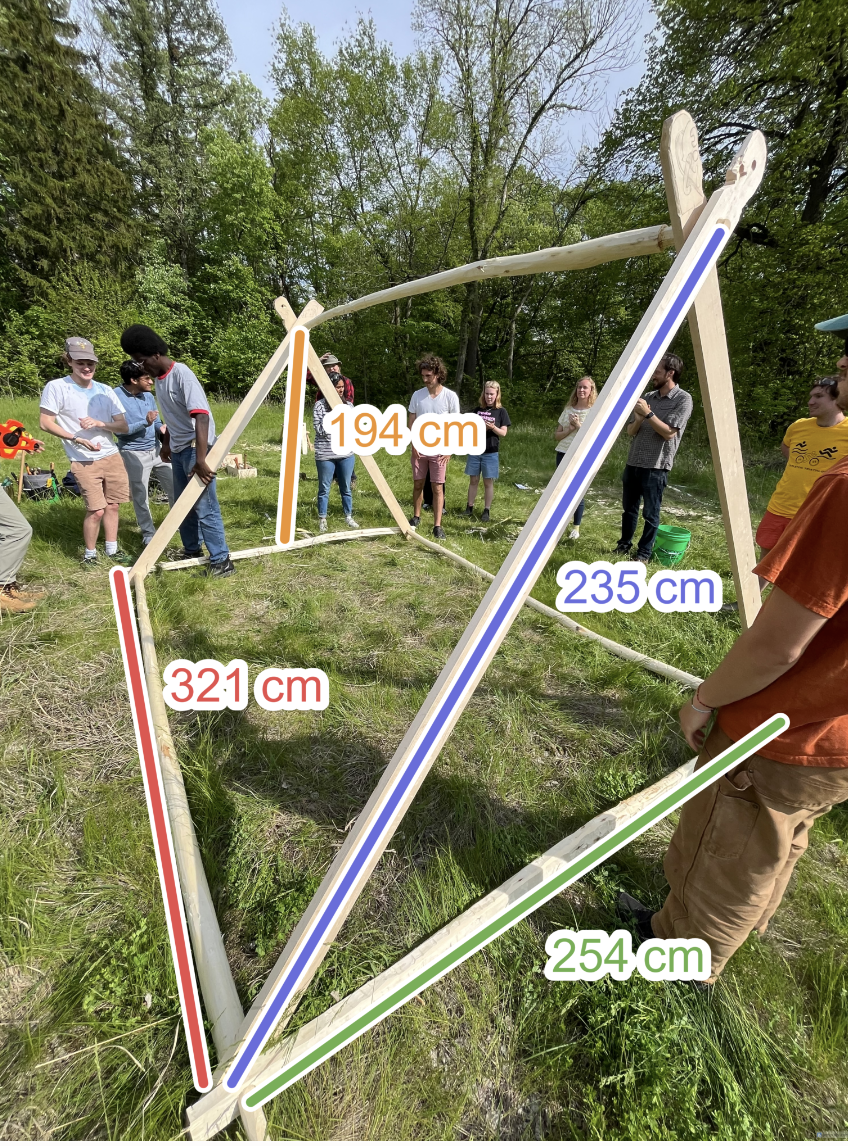
Final Tent Dimensions
| Tent Dimensions | Measurement |
| Height | 194 cm |
| Width | 255 cm |
| Length | 321 cm |
| Floor dimension | 819 cm squared |
| Total Area | 1,588 cm squared |
| Cover | 12 x 15 ft |
Qualitative Data
All groups took note of various qualitative factors that went into this experiment. Important observations included difficulties with learning how to use the tools, particularly the ax for shaping, or conversely, carving the smaller objects like the pegs and learning how to handle smaller knives, carving the dragon heads solely based on examples rather than written instructions, and variation in what data could be recorded. Several groups discussed how satisfying or fun certain parts of the process could be, especially debarking, with shaping as a close second. Seeing the tent constructed was also very cool, and many of us were pleasantly surprised at the ease with which it came together, as well as the fact that we successfully transformed freshly cut wood into a structure.
Conclusion and Takeaways
Overall, this lab was a lot of fun and a healthy mix of experimental archaeology and experiential history. Having a clear, quantifiable end goal to work toward made the process of experimentation fairly straightforward, and there were plenty of opportunities throughout the afternoon to fully experience the process of woodworking, from cutting and debarking to carving dragon heads. Several groups noted a difficulty with data recording, but overall there was a wide variety of data collected regarding nearly all aspects of the process, from the experimental (dimensions of tent components, our calculations, the final tent dimensions) to the more experiential (qualitative observations on the different tools, types of wood, and steps in the process). These observations helped us all see the chaîne opératoire of woodworking come to life.
As with many of our previous labs, getting instruction and guidance from an expert was absolutely crucial, especially when it came to ax and knife safety. There was a bit of a learning curve for some of us when it came to using the tools, but as we have seen several times now, the “on-ramp” to woodworking is relatively accessible–it just takes years of experience to become an expert like Maeve Gathje. Learning how to use these traditional hand tools was a valuable part of this process.
It was also fascinating to see the element of transformation at play here, as we transformed fresh logs into a structure big enough to house most of the class. As we familiarized ourselves with the tools and the materials, we spent time noticing and appreciating each step in the process and how the wood changed throughout. It may not have involved fire or dramatic color changes, but it was equally gratifying to see the results of our experiment come to life in a (somewhat) accurate recreation. The lab was also very social and collaborative, which sparked thought and discussion around how this process would have functioned in ancient societies. Several of us noted the importance of community in practices like woodworking or building. This has been a theme across most of our labs so far. With an experiment like this, it would not have really been possible to build something without collaboration. All in all, this lab was a successful experiment which emphasized both the experimental, accessible nature of woodworking as well as the high level of skill and artistry that is possible to achieve (although not for us, yet) as Maeve showed us.


0 thoughts on “Lab Summary Week 8: Woodworking”