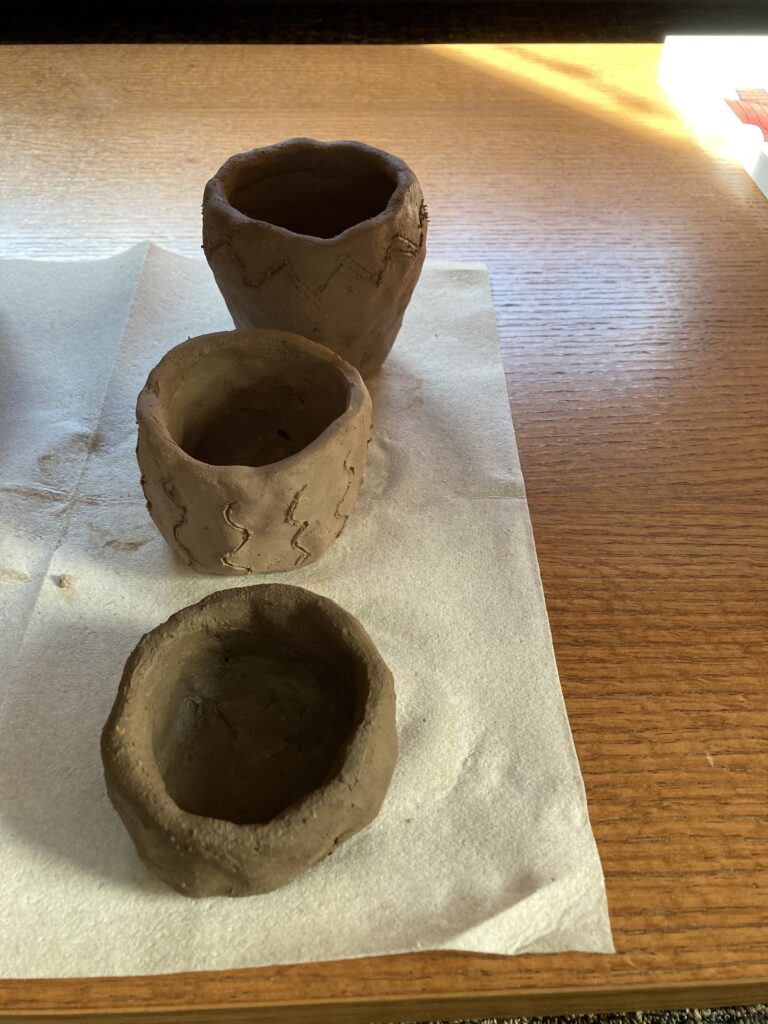
This week in lab, we learned how to prepare clay and form pinch pots under the guidance and instruction of Kelly Connole, a ceramics professor at Carleton College. Each student was provided with a bag of purified commercial clay powder, a bag of clay powder from the arboretum, and a bag of grog/temper. We also needed a cup of water and a container to mix clay in.
Steps of the lab:
- Added 1 tbsp of water to 1/2 of the powdered arb clay in the bag, mixed by hand, and removed from the bag
- Added between 1 and 2 tbsp of water to the other half of the arb clay, mixed by hand, and removed from the bag
- Leaving the arb clay to the side, added tbsps of water to 1/2 of the commercial clay powder in mixing container (an average of 4.5 tbsps added)
- Mixed first half of the commercial clay with the water and formed into a ball
- Coil test: pulled a small bit of clay off of the clay ball; rolled it into a thin, snake-like shape; gently wrapped the thin bit of clay around a finger–if clay cracked or broke, more water was added
- Added the test coil back into the clay ball and began the pinch pot process
- Placed 2 tsps of grog on the table and gently rolled clay ball in the grog, picking it up and mixing it in with the clay
- Stuck one thumb into the clay ball, pressing towards the bottom without going all the way through
- Pinched outward with a thumb and forefinger, thinning the walls around the hole made by the thumb to a thickness of 1/4 of an inch
- Continued to gently pinch and shape the pot, pulling upwards and evening out the sides and bottom (adding small amounts of water as necessary if clay cracked)
- Set first pinch pot to the side and added 2 tsps of grog to the remaining commercial clay powder
- Added tbsps of water to this remaining powder and mixed by hand in mixing container until the desired texture was reached (approximately 5 tbsps, depending on how evenly the clay powder was split in half in the beginning)
- Made at least one coil out of this remaining clay and added it to the top of the pinch pot by rubbing water onto the coil and the rim of the pot, continually smoothing and combining with fingers
- Optional: made and added more coils, either to the inside or the outside of the rim, altering the shape of the pot opening
- Used the rest of this clay to make a second pinch pot
- Combined the two balls of arb clay, added more water, and formed a third pinch pot
- Optional: ~4 hours later, or when the pinch pots reached a leather-hard texture: gently carved designs into the outside of the pot with a sharp object
- Left pots to dry for 8 days, until the firing lab in the following week
General Observations
- The arb clay felt gritty and sandy; had small rocks in it
- Arb clay looked a bit like melted chocolate when water was first added (dark in color and shiny)
- The commercial clay was very dusty and threw clouds of fine dust into the air when we opened the bag
- This was a very messy process–clay got all over our hands and anything we touched
- Because it was so messy, we could not multitask
- Adding grog (either before water or after water) made the clay feel firmer
- The clay cracked in small places as we worked but it was easy to seal it with our fingers and a bit of water
- Making the pots too wide made the rims too thin; there was a careful balance between width/height/thickness
- We had to be very gentle or the clay/pots collapsed in our hands–the clay was forgiving but sometimes too forgiving
- The arb clay was much harder to form into a pot–cracked more easily and was harder to fix the cracks with water (more stubborn)
- It was also easier to add too much water to arb clay and cause it to fall apart
- The pots remained noticeably cold to the touch for at least the next 6 hours
- As the pots dried, imperfections that were not noticeable before suddenly became visible


0 thoughts on “Week 7 Lab Data – Group A”