
This week’s lab focused on ancient ways of measurement. It was divided into three sections: Monday included the making of a rope with knots for making right triangles; Wednesday was mainly the construction of the groma; Thursday was actually using the groma to do measurements.
Monday
For Monday, we had to make a rope with 12 equal-length segments, which replicates the technique the ancient Egyptian people used to find the orthogonal angles of the four corners of the pyramid.
| Total length | Segment length | Number of knots | 1st side amount of segments | 2nd side amount of segments | 3rd side amount of segments |
| 33 ft | 2.5 ft | 13 | 3 | 4 | 5 |
Based on the Pythagorean theorem, a triangle with 3-4-5 sides will form a 90-degree angle at the corner between the 3 and the 4 sides.
Our first attempt at making the segments wasn’t successful: we ran out of rope for the last knot. So we redid the entire process. We improved in two aspects, which we consider to be the causes of the failure from the first time. The first thing is making small knots, tying them as small as possible. The second thing is ensuring the rope is pulled straight when doing each measuring, so we don’t accidentally give extra length to any segment.
Here is a photo of the successful triangle my group mates had formed:

Wednesday
Wednesday’s lab focused on making the groma from an “Ikea” kit. All of the materials we used were part of the standard manual; I will not repeat it. The only variation that happened was the different lengths of the strings used for the five lines. We aimed at creating the strings on the side to a medium length so that they would move less when encountering wind. For the center string, we ensure it is long and close to the ground. The knotting process again caused variations in the length of the four side strings that were supposed to be the same length, so we decided to cut the longer ones and adopt the length of the shortest. Another incident that happened during the process was that one of the strings snapped when we tried to tie it. This hints that the type of string we selected might not be the most suitable for this type of work, considering its physical quality, which no doubt is true as strings snapped more during Thursday’s lab.
| Center string length | 46 inch |
| 1st string length | 36 inch |
| 2nd string length | 35 inch |
| 3rd string length | 29.5 inch |
| 4th string length | 36 inch |
| Unified string length | 29.5 inch |
Here is a photo of our completed groma:

Thursday
During Thursday’s lab, we went out into the field to conducting actually measuring with the groma. There were four tasks we completed: first, making a road; second, making a square; third, making a grid; fourth, measuring the area of an irregular space.
Road
We started making a road using the groma from the hilltop of Bell Field. The way to do it was to line up the three strings on the groma, then line up a pole with them, and plant a flag where the pole stands. We kept doing this till we reached the end of the field. This turned out to be rather challenging as it was hard to line up the strings with either the flag or the pole on a slope. So the first half of our road, which was on the hill, has a little nice long curve, but as soon as we reached the flat ground, our line improved immediately. In the end, we managed to plant 19 flags, making 18 line segments, and made a perfect 90-degree turn at flag 18. The curve that I previously mentioned appeared to be between flag 4 and flag 9.
The following table reports the distances between two flags. We got the measuring tape in metric, so all the following measurements and calculations will be in metric.
| Flag 1 | 0m |
| Flag 2 | 7.59m |
| Flag 3 | 12.47m |
| Flag 4 | 15.53m |
| Flag 5 | 5.73m |
| Flag 6 | 6.36m |
| Flag 7 | 6.05m |
| Flag 8 | 6.09m |
| Flag 9 | 7.70m |
| Flag 10 | 8.65m |
| Flag 11 | 9.72m |
| Flag 12 | 11.12m |
| Flag 13 | 11.58m |
| Flag 14 | 16.21m |
| Flag 15 | 12m |
| Flag 16 | 16.64m |
| Flag 17 | 11.60m |
| Flag 18 | 11.61m |
| Flag 19 | 7.21m |
Here is a photo of our line/road, where you can see a curve at the far end, which is where we started:

Square
The next thing we built using the groma was a 4x4m square. The construction of a square starts with finding a center point. Expanding from the center point, using the groma, you find two perpendicular lines whose endpoints will be turned into the midpoints of the four sides of the square. Now with the midpoints, we will be able to make more 90-degree angles with the groma and find the four corners of the square. Since we were trying to make a 4×4 m square, the distances between the center point and the midpoints are all 2m, so were the distances between any two points.
Here is a photo of Edward, Natalie, and Aselya working on the square:

After making the square, we were able to stand in the center to look for bird signs. We spotted 6 birds in the direction of the northeastern quadrant, which we interpreted as the legions of group 6 were facing defeat.
Grid
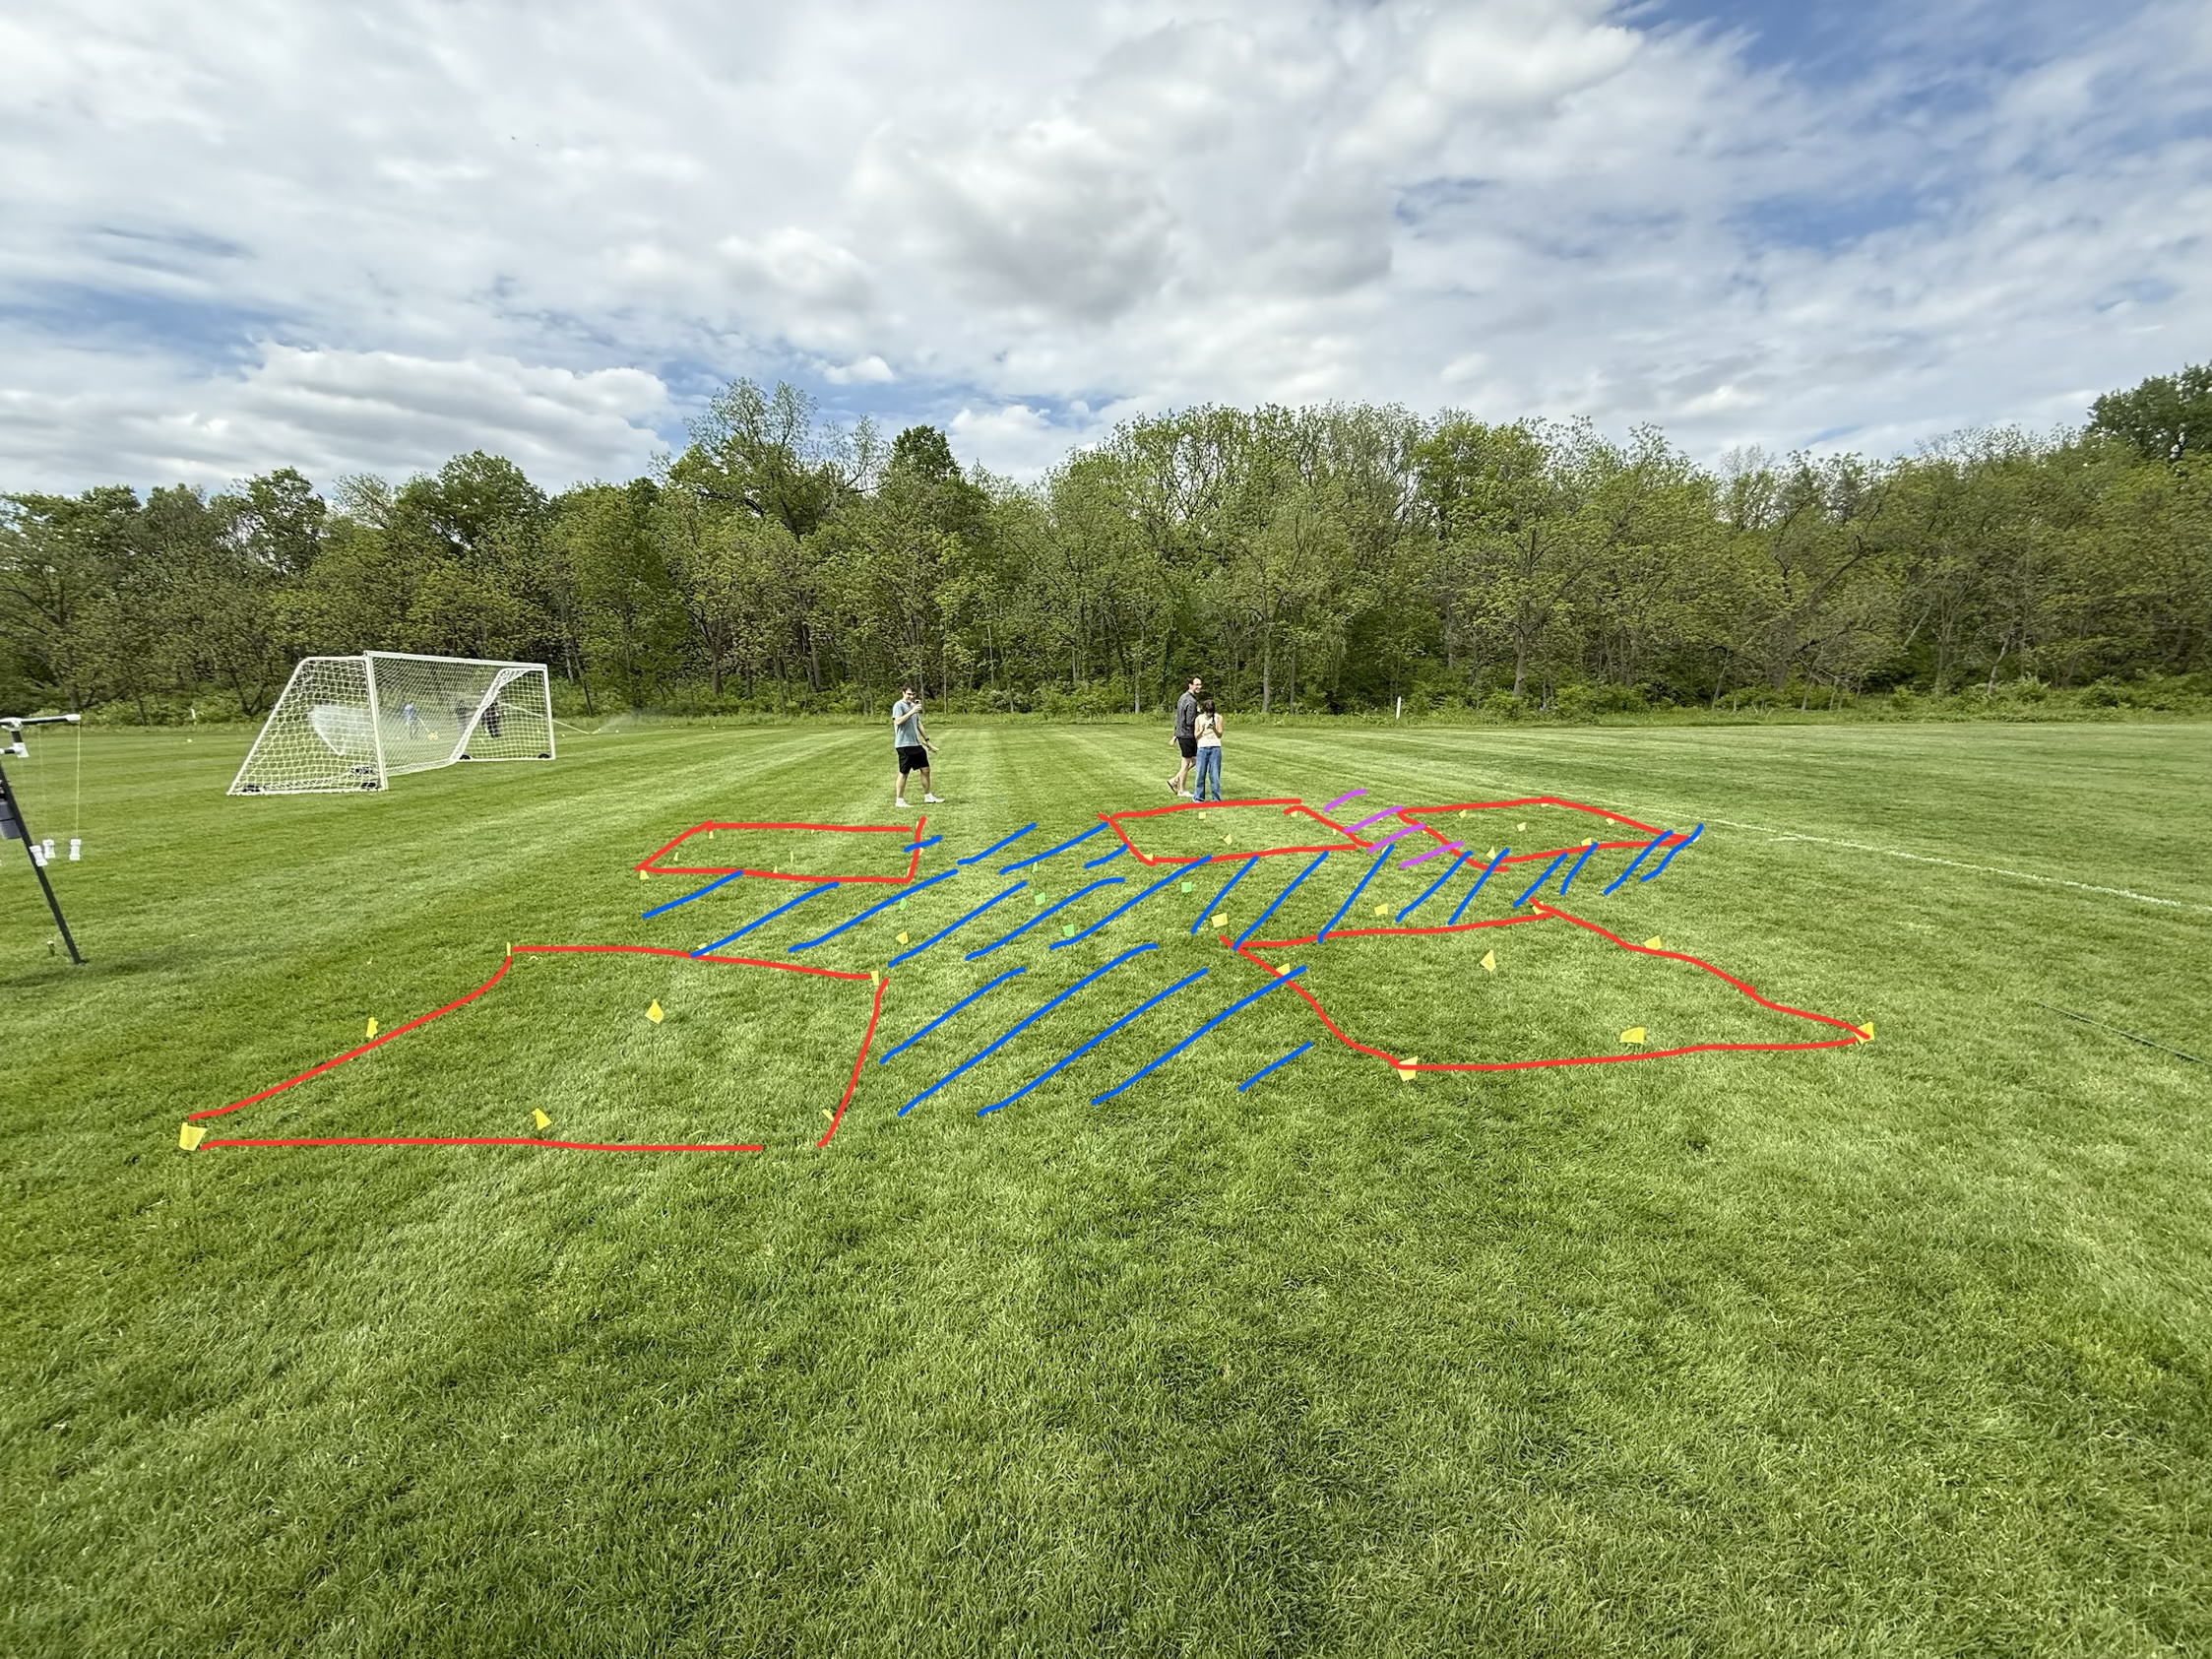
Our third project was to make a grid, which was basically the extended version of the square. We based the grid of our reading of Diagram 11. We first chose a center point. Then, we used the groma to construct a square, whose borderlines were used as the sides of the main cross road. Using the main road as the reference, we constructed four squares, one on each corner. After this, in order to replicate the small road set up in the Diagram, we extended the main road and constructed another square, which has a small road between it and its neighboring square. In total, we constructed five squares.
Here are the dimensions of the grid:
| Main road | 2m |
| Square | 2x2m |
| Small road | 1m |
Here is a photo referencing how we structured our grid. The blue section is the main road, the purple section is the small road, and the red boxes are the squares:
Mini Bald Spot
The final part of the lab was measuring the area of an irregular space. We chose to do the mini bald spot, which is actually a rectangular area with a chopped-off corner. Thus, in order to challenge ourselves, we decided to use the trees as the border. The ancient way of measuring an area is to first find a rectangle and then start subtracting right triangles from it. What we did was to measure where the tree lines curved. We ended up cutting off four triangles and one rectangle.
During the measurement of the mini bald spot, the center string snapped twice, once at 3:30 pm, about 2 hours after we started our work, and once at 4:10 pm. This further proves we might not have selected the most suitable string.
Here are the measurements we used:
| Width | 46.32m |
| Length | 51m |
| Segment 1 | 10.33m |
| Segment 2 | 22.14m |
| Segment 3 | 10.59m |
| Segment 4 | 6.60m |
| Segment 5 | 6.12m |
| Segment 6 | 21.82m |
| Segment 7 | 14.95m |
| Segment 8 | 3.18m |
| Total area | 2061.4206m^2 |
Here is an image showcasing our selection of line segments and the calculation:

Based on the collected data, after calculation, we were able to conclude that there exist errors in the measurements since the line segments don’t add up to the width. There are two speculated reasons: one, maybe the 90-degree corners we found with the groma weren’t actually precise 90 degrees; two, the ups and downs of the landscape made the measurement with groma and measuring tape hard.

0 thoughts on “Week 8 Lab Data Group 2: Measurement”