
Introduction
On Thursday our class finally convened in the Arboretum art yard to fire the loom weights that we shaped in Week 3. We had a great time firing the loom weights with tremendous help from Kelly Connole, the master of pottery, and Austin Mason, our professor. We came to the art yard knowing that the smell of smoke would follow us for the rest of our lives (or this week). We set up in a gravel-covered area of the yard, close enough to hear and see one another, but still separate enough to work in our own spaces.
The hypothesis of this experiment and lab is: “A lifetime of experience in building and maintaining a hot fire to transform wet clay into hardened ceramic ware would have influenced practices of fire construction, temperature maintenance and retrieval of bone from the ashes in the cremation rite, and vice versa,” according to the lab manual. We also compared our experience keeping the cheese fire steady to keeping these fires hot. From our discussion, we think it’s really interesting how the ability to maintain the fire heat in these activities could be transferable and relevant to each other. The differences between the activities boil down to how the heat is transferred: for the cheese, it was in a vessel over the fire, but for both cremation and firing, the heated element was directly in the fire.
We also discussed the purposes of this lab: “To gain an experimental understanding of the final firing step…, to appreciate the inherent properties of the raw materials, to better understand the constraints those properties imposed on the desired finished product…, to assess the effectiveness of different materials for smothering the fire to protect pots from thermal shock and produce a black finish, and to compare the practices of pot firing and open air cremation.” These goals were met both during the data collecting, the lab processes, and the post-lab discussion.
There are a number of research questions one can ask about this lab because there are a number of different factors starting from the weights, thickness, length, and elements of the loom weights to the various materials used to smother different piles of fire. One question we came across is how possible is it that we can accurately conclude the information from the experiment given that we had a high level of uncertainty in the decisions we were making throughout the process. Similarly, we had a very low success rate with the weights that had not been bisque-fired, implying something was amiss with our process.
Process


Materials:
- For all groups
- Dry loom weights
- Bisque-fired loom weights
- Thermocouple (did not end up being able to record the temperature of the fire; too hot)
- Blue laser thermometer
- Yellow laser thermometer (did not end up being able to record the temperature of the fire; too hot)
- Digital Scale
- Tape measures
- Timing device (phones)
- Matches
- Wood/ tinder
- Axe
- Oven mitts and metal tongs
- For Group A
- Sawdust
- Sawdust
- For Group B
- Bark
- Plant Leaves
- For Group C
- Straw
Steps:
When we arrived at the Arb art yard, Kelly gave us a quick rundown of the process and of the resources we had available (mostly wood and more wood). After that, it was time to get started. The three groups each staked out a spot in the yard and began to gather fuel for the fire. We picked up armfuls of cut wood from the art yard’s supply as well as stacks of raw branches that Austin had brought, and we started to build fires out of the former. Group A opted for an open triangle shape, while B and C used a log cabin structure. While the variation was interesting, it wasn’t at all crucial to the results of the lab, and we were able to build our fires however we pleased. Our objective at this point was to allow plentiful airflow through the structure, as we were attempting to produce hot flames quickly. Though we had gotten some practice in fire building during the cheesemaking lab, many members of the class were slightly at a loss as to how to build a successful fire— but by 1:30, all three groups had figured it out and had moved on to the next step.
While the flames were crackling away, we used the wait time to measure our loom weights. We failed to standardize what terms we were using for each dimension throughout the groups, but generally speaking, all of the groups measured the weight and some groups measured full diameter, diameter of the hole, and height/thickness of each weight’s side. At this stage, it was important to note which weights had previously been bisque fired by Kelly and which had not. With a few exceptions, all of the weights labeled “1” were not bisque fired prior to the start of the lab. We could tell these from the unfired weights by a slight difference in color as well; the fired weights took on a faint orange-pink tone while the unfired weights remained fully grey.
It took a fairly long time for all three groups to finish measuring all of their weights, but as soon as we were done, we arranged them in neat circles around our fires. We were attempting to warm the weights up somewhat gradually, in order to give them a fighting chance at remaining intact during the firing. From this point onward, all of the groups were meant to take regular measurements of the temperature of the flame and/or loom weights. We all varied in how we approached this, which makes analyzing trends in the resulting data somewhat difficult. Group A recorded the temperature of each individual loom weight in intervals ranging from 3-10 minutes; Group B measured mostly the heat of the flame itself, but in precise 5 minute intervals; and Group C also measured the fire, but in 10 minute intervals (with some unaccounted-for time — probably spent stacking the weights — between 2:17pm and 2:53pm). While we recorded temperatures, we also tried to rotate the loom weights and gradually move them closer to the flame at each time interval.
By this point, we were no longer feeding the fires— quite the opposite. We were waiting for them to consume the wood we had initially fed them and subside to beds of coals. It didn’t take too long; all of the groups began to move their weights onto their coal beds at roughly 2:35pm. Some poking of the fire, getting it to finish burning the sides of pieces of wood and lie flat enough to stack things on it, was necessary. We used tongs provided by Kelly to pick up the weights, as by this point, they were too hot to touch with bare hands. In our stacking of the weights, we didn’t do anything very fancy; we were generally just trying to fit them all close together so that they would be easily contained by the structures we would build in the next step.
This part was a little tricky. After a period of waiting, we were under some time pressure to build a “teepee” structure of Austin’s branches that held itself together and contained the fire within with few to no gaps. Here, we wanted to prevent too much air from getting into the structure. Many of the branches we were using were fairly long, so we had attempted to break them down to a more useful size while we were waiting. Some members of the class took to this with more pleasure and ease than others. Using the axe we had brought was challenging for many, and it was ultimately easier to attempt to snap the branches underfoot. Though some groups were low on suitable branches because of their difficulties in breaking down timbers, they were able to supplement with Kelly’s stock of cut wood and fill in the gaps in their teepee structures successfully.
The wind was strong, which caused a slight delay in a few groups’ fires catching to the whole structure. When it did, though, it was a dramatic flare, tall, hot, and bright. This is the moment that I suppose would have been the emotional and theatrical climax of cremation rituals: the great blaze of hungry flame consuming the body. Popping sounds could be heard from all of the fires almost immediately as our weights began to blow out despite our best efforts. We stood back a little ways and watched the branches burn up and collapse. Again, we tried to utilize our waiting time to gather materials that we would need in the next step: smothering. Once the fires started collapsing, they were dying down and smothering themselves slightly. That was the time to act. Group A used sawdust, Group B used bark, and Group C used straw to pile atop the flame as quickly as possible and choke it. We all poured water on top of the material to ensure that the fire wouldn’t just consume that too. Group B also ended up using the broad green leaves growing in the art yard to plug some of the spaces left by the bark, aiming for a consistent seal. Group A’s sawdust covered up their fire very effectively; there wasn’t even any smoke visible. The other two groups still had plumes of smoke emerging from the mounds they had created. Once we were satisfied that the fires were sufficiently smothered (minimal airflow, generous mound, and thoroughly damp material), and had tentatively stepped and stomped on the edges for good measure, we gathered up our materials and left for the day.
We did come back on Friday to retrieve our weights and take another set of weight measurements. Almost no non-bisque-fired weight had survived the experience, and we saw a range of blackening. Every group ensured that the remnants of their fires were completely put out, and then we packed up our weights and departed the art yard.
Results
We were looking at the following variables in our research:
- Firing status (bisqued versus unfired)
- We fired thirty-seven loom weights, of which twenty-five had been previously bisque fired by Kelly.
- Type of smothering material
- Group A smothered with slightly damp sawdust, Group B smothered with large leaves and damp wood shaving scraps, and Group C smothered with slightly damp hay.
- Temperature of fire
- The temperature of the fire ranged both by time and by group widely, as did the carefulness of taking the temperature with regularity. The measurements can be split into four types: the initial or drying fire, the firing fire, the smothering temperature, and the day after. The highs (or onlys*) of each group for each type are as follows in Table 1:
| Type | Group A | Group B | Group C |
| Initial | 627* °C | 780 °C | 986 °C |
| Firing | 893 °C | 814 °C | 808* °C |
| Smothering | 813* °C | 784* °C | 722* °C |
| Day After | 19* °C | 156 °C |
- Group A also took measurements of the clay weights themselves every five to ten minutes in the initial stage (Table 2) and Group B took fire measurements every five minutes (Figure 1). It is hard to be certain of the measurements of the temperatures of the loom weights, since they vary so much even within the same time and loom weight, but it gives an estimate for about how hot they were when they went into the firing fire. Group B’s dip in fire temperature around 14:35-14:55 likely has to do with the process of building up the teepee for firing.
| 13:51 | 13:54 | 13:59 | 14:09 | 14:17 | 14:32 | |
| Hali’a | 22 °C , 27 °C , 19 °C | 35 °C , 35 °C, 33 °C | 100 °C, 80 °C, 63 °C | 213 °C, 261 °C, 280 °C | 394 °C, 163 °C, 113 °C | |
| Elliot | 50 °C , 40 °C , 45 °C | 83 °C, 65 °C, 94 °C | 88 °C, 68 °C, 59 °C | 101 °C, 94 °C, 96 °C | 222 °C, 374 °C, 320 °C | |
| Margie | 26 °C, 25 °C, 24 °C | 107 °C, 100 °C, 62 °C | 282 °C, 283 °C, 200 °C | 430 °C, 320 °C, 150 °C | ||
| Phoebe | 21 °C, 24 °C, 25 °C | 63 °C, 41 °C, 46 °C | 75 °C, 68 °C, 271 °C | 386 °C, 138 °C, 103 °C | 230 °C, 329 °C, 357 °C | |
| Dane | 25 °C, 21 °C, 30 °C | 58 °C, 74 °C, 63 °C | 148 °C, 115 °C, 101 °C | 150 °C, 80 °C, 127 °C |

Our results were in the following areas:
- Blackening
- There was a wide range of blackening. Many loom weights were partially blackened. Those that were most blackened were in the fire that was smothered with the damp straw. The sawdust firing saw some blackening, but not consistently. The weights that were the least blackened were in the fire smothered with leaves and wood shavings.
- Shattering/exploding
- There were thirty-seven loom weights, of which ten exploded. All of these were the unfired loom weights, regardless of hole status. The twenty-seven which did not explode had all been bisque-fired with the exception of two. When looking at the temperature data from Group A, it seems likely temperature shock also played a role many of the loom weights were still much colder (~500 degrees Celsius) than the fires they were put into.
- Weight (possibly)
- Unsurprisingly, there was a change in weight from the day after to the post-firing stage. There was an average of about forty-one grams lost between the day after forming and the day after firing and about fifty-eight grams lost between the mass of wet clay on the day of forming and the mass after firing. However, most of this seems to have been lost in the bisque firing; if the weights of the loom weights differed between the bisque and pit firing stages, they were only a gram different—and sometimes they were one gram heavier rather than lighter. This suggests either uncertainty with the scale or ash in the holes poked through the weights. See Figure 2.

- Size
- Not enough data for comparison. Only had data from one group.
Conclusion
In this lab, we experimented with several factors in the firing process. Some of these questions began in the loom weight formation lab in the ceramics studio, as many of us tried out different strategies to promote successful firing. Poking multiple holes throughout the weights, for instance, seems not to have had enough of an effect to help the unfired weights survive. Whether it allowed for a higher-quality finish on the pieces that did survive is unclear. Some of us also tried out different ratios of sand to clay as we shaped our weights, and class members have reported that the weights with very high amounts of sand exploded without turning black. We can at least fairly conclusively say that bisque firing before fire-firing effectively ensures a higher survival rate.
We attempted to create a reducing environment by smothering the fires with the pottery inside, which would ideally produce a black finish in the final product. Nobody seemed to achieve an attractive and uniformly black finish, but the variation between the different groups in how dark their loom weights became suggests a potential influence from the different smothering materials used. Group B’s bark-and-leaves smother resulted in very little blackening, while Group C’s straw produced the most and Group A’s sawdust struck a balance between the two. Group B’s failure might be put down to their extensive watering of the flame and fairly low temperature going into the smothering process, but Group C also used copious amounts of water and was successful. It has also been suggested that Group A’s sawdust, which wasn’t even smoking after the smothering occurred, might have been too successful in smothering the fire before the weights had a chance to turn black.
In any case, the class as a whole certainly produced enough fired loom weights to be of use when we finally begin weaving our garment! Though we lost some weights along the way, we gained a more nuanced understanding of how to create different environments for firing and how to create (somewhat) black, useful, intact loom weights.
Group Data Reports
In this lab, we were tasked with beginning the weaving process. Unfortunately, the sheer complication and time-consumption of setting up the warp-weighted loom hampered the process––we have not yet begun weaving, and the lab has been extended somewhat indefinitely into the following week. Even though as a class we didn’t technically complete our task, it has been very illuminating to experience the detailed process of preparing to weave a piece of fabric on a warp-weighted loom.
Moving within our predetermined lab groups (A, B, and C), we were assigned to take over specific loom set-up tasks in shifts, since the limitations of space meant only a few people could effectively work on the loom at one time. Most of the time, while a given group was working on the loom, the members of the other groups would continue the tablet-weaving process, which we had begun on Monday and continued on Wednesday.
Some research goals and questions we considered:
- To produce enough fabric to create a “peplos-type” gown for our reconstructed outfit
- To understand the basic principles of weaving on the warp weighted loom
- To compare warp-weighted loom weaving with other forms, including rigid frame and tablet weaving methods
- How much time and forethought would you need to put in if you needed a length of homespun fabric?
- How does technology transfer between weaving cloth and any other crafts?
Tablet Weaving
The first part of this lab was tablet weaving, which became an ongoing process throughout the week. We began by each taking our warp threads from among the three colors of wool we had: the blue, orange and yellow wool we had dyed during week five. We selected twenty-four threads of one color and sixteen threads of a second color. Then we each took a set of ten cards and numbered them from one to ten.
We threaded each card using one of two patterns. For the cards numbered one and ten, we used only threads of our primary color (the color with twenty-four threads). For the cards numbered two through eight, we threaded the holes labeled A and B with our primary color, and the holes labeled C and D with our secondary color. We then tied the end of our threads together, and secured them with a length of hemp cord.
Next, we fastened the closed end to a clamp to create tension, and slid the cards down the length of the threads to comb and detangle them. With about ten inches left at the bottom, we tied another knot and used another piece of cord to secure the threads in place.
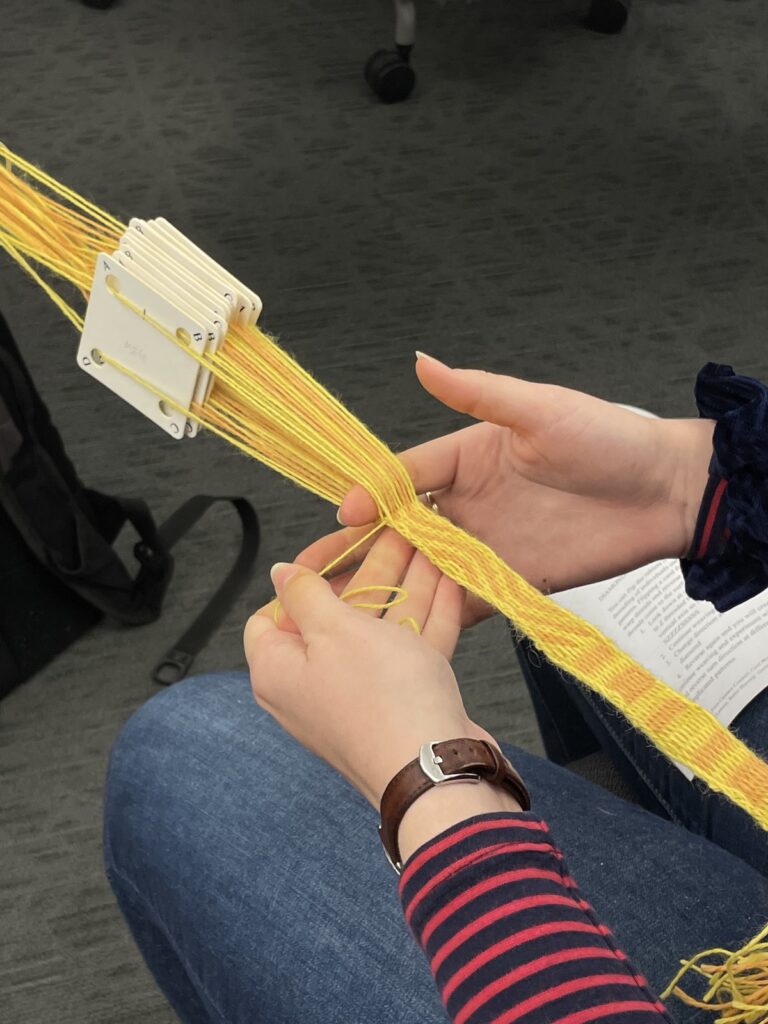
With the setup complete, we were finally able to begin the tablet weaving itself. We left one end secured to the clamp, and attached another end to ourselves, either to a belt or to another piece of cord. Then we took another thread of the primary color to use as the weft and wrapped it around our fingers to form a small hank.
The process of tablet weaving went as follows: first, we pulled the weft thread between the warp threads, leaving a small loop behind. Next, we turned the cards (we began with all of them facing in the same direction, and we turned them in the same direction). Then, we slid the cards along the threads to beat down the weft (and used a small ruler for the same purpose). Finally, we pulled the loop through. We did these steps turning the cards eight times in one direction, followed by eight times in the other direction in order to unravel the threads beyond the cards.
The process described above makes a woven fabric with borders in the primary color and horizontal stripes. However, we also experimented with adding other patterns. Each of these involved changing the orientations of the cards without passing the weft. This allowed us to make diagonal and zigzag patterns. We also flipped some of the cards vertically, changing from S to Z threading, and allowing us to create diamonds and chevrons. The finished products of our tablet weaving could be used as belts or cuffs.

Tablet weaving as a class 
Aerial view
Set-up
GROUP A –– Threading cards
To begin the setup of the loom, Group A measured threads out for the tablet woven border. They took forty-eight yards of yarn, and cut that into two-yard lengths. They then threaded the yarn through the cards, and followed the tablet weaving process described above. Once the woven border was created, it was attached to the upright loom.
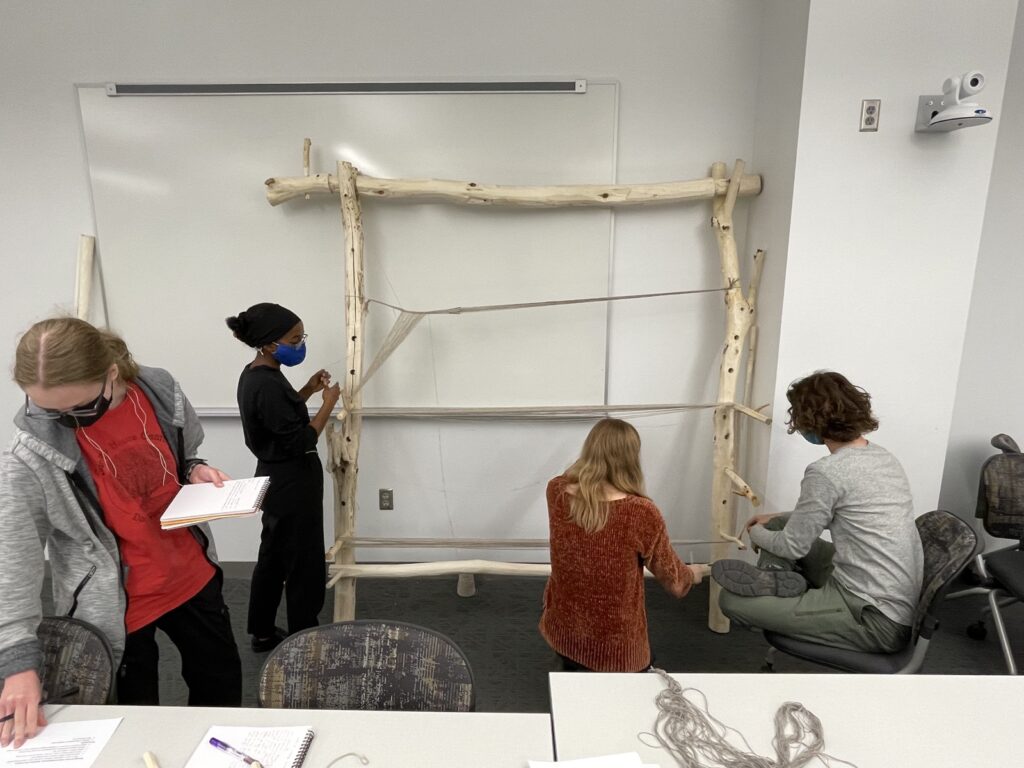
GROUP B –– Assembling the loom
This group had the task of putting the loom together from the component parts we made in an earlier lab. This was fairly straightforward. We leaned the two forked uprights against the wall, with the flattened side facing out, and settled the top bar in the forks where it was chiseled to be able to fit. (For further stability, we chose a spot in the room where one upright could also be leaned into a corner.) We measured that the base of each upright was about 93 cm from the wall, or around three feet.

Then we attached the shed rod with pegs, placing it in the lowest pair of drilled holes so that it was up against the uprights on either side. With two of our forked pegs, placed in a pair of holes near the center of the loom, we created a place for the heddle rod. We then tied a length of string to the sword-beater, so it had a loop to hang from, and the loom was fully assembled.
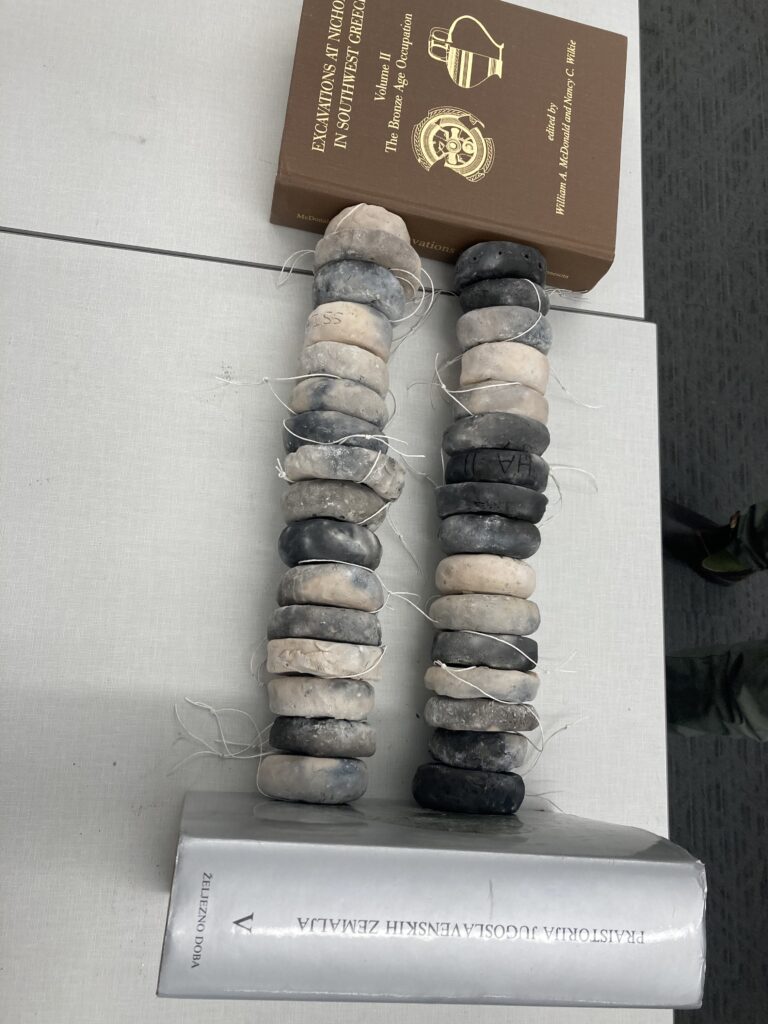
GROUP C –– Setting up weights and weft
The first step in the process of preparing our loom weights was to organize them by size and weight. After we had weighed all the weights, we separated them into pairs of approximately the same size and shape. For each pair, one weight would be attached to the back warp threads and one would get attached to the front warp threads. One challenge we faced was that not all of our weights were uniform, so some pairs were not evenly matched. In total, there were 32 weights, each with an average weight of 180 grams.
The second step in preparing the loom weights was to tie strings to each weight to create a loop. This allows for the warps threads to thread through the string loop rather than the weight itself. This makes it easier to have more warp threads per weight and it protects the warp thread from the roughness of the clay.
For setting up the weft thread, we created hanks. To do so we used the butterfly technique to wrap approximately 40 yards of weft thread. Each hand should last for about 10 cm of fabric. We made 4 hanks in total. In doing this process, we played around with the size of loops we created to try and get the most effective size hank.

Preparing the tablets for the border 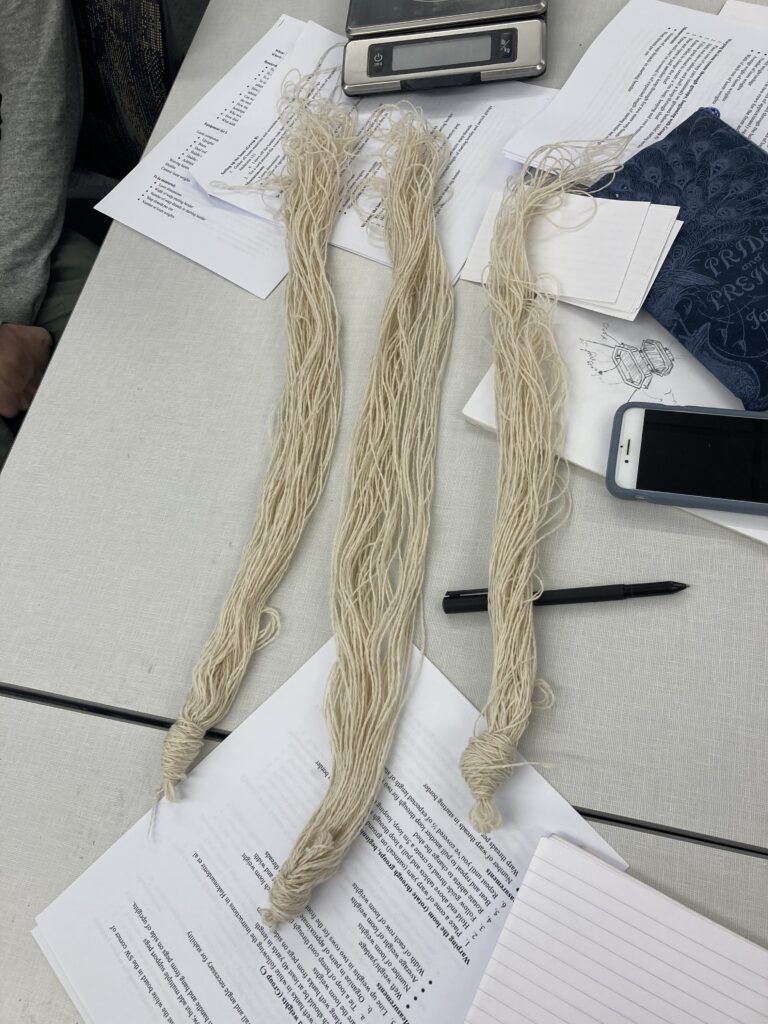
Hanks of weft yarn
Warping
Next, we began the process of warping the loom. We placed a cone of yarn on the ground, below the tablet woven border. We then pulled a loop of thread through the shed, and wrapped it around several pegs until it reached 5m in length and was looped around the bottom peg. Then, we rotated the cards to change the shed, and beat down the thread. We needed about 50cm worth of tablet-woven border to create the correct number of warp threads, and all of the groups took a turn, each completing about one-third of the warping. Though there was a learning curve, this part of the process went relatively quickly: Group B timed their work, and found that they completed 10cm of tablet weaving and warping in 12 minutes.
Group A warping 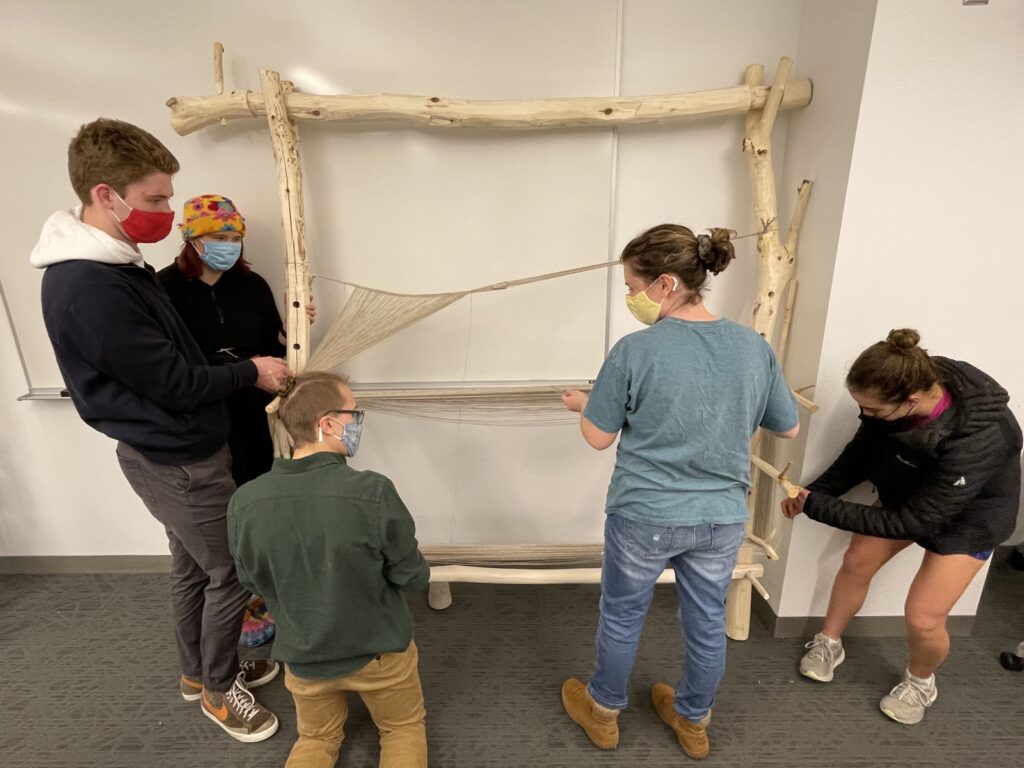
Group C warping
Once we finished the warping, Group B lashed the tablet woven border to the top. This was done by tying either side of the woven piece to the top rod, to keep it in the right approximate place. Then we tied the hemp cord around the rod, and started wrapping it around the rod multiple times, picking up about an inch-worth of the tablet-woven border each time and pulling it snugly against the top rod.
More specifically, this was done by holding the active cord in one hand beneath the shed, passing the spool of cord up through about every six warp threads, pulling the cord up and over the rod and passing it behind, and then passing the spool under the cord held in the other hand. This didn’t really create knots, but it helped maintain the tension to hold the border to the rod while we continued working, and it allowed us to space out the lashings so we weren’t stretching any of the warp thread out of place. At the end of the tablet woven border, we tied a knot around the bar once more to secure the lashing.
Having previously tied the two ends of the warp, Group B cut through the loop at the end, bisecting each warp thread so we would have the front warp and the back warp. After cutting them we had to spend some time separating the two groups, because in the warping process they had gotten somewhat tangled and twisted. By pulling gently and moving upwards towards the lashed woven border, we were finally able to separate the front and back threads, effectively creating the open shed. From here we could begin weighting the warp threads.
Weights
The first step in attaching the loom weights to the warp thread was to separate the warp threads into even sections. To get the correct tension for the size of our weights and loom, we attached 7 threads to each individual loom weight. We untangled the thread and created bundles of threads to tie to the weights. It was quite difficult to untangle the thread, but we managed to separate the threads enough to tie the weights on. We had some threads that ended up in the wrong bundle, but we reorganized the threads as we tied the weights on.
To attach the weights to the warp, we used slip knots and daisy chains. We first warped the back of the shed. When tying the weights onto the warp it was important for the weights to hang below the shed bar, but above the ground to allow for the movement in changing the shed. We also made sure to keep the pairs together as we tied the back of the shed. After the back was complete, we tied the weights to the front section of warp threads, keeping in mind the same considerations about height off the ground. We used the daisy chain method to keep the extra length of warp thread from getting tangled on the ground. One challenge that arose was that some of our weights slipped out of their knots and fell too low. To solve this, we tied the weights to the loom slightly higher than before, and we made sure that the knots were tight.
Once completed, there were 16 weights in the front and 16 in the back, so 32 weights in total, each attached to 7 threads on average. From this we can estimate that we had a total of approximately 224 warp threads.
Paired-off warp weights 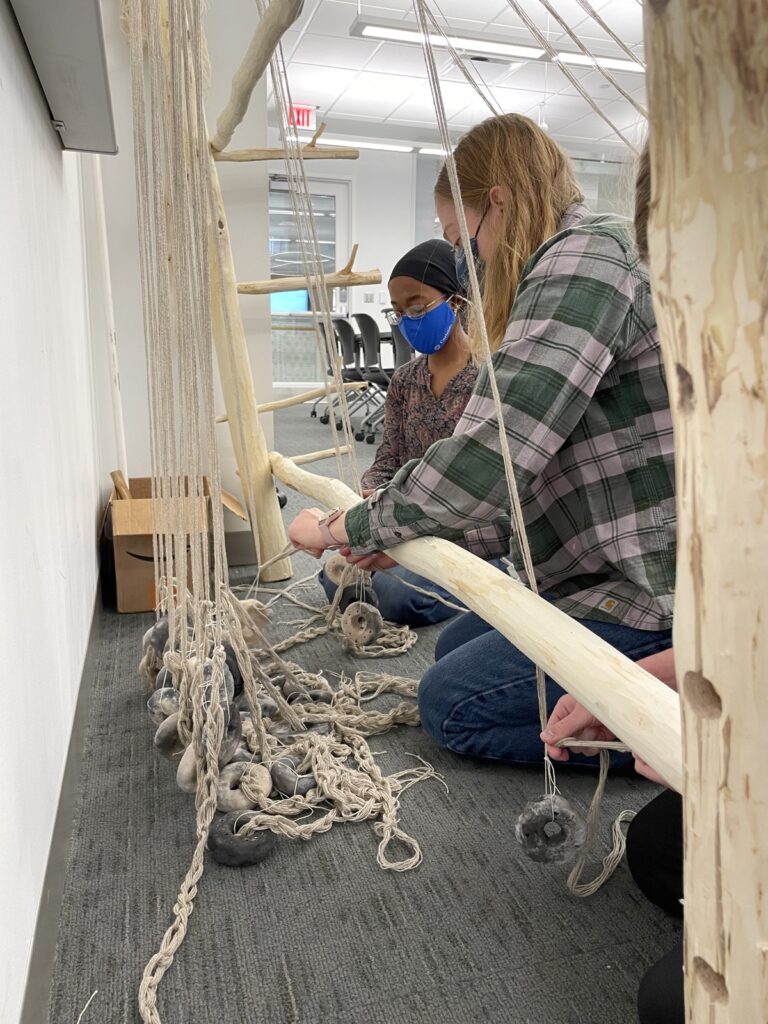
Attaching the weights 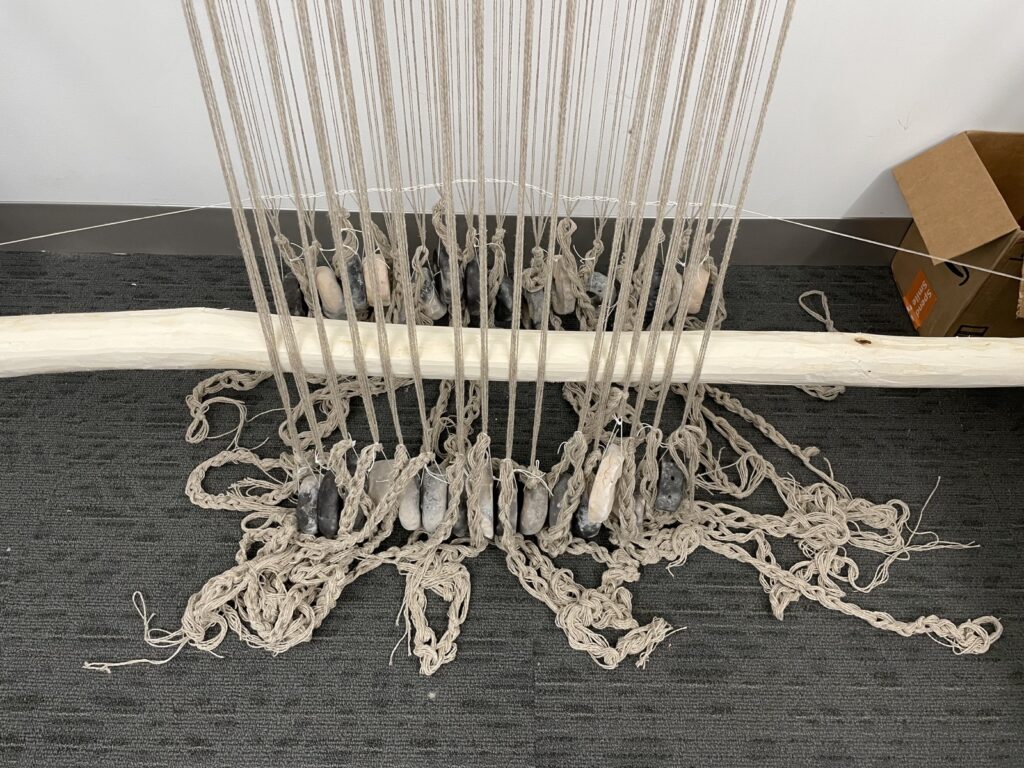
Done!
Final Steps
Once the weights were attached, Group B completed the two remaining steps before we could start weaving. First, we had to chain the warp in order to keep the threads organized and evenly aligned. This will help avoid tangling and twisting once we start weaving, making the process much more smooth. To complete this step, we started with the back half of the warp, tying one end of our hemp cord to the left upright, passing the spool behind the threads, and making a slip knot in the cord near the first warp threads. With three people, the process was simple: one person held the cord and spooled it out as needed; another person worked out which were the next threads to be chained up by looking closely at the tablet woven border which began our warp, preparing them in pairs; finally, a third person chained the pairs with the cord, pulling the cord from behind the threads through a loop at the front and tugging it so there was a bit of slack.
When we finished the back warp, we knotted the cord and moved the entire chain down so it rested close to the weights, then tied either side beneath the shed rod. We then repeated the process on the front half of the warp threads. It was very time consuming work, but it made a big difference in the way the warp hangs––it was much more organized after chaining.
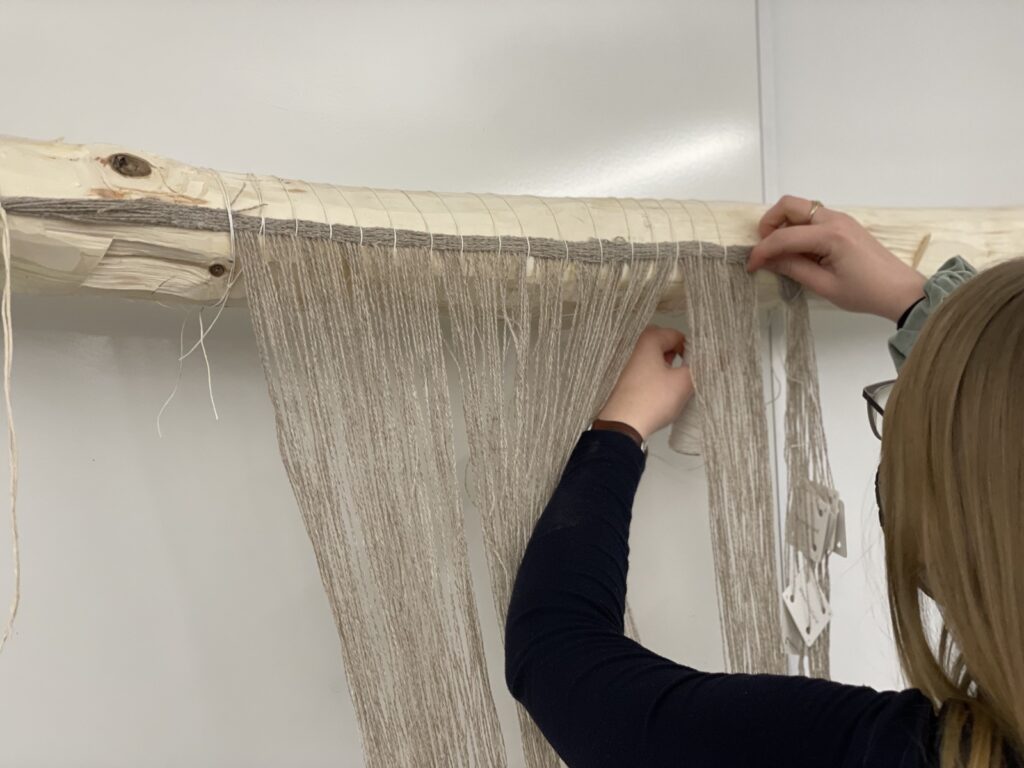
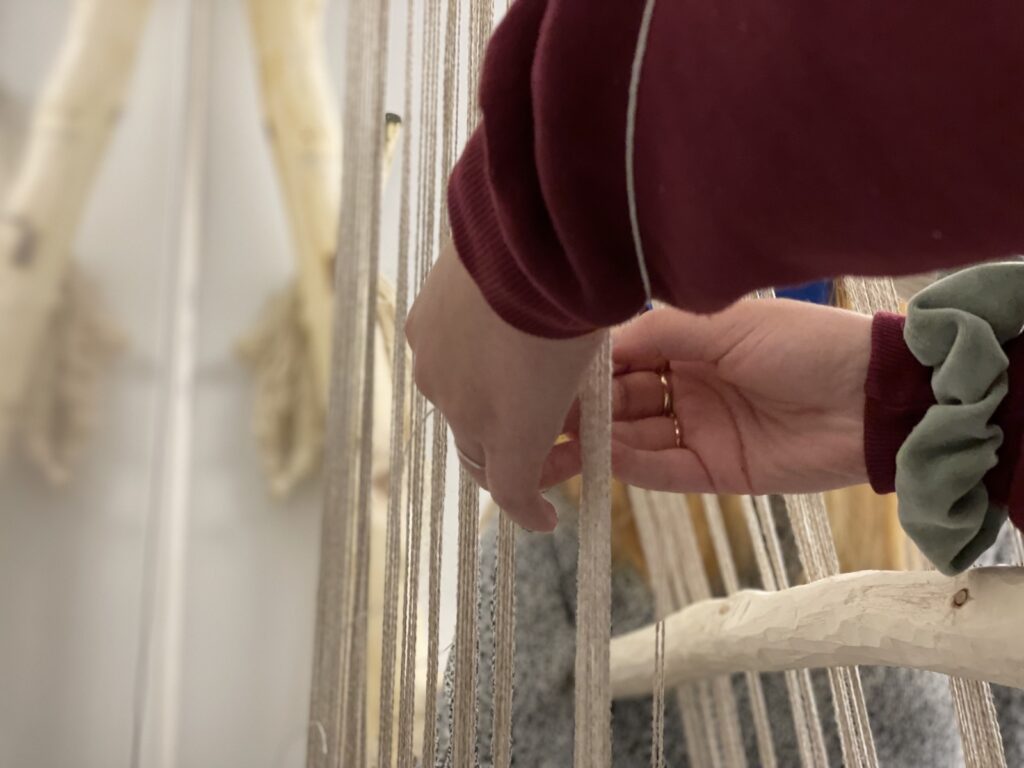
The final step before we could start weaving was knitting the heddles. For this, we lashed a length of pipe from the Makerspace to the back of the two uprights as our helper rod, directly behind the heddle rod, which was resting against the uprights on the front side of the loom. Tying our hemp cord to the heddle rod, we began the long process of passing the cord over the heddle rod and to the right of each front warp thread, then over the helper rod and to the left of each back warp thread, coming around under the helper rod and to right of each back warp thread, then up from under the heddle rod (through the same space we initially went through. This captured the back threads while missing the threads at the front. Each pass through was secured with a kind of twisted knot, or a buttonhole stitch. This was a little finicky and very time-consuming, especially with the amount of warp threads we have, and we were significantly limited by the fact that only one person can effectively knit the heddles at a time.
In retrospect, the flexible pipe was not the best material for the helper rod. When we tugged the knots tight, the pipe would flex forward, so although we did our best to maintain approximately the same tension for each of these heddle loops, some of the loops ended up shorter or longer than others (particularly they got shorter the more we kept going). It shouldn’t have too great an impact on the actual weaving process, but it might mean the two sheds are not as clean and evenly parallel as they could be.
Conclusion
Although we were not able to begin the weaving process on the warp-weighted loom and will have to continue that at a later time, we were still able to gain valuable insights from the setup process. Many of the questions about our ability to create fabric and what it is like to work with the loom will have to be answered as we move into the actual weaving. However, the setup illuminated one major insight: it takes an incredible amount of time and patience to set up this type of loom. Based on our experience during this lab, we can assume that it would take a significant amount of time and forethought to create a homespun clothing item.
In comparison, table weaving turned out to be a rather fast process, with many people in the class finishing their first tablet weave by the end of the week. As we progress with our loom in the coming days and begin weaving, we will hopefully have the opportunity to answer some of the research questions that remain unanswered and be able to better compare different types of weaving.
Group Data Reports
In this lab, we were tasked with beginning the weaving process. Unfortunately, the sheer complication and time-consumption of setting up the warp-weighted loom hampered the process––we have not yet begun weaving, and the lab has been extended somewhat indefinitely into the following week. Even though as a class we didn’t technically complete our task, it has been very illuminating to experience the detailed process of preparing to weave a piece of fabric on a warp-weighted loom.
Moving within our predetermined lab groups (A, B, and C), we were assigned to take over specific loom set-up tasks in shifts, since the limitations of space meant only a few people could effectively work on the loom at one time. Most of the time, while a given group was working on the loom, the members of the other groups would continue the tablet-weaving process, which we had begun on Monday and continued on Wednesday.
Some research goals and questions we considered:
- To produce enough fabric to create a “peplos-type” gown for our reconstructed outfit
- To understand the basic principles of weaving on the warp weighted loom
- To compare warp-weighted loom weaving with other forms, including rigid frame and tablet weaving methods
- How much time and forethought would you need to put in if you needed a length of homespun fabric?
- How does technology transfer between weaving cloth and any other crafts?
Tablet Weaving
The first part of this lab was tablet weaving, which became an ongoing process throughout the week. We began by each taking our warp threads from among the three colors of wool we had: the blue, orange and yellow wool we had dyed during week five. We selected twenty-four threads of one color and sixteen threads of a second color. Then we each took a set of ten cards and numbered them from one to ten.
We threaded each card using one of two patterns. For the cards numbered one and ten, we used only threads of our primary color (the color with twenty-four threads). For the cards numbered two through eight, we threaded the holes labeled A and B with our primary color, and the holes labeled C and D with our secondary color. We then tied the end of our threads together, and secured them with a length of hemp cord.
Next, we fastened the closed end to a clamp to create tension, and slid the cards down the length of the threads to comb and detangle them. With about ten inches left at the bottom, we tied another knot and used another piece of cord to secure the threads in place.
With the setup complete, we were finally able to begin the tablet weaving itself. We left one end secured to the clamp, and attached another end to ourselves, either to a belt or to another piece of cord. Then we took another thread of the primary color to use as the weft and wrapped it around our fingers to form a small hank.
The process of tablet weaving went as follows: first, we pulled the weft thread between the warp threads, leaving a small loop behind. Next, we turned the cards (we began with all of them facing in the same direction, and we turned them in the same direction). Then, we slid the cards along the threads to beat down the weft (and used a small ruler for the same purpose). Finally, we pulled the loop through. We did these steps turning the cards eight times in one direction, followed by eight times in the other direction in order to unravel the threads beyond the cards.
The process described above makes a woven fabric with borders in the primary color and horizontal stripes. However, we also experimented with adding other patterns. Each of these involved changing the orientations of the cards without passing the weft. This allowed us to make diagonal and zigzag patterns. We also flipped some of the cards vertically, changing from S to Z threading, and allowing us to create diamonds and chevrons. The finished products of our tablet weaving could be used as belts or cuffs.
Tablet weaving as a class Aerial view
Set-up
GROUP A –– Threading cards
To begin the setup of the loom, Group A measured threads out for the tablet woven border. They took forty-eight yards of yarn, and cut that into two-yard lengths. They then threaded the yarn through the cards, and followed the tablet weaving process described above. Once the woven border was created, it was attached to the upright loom.
GROUP B –– Assembling the loom
This group had the task of putting the loom together from the component parts we made in an earlier lab. This was fairly straightforward. We leaned the two forked uprights against the wall, with the flattened side facing out, and settled the top bar in the forks where it was chiseled to be able to fit. (For further stability, we chose a spot in the room where one upright could also be leaned into a corner.) We measured that the base of each upright was about 93 cm from the wall, or around three feet.
Then we attached the shed rod with pegs, placing it in the lowest pair of drilled holes so that it was up against the uprights on either side. With two of our forked pegs, placed in a pair of holes near the center of the loom, we created a place for the heddle rod. We then tied a length of string to the sword-beater, so it had a loop to hang from, and the loom was fully assembled.
GROUP C –– Setting up weights and weft
The first step in the process of preparing our loom weights was to organize them by size and weight. After we had weighed all the weights, we separated them into pairs of approximately the same size and shape. For each pair, one weight would be attached to the back warp threads and one would get attached to the front warp threads. One challenge we faced was that not all of our weights were uniform, so some pairs were not evenly matched. In total, there were 32 weights, each with an average weight of 180 grams.
The second step in preparing the loom weights was to tie strings to each weight to create a loop. This allows for the warps threads to thread through the string loop rather than the weight itself. This makes it easier to have more warp threads per weight and it protects the warp thread from the roughness of the clay.
For setting up the weft thread, we created hanks. To do so we used the butterfly technique to wrap approximately 40 yards of weft thread. Each hand should last for about 10 cm of fabric. We made 4 hanks in total. In doing this process, we played around with the size of loops we created to try and get the most effective size hank.
Preparing the tablets for the border Hanks of weft yarn
Warping
Next, we began the process of warping the loom. We placed a cone of yarn on the ground, below the tablet woven border. We then pulled a loop of thread through the shed, and wrapped it around several pegs until it reached 5m in length and was looped around the bottom peg. Then, we rotated the cards to change the shed, and beat down the thread. We needed about 50cm worth of tablet-woven border to create the correct number of warp threads, and all of the groups took a turn, each completing about one-third of the warping. Though there was a learning curve, this part of the process went relatively quickly: Group B timed their work, and found that they completed 10cm of tablet weaving and warping in 12 minutes.
Group A warping Group C warping
Once we finished the warping, Group B lashed the tablet woven border to the top. This was done by tying either side of the woven piece to the top rod, to keep it in the right approximate place. Then we tied the hemp cord around the rod, and started wrapping it around the rod multiple times, picking up about an inch-worth of the tablet-woven border each time and pulling it snugly against the top rod.
More specifically, this was done by holding the active cord in one hand beneath the shed, passing the spool of cord up through about every six warp threads, pulling the cord up and over the rod and passing it behind, and then passing the spool under the cord held in the other hand. This didn’t really create knots, but it helped maintain the tension to hold the border to the rod while we continued working, and it allowed us to space out the lashings so we weren’t stretching any of the warp thread out of place. At the end of the tablet woven border, we tied a knot around the bar once more to secure the lashing.
Having previously tied the two ends of the warp, Group B cut through the loop at the end, bisecting each warp thread so we would have the front warp and the back warp. After cutting them we had to spend some time separating the two groups, because in the warping process they had gotten somewhat tangled and twisted. By pulling gently and moving upwards towards the lashed woven border, we were finally able to separate the front and back threads, effectively creating the open shed. From here we could begin weighting the warp threads.
Weights
The first step in attaching the loom weights to the warp thread was to separate the warp threads into even sections. To get the correct tension for the size of our weights and loom, we attached 7 threads to each individual loom weight. We untangled the thread and created bundles of threads to tie to the weights. It was quite difficult to untangle the thread, but we managed to separate the threads enough to tie the weights on. We had some threads that ended up in the wrong bundle, but we reorganized the threads as we tied the weights on.
To attach the weights to the warp, we used slip knots and daisy chains. We first warped the back of the shed. When tying the weights onto the warp it was important for the weights to hang below the shed bar, but above the ground to allow for the movement in changing the shed. We also made sure to keep the pairs together as we tied the back of the shed. After the back was complete, we tied the weights to the front section of warp threads, keeping in mind the same considerations about height off the ground. We used the daisy chain method to keep the extra length of warp thread from getting tangled on the ground. One challenge that arose was that some of our weights slipped out of their knots and fell too low. To solve this, we tied the weights to the loom slightly higher than before, and we made sure that the knots were tight.
Once completed, there were 16 weights in the front and 16 in the back, so 32 weights in total, each attached to 7 threads on average. From this we can estimate that we had a total of approximately 224 warp threads.
Paired-off warp weights Attaching the weights Done!
Final Steps
Once the weights were attached, Group B completed the two remaining steps before we could start weaving. First, we had to chain the warp in order to keep the threads organized and evenly aligned. This will help avoid tangling and twisting once we start weaving, making the process much more smooth. To complete this step, we started with the back half of the warp, tying one end of our hemp cord to the left upright, passing the spool behind the threads, and making a slip knot in the cord near the first warp threads. With three people, the process was simple: one person held the cord and spooled it out as needed; another person worked out which were the next threads to be chained up by looking closely at the tablet woven border which began our warp, preparing them in pairs; finally, a third person chained the pairs with the cord, pulling the cord from behind the threads through a loop at the front and tugging it so there was a bit of slack.
When we finished the back warp, we knotted the cord and moved the entire chain down so it rested close to the weights, then tied either side beneath the shed rod. We then repeated the process on the front half of the warp threads. It was very time consuming work, but it made a big difference in the way the warp hangs––it was much more organized after chaining.
The final step before we could start weaving was knitting the heddles. For this, we lashed a length of pipe from the Makerspace to the back of the two uprights as our helper rod, directly behind the heddle rod, which was resting against the uprights on the front side of the loom. Tying our hemp cord to the heddle rod, we began the long process of passing the cord over the heddle rod and to the right of each front warp thread, then over the helper rod and to the left of each back warp thread, coming around under the helper rod and to right of each back warp thread, then up from under the heddle rod (through the same space we initially went through. This captured the back threads while missing the threads at the front. Each pass through was secured with a kind of twisted knot, or a buttonhole stitch. This was a little finicky and very time-consuming, especially with the amount of warp threads we have, and we were significantly limited by the fact that only one person can effectively knit the heddles at a time.
In retrospect, the flexible pipe was not the best material for the helper rod. When we tugged the knots tight, the pipe would flex forward, so although we did our best to maintain approximately the same tension for each of these heddle loops, some of the loops ended up shorter or longer than others (particularly they got shorter the more we kept going). It shouldn’t have too great an impact on the actual weaving process, but it might mean the two sheds are not as clean and evenly parallel as they could be.
Conclusion
Although we were not able to begin the weaving process on the warp-weighted loom and will have to continue that at a later time, we were still able to gain valuable insights from the setup process. Many of the questions about our ability to create fabric and what it is like to work with the loom will have to be answered as we move into the actual weaving. However, the setup illuminated one major insight: it takes an incredible amount of time and patience to set up this type of loom. Based on our experience during this lab, we can assume that it would take a significant amount of time and forethought to create a homespun clothing item.
In comparison, table weaving turned out to be a rather fast process, with many people in the class finishing their first tablet weave by the end of the week. As we progress with our loom in the coming days and begin weaving, we will hopefully have the opportunity to answer some of the research questions that remain unanswered and be able to better compare different types of weaving.
Group Data Reports
-
Firing Lab Data – Group B

Name Weight Diameter (Total) Diameter (Hole) Thickness MG1* 194g 7.5 cm 2.5 cm 2 cm MG2 196g 7 cm 2.5 cm 2.75 cm MG3 195g 7.5 cm 3.25 cm 3 cm SS1* 207g 7 cm 2.75 cm 3 cm SS2 193g 7 cm 2.5 cm 3.25 cm SS3 190g 6.5 cm 2.5 cm 3.25 cm……
-
Pottery II – Firing Data, Group A

At 1:22 we started the fire. It was a little tricky to get going because of the wind, and kept collapsing. We added more kindling. We also tried to use a probe to take the temperature once the fire started, but it didn’t work, so we used a thermometer gun for the rest of the……
-
Group C: Week 8 Data
Updated Loom Weight Data: Weight 1 2 3 Sagal 191g 197g 175g Emmy 189g 200g 184g Hannah 210g 198g 194g Beck 203g 171g 187g Weight Post Firing 1 2 3 Sagal 119g (Broke) 196g 175g Emmy 175g 200g 185g Hannah NA (Very Dead) 198g 194g Beck 116g (Deceased) 171g 187g 9/12 survived Diameter 1 2……
0 thoughts on “Week 8 Lab Summary: Pottery Firing”