
In this lab, we were tasked with beginning the weaving process. Unfortunately, the sheer complication and time-consumption of setting up the warp-weighted loom hampered the process––we have not yet begun weaving, and the lab has been extended somewhat indefinitely into the following week. Even though as a class we didn’t technically complete our task, it has been very illuminating to experience the detailed process of preparing to weave a piece of fabric on a warp-weighted loom.
Moving within our predetermined lab groups (A, B, and C), we were assigned to take over specific loom set-up tasks in shifts, since the limitations of space meant only a few people could effectively work on the loom at one time. Most of the time, while a given group was working on the loom, the members of the other groups would continue the tablet-weaving process, which we had begun on Monday and continued on Wednesday.
Some research goals and questions we considered:
- To produce enough fabric to create a “peplos-type” gown for our reconstructed outfit
- To understand the basic principles of weaving on the warp weighted loom
- To compare warp-weighted loom weaving with other forms, including rigid frame and tablet weaving methods
- How much time and forethought would you need to put in if you needed a length of homespun fabric?
- How does technology transfer between weaving cloth and any other crafts?
Tablet Weaving
The first part of this lab was tablet weaving, which became an ongoing process throughout the week. We began by each taking our warp threads from among the three colors of wool we had: the blue, orange and yellow wool we had dyed during week five. We selected twenty-four threads of one color and sixteen threads of a second color. Then we each took a set of ten cards and numbered them from one to ten.
We threaded each card using one of two patterns. For the cards numbered one and ten, we used only threads of our primary color (the color with twenty-four threads). For the cards numbered two through eight, we threaded the holes labeled A and B with our primary color, and the holes labeled C and D with our secondary color. We then tied the end of our threads together, and secured them with a length of hemp cord.
Next, we fastened the closed end to a clamp to create tension, and slid the cards down the length of the threads to comb and detangle them. With about ten inches left at the bottom, we tied another knot and used another piece of cord to secure the threads in place.
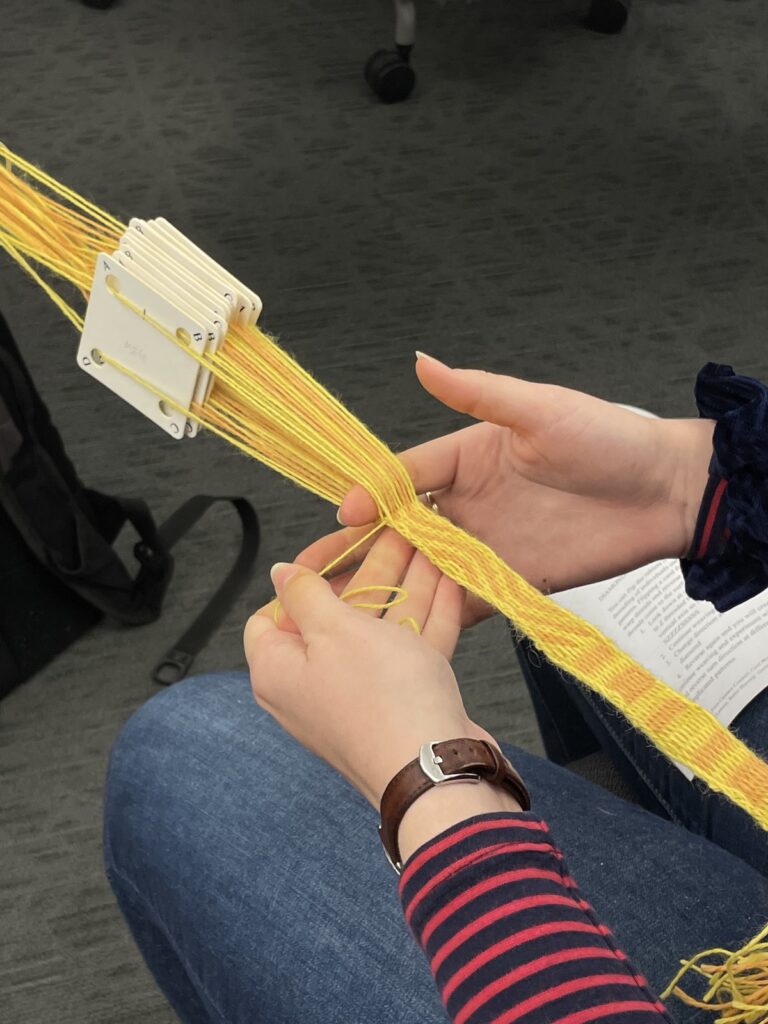
With the setup complete, we were finally able to begin the tablet weaving itself. We left one end secured to the clamp, and attached another end to ourselves, either to a belt or to another piece of cord. Then we took another thread of the primary color to use as the weft and wrapped it around our fingers to form a small hank.
The process of tablet weaving went as follows: first, we pulled the weft thread between the warp threads, leaving a small loop behind. Next, we turned the cards (we began with all of them facing in the same direction, and we turned them in the same direction). Then, we slid the cards along the threads to beat down the weft (and used a small ruler for the same purpose). Finally, we pulled the loop through. We did these steps turning the cards eight times in one direction, followed by eight times in the other direction in order to unravel the threads beyond the cards.
The process described above makes a woven fabric with borders in the primary color and horizontal stripes. However, we also experimented with adding other patterns. Each of these involved changing the orientations of the cards without passing the weft. This allowed us to make diagonal and zigzag patterns. We also flipped some of the cards vertically, changing from S to Z threading, and allowing us to create diamonds and chevrons. The finished products of our tablet weaving could be used as belts or cuffs.

Tablet weaving as a class 
Aerial view
Set-up
GROUP A –– Threading cards
To begin the setup of the loom, Group A measured threads out for the tablet woven border. They took forty-eight yards of yarn, and cut that into two-yard lengths. They then threaded the yarn through the cards, and followed the tablet weaving process described above. Once the woven border was created, it was attached to the upright loom.
GROUP B –– Assembling the loom
This group had the task of putting the loom together from the component parts we made in an earlier lab. This was fairly straightforward. We leaned the two forked uprights against the wall, with the flattened side facing out, and settled the top bar in the forks where it was chiseled to be able to fit. (For further stability, we chose a spot in the room where one upright could also be leaned into a corner.) We measured that the base of each upright was about 93 cm from the wall, or around three feet.

Then we attached the shed rod with pegs, placing it in the lowest pair of drilled holes so that it was up against the uprights on either side. With two of our forked pegs, placed in a pair of holes near the center of the loom, we created a place for the heddle rod. We then tied a length of string to the sword-beater, so it had a loop to hang from, and the loom was fully assembled.
GROUP C –– Setting up weights and weft
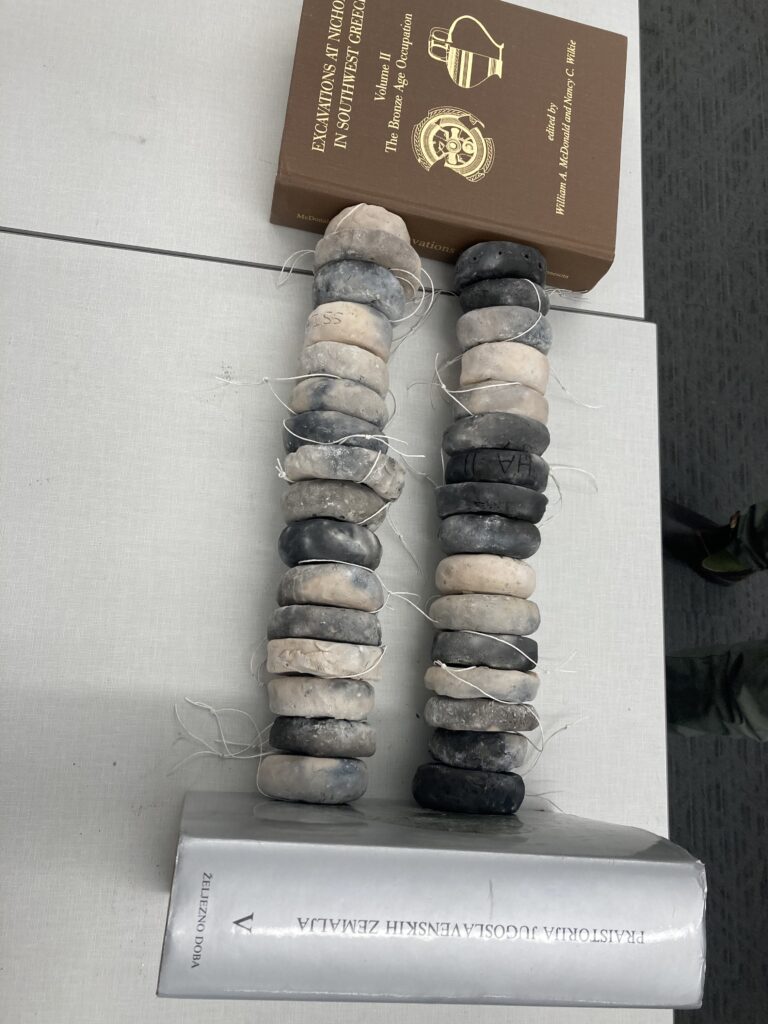
The first step in the process of preparing our loom weights was to organize them by size and weight. After we had weighed all the weights, we separated them into pairs of approximately the same size and shape. For each pair, one weight would be attached to the back warp threads and one would get attached to the front warp threads. One challenge we faced was that not all of our weights were uniform, so some pairs were not evenly matched. In total, there were 32 weights, each with an average weight of 180 grams.
The second step in preparing the loom weights was to tie strings to each weight to create a loop. This allows for the warps threads to thread through the string loop rather than the weight itself. This makes it easier to have more warp threads per weight and it protects the warp thread from the roughness of the clay.
For setting up the weft thread, we created hanks. To do so we used the butterfly technique to wrap approximately 40 yards of weft thread. Each hand should last for about 10 cm of fabric. We made 4 hanks in total. In doing this process, we played around with the size of loops we created to try and get the most effective size hank.

Preparing the tablets for the border 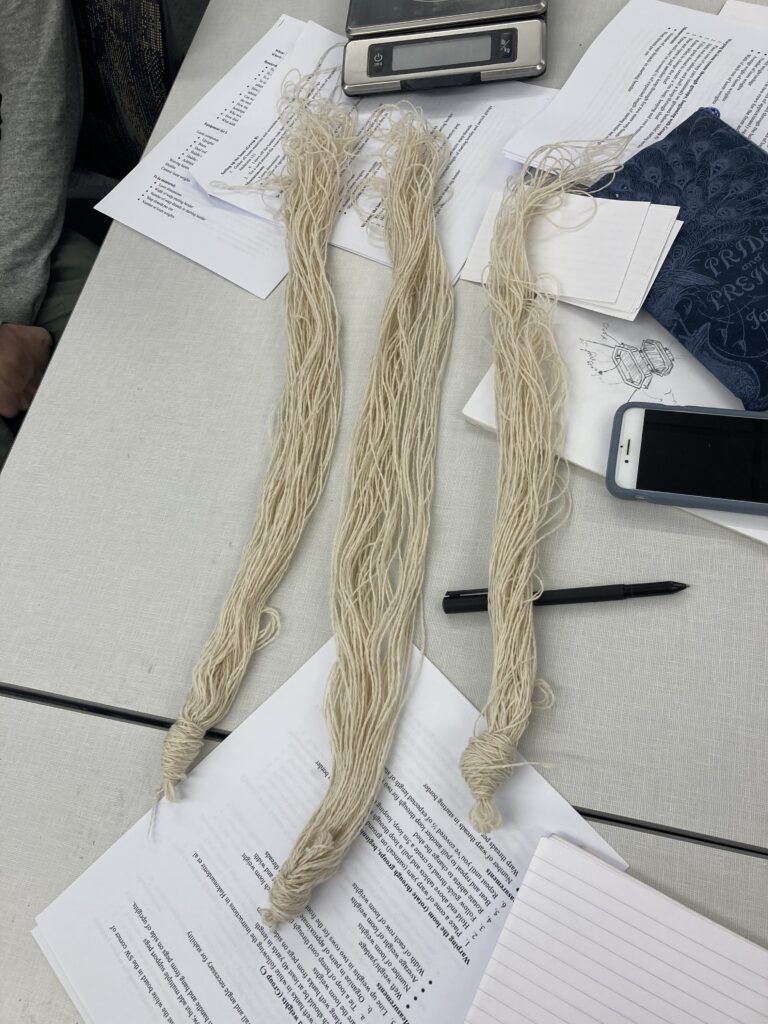
Hanks of weft yarn
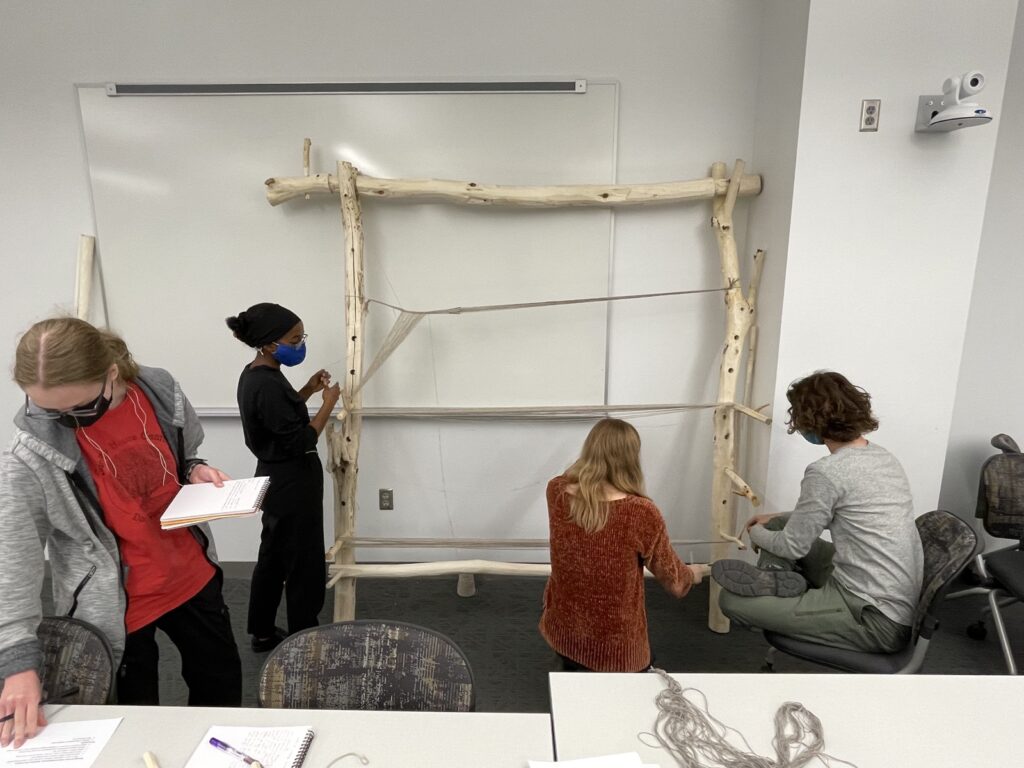
Warping
Next, we began the process of warping the loom. We placed a cone of yarn on the ground, below the tablet woven border. We then pulled a loop of thread through the shed, and wrapped it around several pegs until it reached 5m in length and was looped around the bottom peg. Then, we rotated the cards to change the shed, and beat down the thread. We needed about 50cm worth of tablet-woven border to create the correct number of warp threads, and all of the groups took a turn, each completing about one-third of the warping. Though there was a learning curve, this part of the process went relatively quickly: Group B timed their work, and found that they completed 10cm of tablet weaving and warping in 12 minutes.
Group A warping 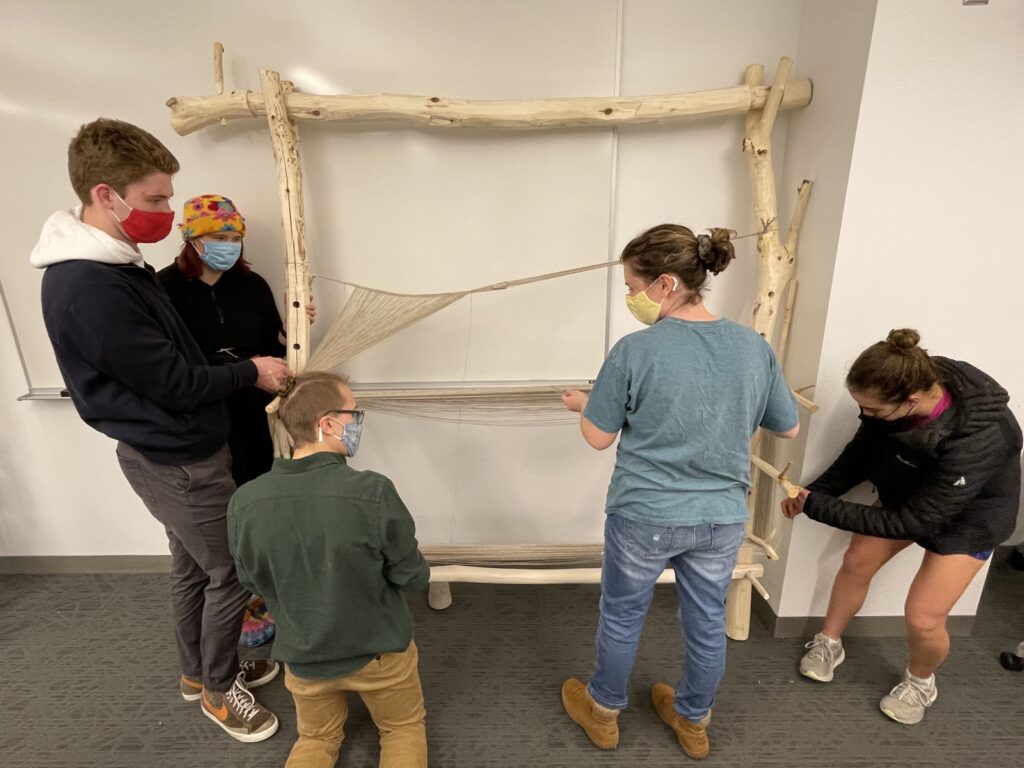
Group C warping
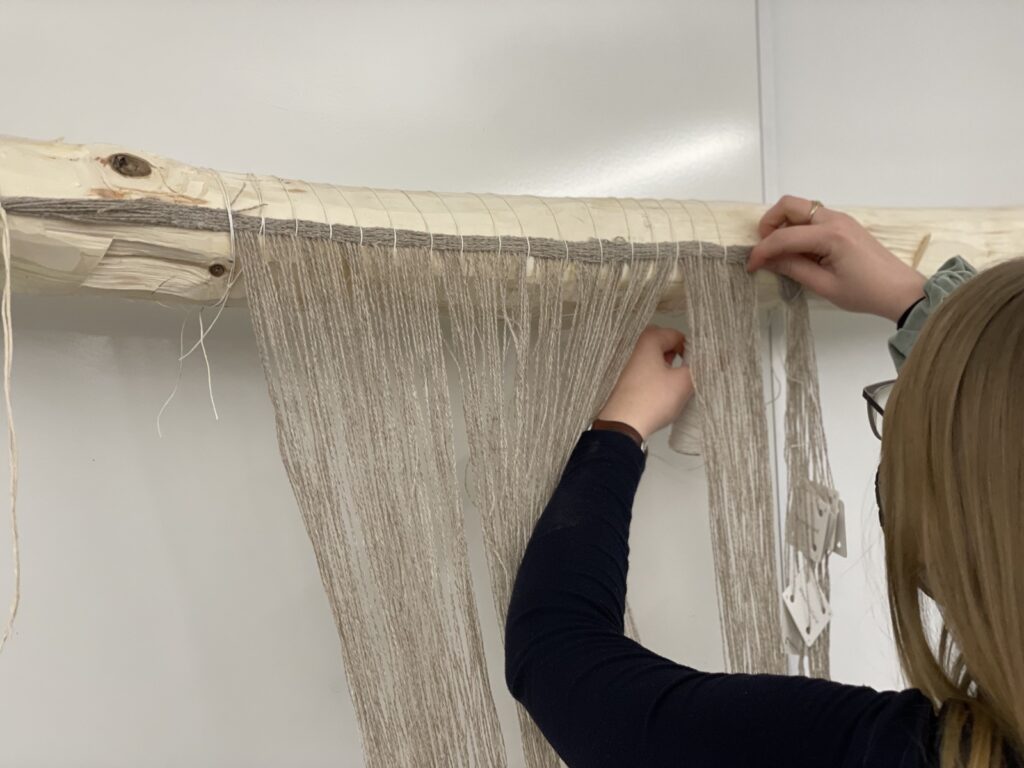
Once we finished the warping, Group B lashed the tablet woven border to the top. This was done by tying either side of the woven piece to the top rod, to keep it in the right approximate place. Then we tied the hemp cord around the rod, and started wrapping it around the rod multiple times, picking up about an inch-worth of the tablet-woven border each time and pulling it snugly against the top rod.
More specifically, this was done by holding the active cord in one hand beneath the shed, passing the spool of cord up through about every six warp threads, pulling the cord up and over the rod and passing it behind, and then passing the spool under the cord held in the other hand. This didn’t really create knots, but it helped maintain the tension to hold the border to the rod while we continued working, and it allowed us to space out the lashings so we weren’t stretching any of the warp thread out of place. At the end of the tablet woven border, we tied a knot around the bar once more to secure the lashing.
Having previously tied the two ends of the warp, Group B cut through the loop at the end, bisecting each warp thread so we would have the front warp and the back warp. After cutting them we had to spend some time separating the two groups, because in the warping process they had gotten somewhat tangled and twisted. By pulling gently and moving upwards towards the lashed woven border, we were finally able to separate the front and back threads, effectively creating the open shed. From here we could begin weighting the warp threads.
Weights
The first step in attaching the loom weights to the warp thread was to separate the warp threads into even sections. To get the correct tension for the size of our weights and loom, we attached 7 threads to each individual loom weight. We untangled the thread and created bundles of threads to tie to the weights. It was quite difficult to untangle the thread, but we managed to separate the threads enough to tie the weights on. We had some threads that ended up in the wrong bundle, but we reorganized the threads as we tied the weights on.
To attach the weights to the warp, we used slip knots and daisy chains. We first warped the back of the shed. When tying the weights onto the warp it was important for the weights to hang below the shed bar, but above the ground to allow for the movement in changing the shed. We also made sure to keep the pairs together as we tied the back of the shed. After the back was complete, we tied the weights to the front section of warp threads, keeping in mind the same considerations about height off the ground. We used the daisy chain method to keep the extra length of warp thread from getting tangled on the ground. One challenge that arose was that some of our weights slipped out of their knots and fell too low. To solve this, we tied the weights to the loom slightly higher than before, and we made sure that the knots were tight.
Once completed, there were 16 weights in the front and 16 in the back, so 32 weights in total, each attached to 7 threads on average. From this we can estimate that we had a total of approximately 224 warp threads.
Paired-off warp weights 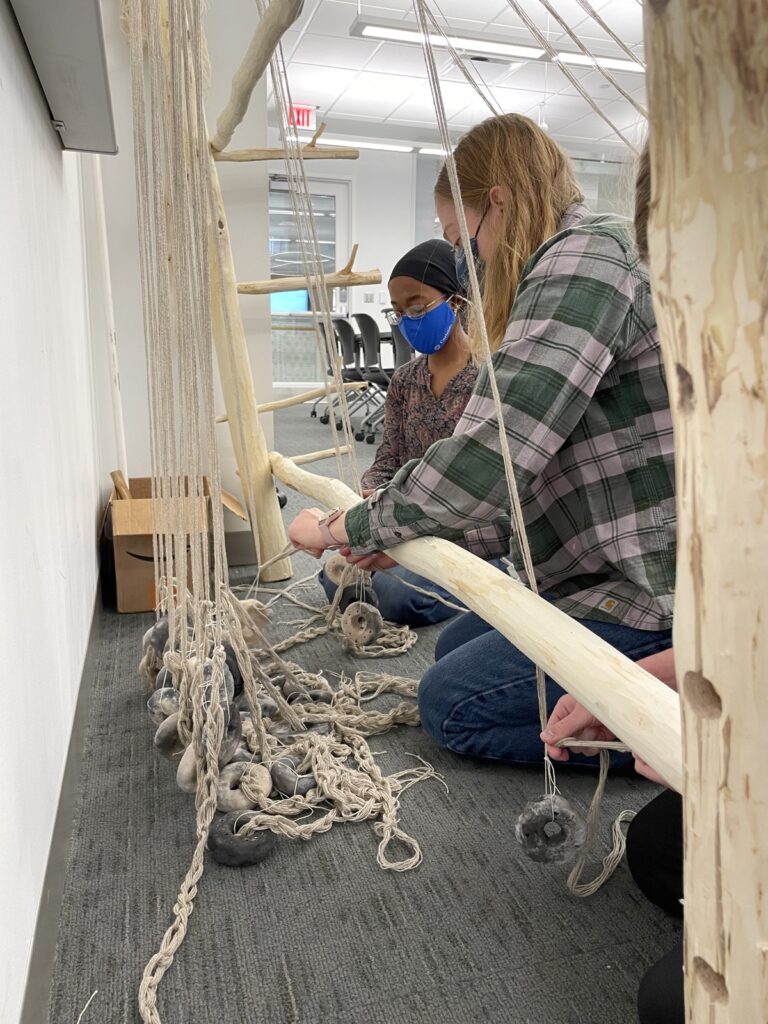
Attaching the weights 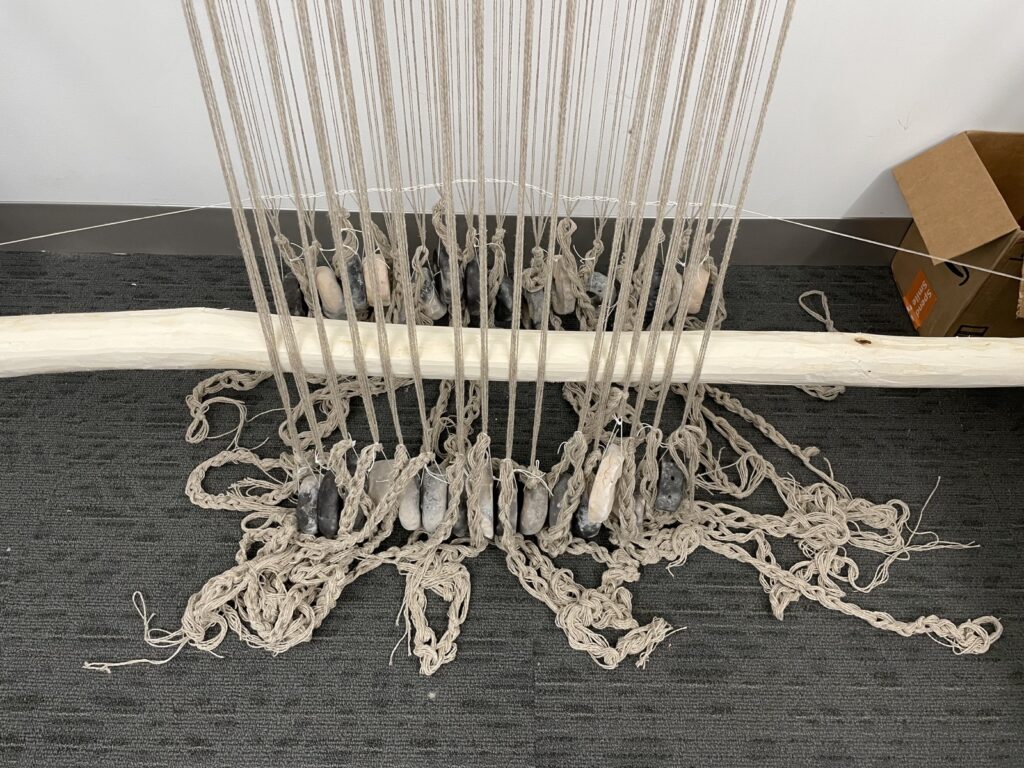
Done!
Final Steps
Once the weights were attached, Group B completed the two remaining steps before we could start weaving. First, we had to chain the warp in order to keep the threads organized and evenly aligned. This will help avoid tangling and twisting once we start weaving, making the process much more smooth. To complete this step, we started with the back half of the warp, tying one end of our hemp cord to the left upright, passing the spool behind the threads, and making a slip knot in the cord near the first warp threads. With three people, the process was simple: one person held the cord and spooled it out as needed; another person worked out which were the next threads to be chained up by looking closely at the tablet woven border which began our warp, preparing them in pairs; finally, a third person chained the pairs with the cord, pulling the cord from behind the threads through a loop at the front and tugging it so there was a bit of slack.
When we finished the back warp, we knotted the cord and moved the entire chain down so it rested close to the weights, then tied either side beneath the shed rod. We then repeated the process on the front half of the warp threads. It was very time consuming work, but it made a big difference in the way the warp hangs––it was much more organized after chaining.
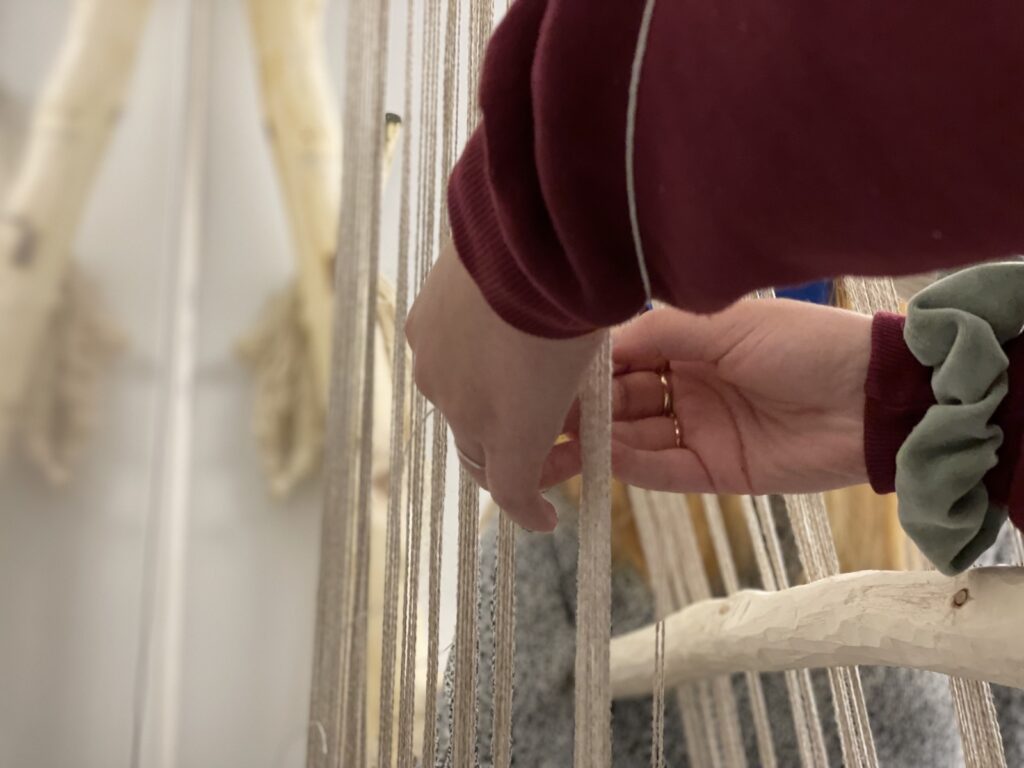
The final step before we could start weaving was knitting the heddles. For this, we lashed a length of pipe from the Makerspace to the back of the two uprights as our helper rod, directly behind the heddle rod, which was resting against the uprights on the front side of the loom. Tying our hemp cord to the heddle rod, we began the long process of passing the cord over the heddle rod and to the right of each front warp thread, then over the helper rod and to the left of each back warp thread, coming around under the helper rod and to right of each back warp thread, then up from under the heddle rod (through the same space we initially went through. This captured the back threads while missing the threads at the front. Each pass through was secured with a kind of twisted knot, or a buttonhole stitch. This was a little finicky and very time-consuming, especially with the amount of warp threads we have, and we were significantly limited by the fact that only one person can effectively knit the heddles at a time.
In retrospect, the flexible pipe was not the best material for the helper rod. When we tugged the knots tight, the pipe would flex forward, so although we did our best to maintain approximately the same tension for each of these heddle loops, some of the loops ended up shorter or longer than others (particularly they got shorter the more we kept going). It shouldn’t have too great an impact on the actual weaving process, but it might mean the two sheds are not as clean and evenly parallel as they could be.
Conclusion
Although we were not able to begin the weaving process on the warp-weighted loom and will have to continue that at a later time, we were still able to gain valuable insights from the setup process. Many of the questions about our ability to create fabric and what it is like to work with the loom will have to be answered as we move into the actual weaving. However, the setup illuminated one major insight: it takes an incredible amount of time and patience to set up this type of loom. Based on our experience during this lab, we can assume that it would take a significant amount of time and forethought to create a homespun clothing item.
In comparison, table weaving turned out to be a rather fast process, with many people in the class finishing their first tablet weave by the end of the week. As we progress with our loom in the coming days and begin weaving, we will hopefully have the opportunity to answer some of the research questions that remain unanswered and be able to better compare different types of weaving.
Group Data Reports
-
Week 9 Data: Group B

For this week’s lab, we set out to make a structure out of turf, one which would be large enough to hold up our tent we made in week 8 and one that could act as benches upon which we could sit on inside of the tent. The purpose of this activity was to replicate……
-
Week 9: Turf Building Data Group E

This week we did turf building, or creating some walls for our tent using sections of turf. My group was in charge of making milk-pen blocks of turn, which were rectangles that were supposed to be about 6 inches wide by 12 inches long and about three inches deep. Cutting out the first block was……
-
Week 9, Group B: Measurement
We started at the mini bald spot. 3-4 groups gathered on the mini-bald spot to create a road, and the others collected on the midi-bald spot. Each aimed to measure a centuriate from there. It took a while for our group to begin, mainly because there was a great debate about the perfect place to……
0 thoughts on “Week 9 Lab Summary: Preparing to Weave”