
For this lab we spent two days learning about woodworking.
First, in our Wednesday class we learned about some of the tools that we would be using and practiced shaping bricks of wood. Some of the tools included:
- Axe
- Draw Knives
- Knives
- Cutting Gloves
- Saws
- Shave horse
In our normal lab period we began to construct the warp-weighted loom.
Our first task was to carry the big timbers to our work area and select which ones we wanted to use for our uprights. We then began to cut pieces into the sizes, following the diagram on the lab handout. These are the measurements that we ended up with. We are missing the heddle rod, shed rod, pegs, and the other things not directly attached to the loom’s measurements (discussed later).
| Item | Length |
| Uprights | 194cm |
| Top Beam | 216cm |
| Supports for Heddlerod | 33cm |
| Holes for pegs | 3/4″ |
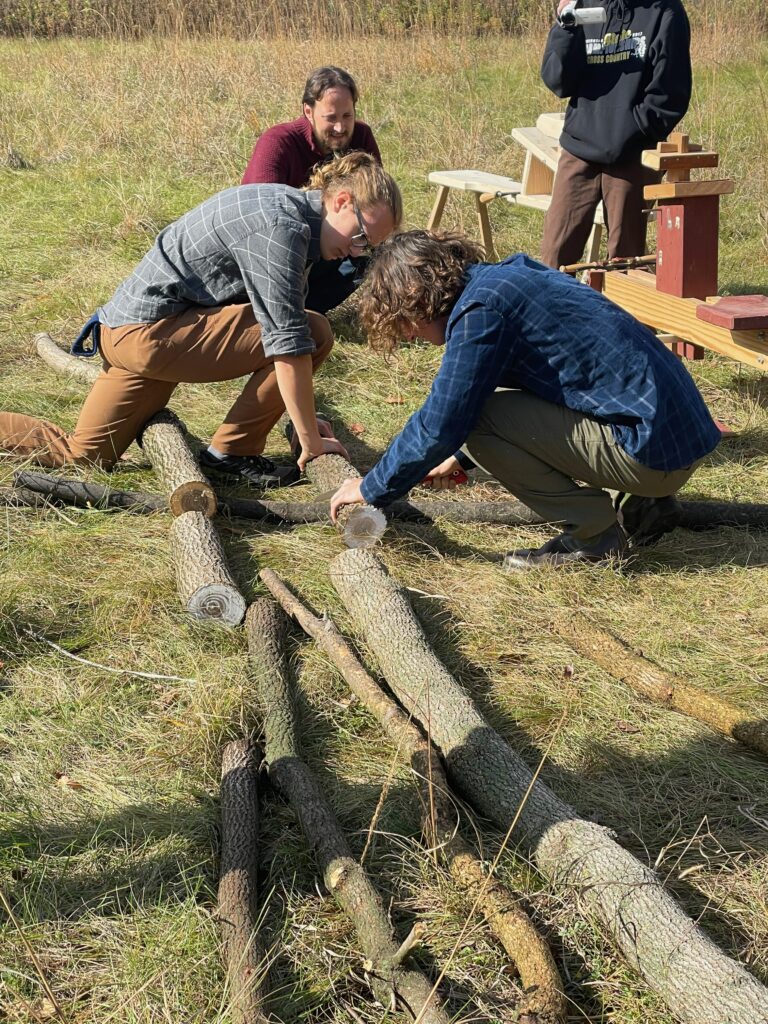
We then split up and worked on a few different processes. Group A first started to debark the uprights, top beam, shell rod, and heddle rod. We used a draw knife, normal knives, and the shave horse. It was important that we removed most of the bark from all these parts of the loom. Group A spent 40 minutes debarking one of the large uprights. Other qualitative things we noticed were:
- The thicker bark was harder to shave off, which made the bigger pieces harder to debark
- The knots needed to be cut off a lot of the branches, but this made it hard to get a smooth finish on our loom. We weren’t allowed to use the axe to do this since it is a more dangerous, higher skill process.
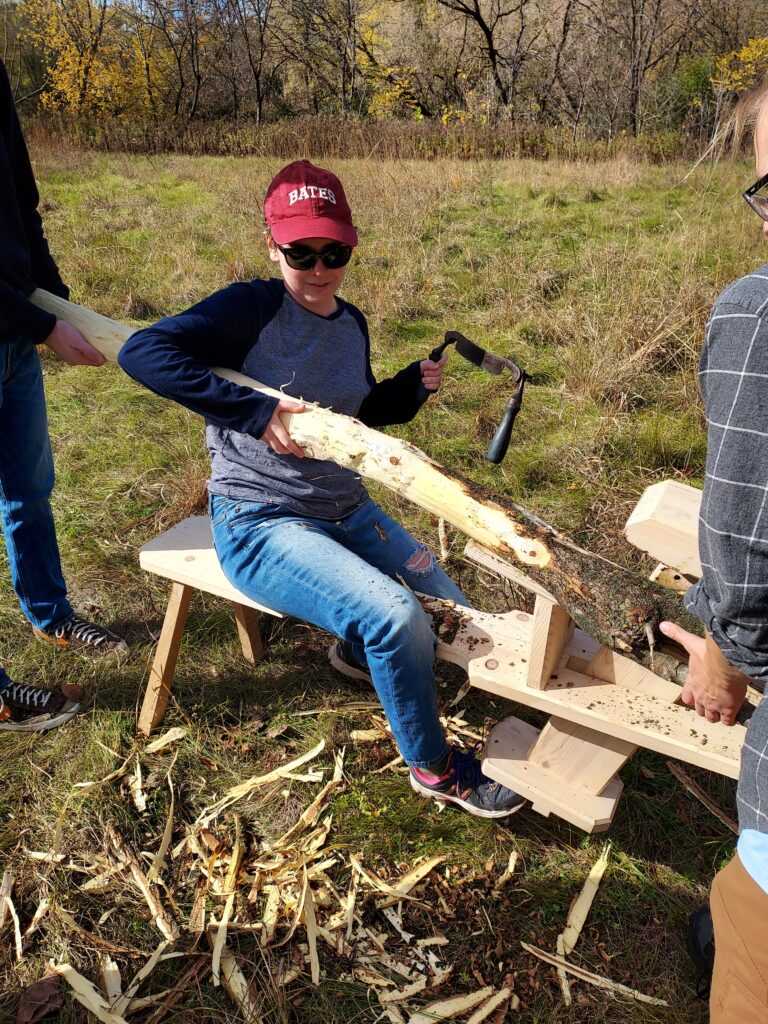
Group A then moved on to shaping some of the accessories necessary for weaving. We needed to make supports for the heddle rod, sawing off 33cm pieces of wood, with forks at the end. We then whittled the ends into 3/4″ circles. Every support was part of a set of 2.
We also shaped pegs that were 3/4″ long along the whole length. These will be used to hold to loom together. We also made a beater that we will used to beat the weft threads into place, and shuttles that will be used to pass the threads through the loom. This whole process took up 2 1/2 hours, with different pieces taking different amounts of time.

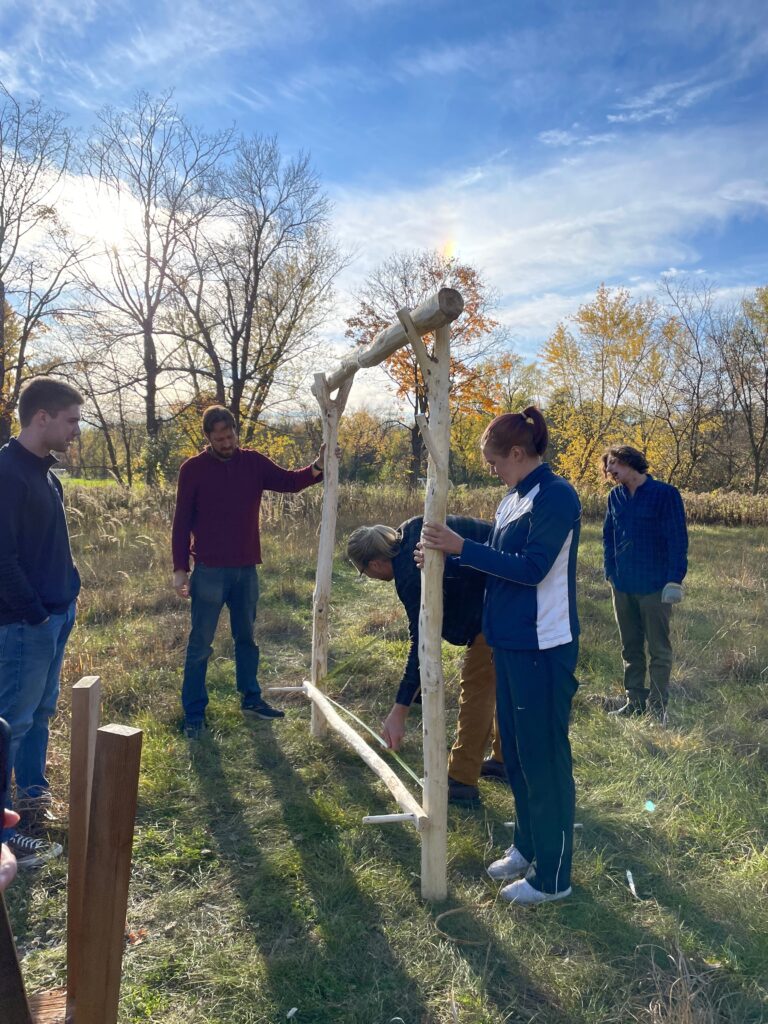
At this time we also had to smooth one side of the uprights to flat. We used a plane to get some fine, and smooth surface. We then drilled 8 holes, 15 inches apart from each other in the uprights. The uprights were then connected and lifted up so we could measure and cut out notches for our top beam. Some things we noticed were:
- Whittling was hard the hands. Some people got blisters and our hands got tired.
- It was hard to take off large chunks of wood with just a knife, so it took a long time to get a large piece of wood down to 3/4″. Using an axe greatly sped up the process.
- The drilling of the holes was one of the most laborious part. It also felt a bit tedious because we had to use some degree of precision, so the loom would fit together correctly.
One of our poor classmates got lost in the woods. Rest in peace Becca.

0 thoughts on “Woodworking – Group A Lab Data”