Introduction
This lab was focused on the process of making iron ship-nails and roves in the historical Anglo-Saxon tradition. Blacksmithing, in some form or another, has been used for millennia to shape raw metal into useful tools. In the viking age, a common use for blacksmithing was the creation of clench nails and roves. These were used for the construction of ships and other wooden structures, and were a marked improvement over the wooden pegs previously used.
In our investigation, we sought to recreate this process to gain insight into the joys and challenges of creating tools through this practice. Given our past experiences in “fine arts” involving open fires, we were curious if some of the experience would transfer over.
Methods
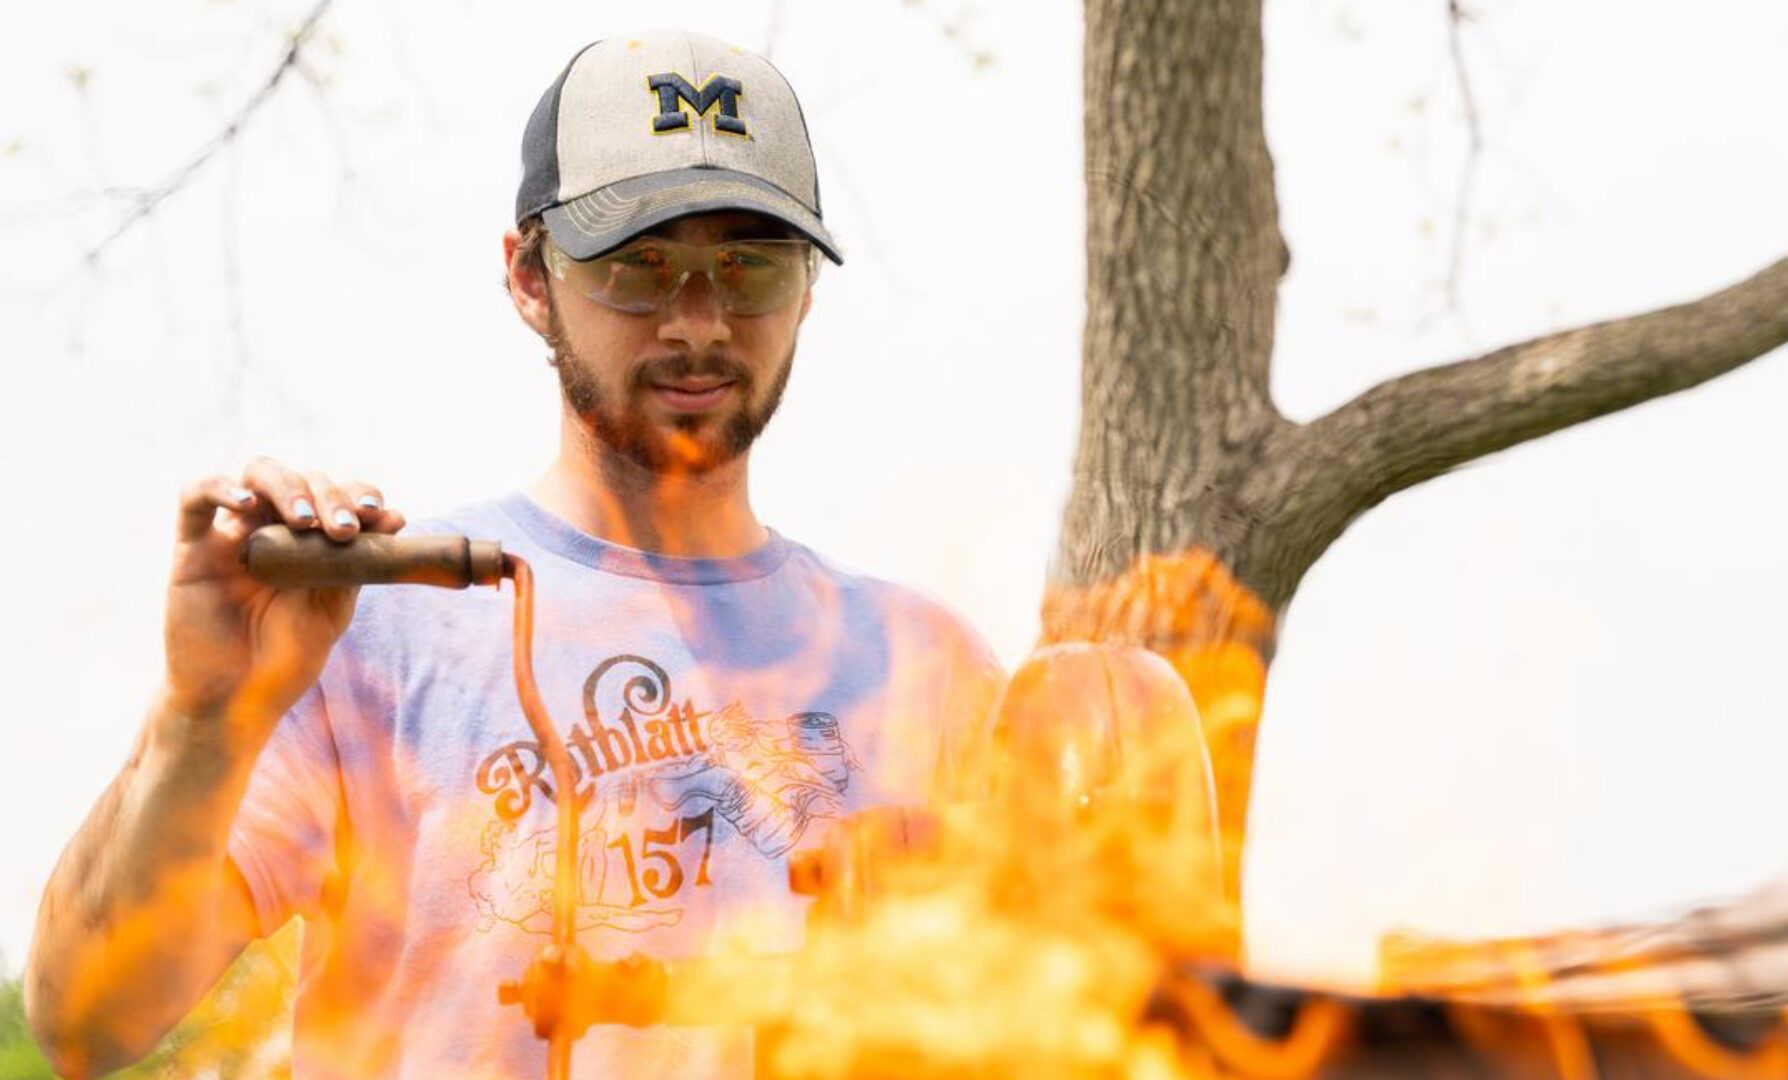
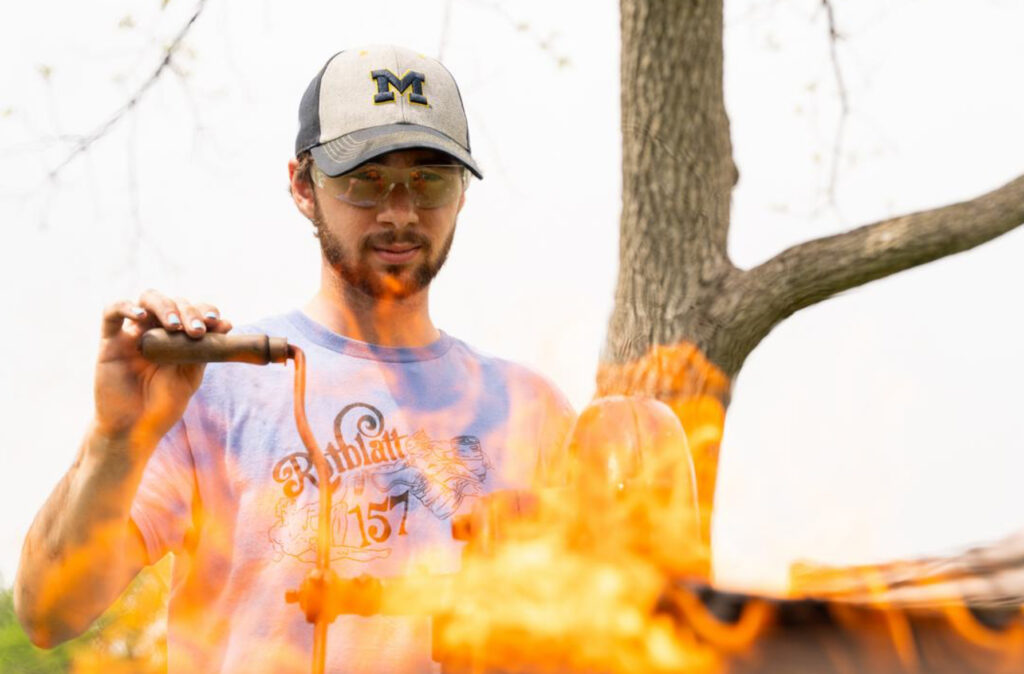
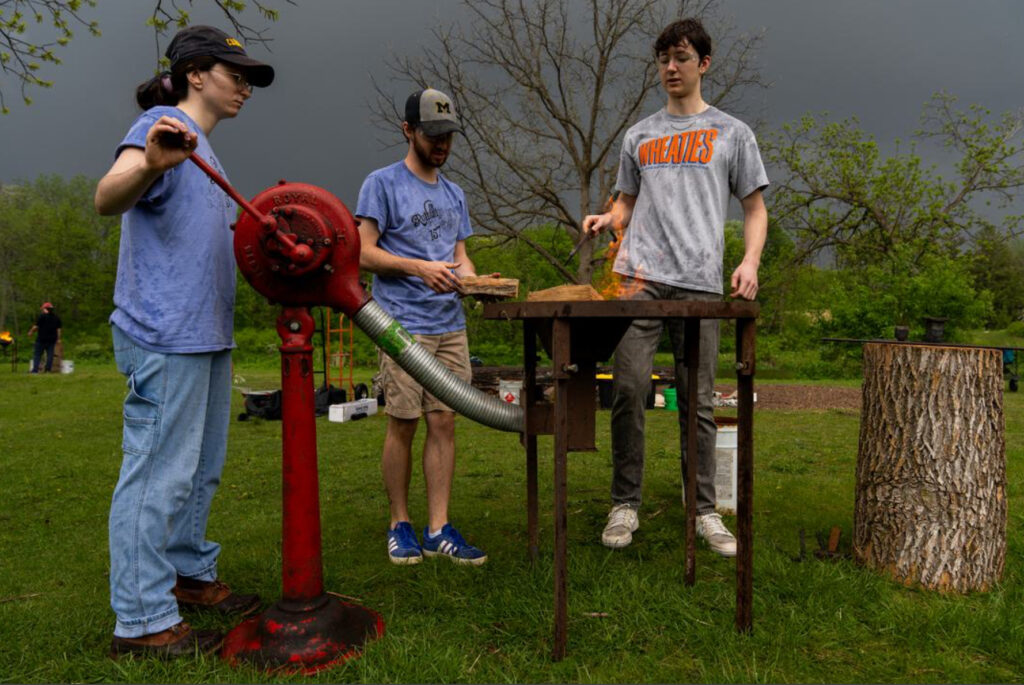
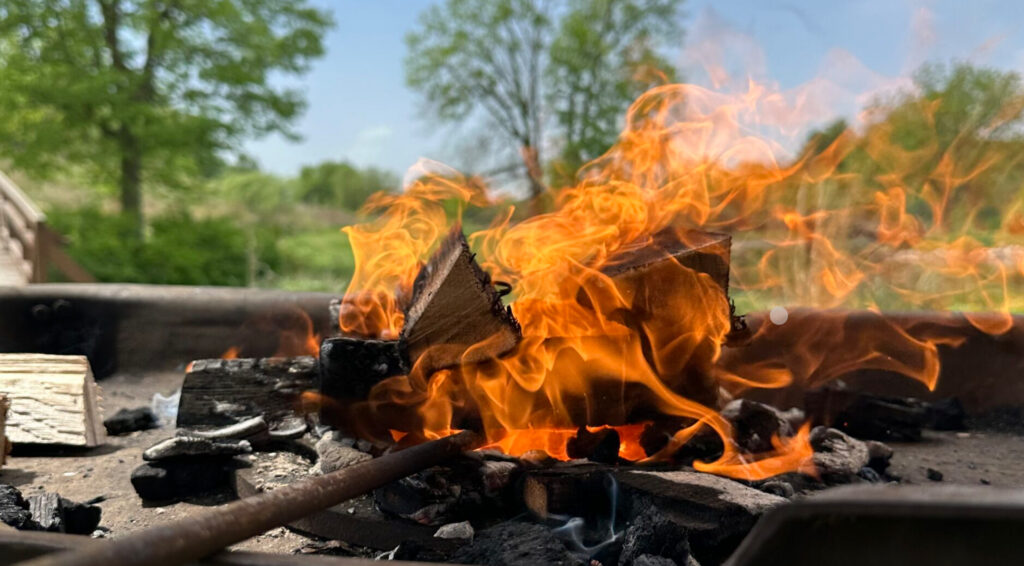
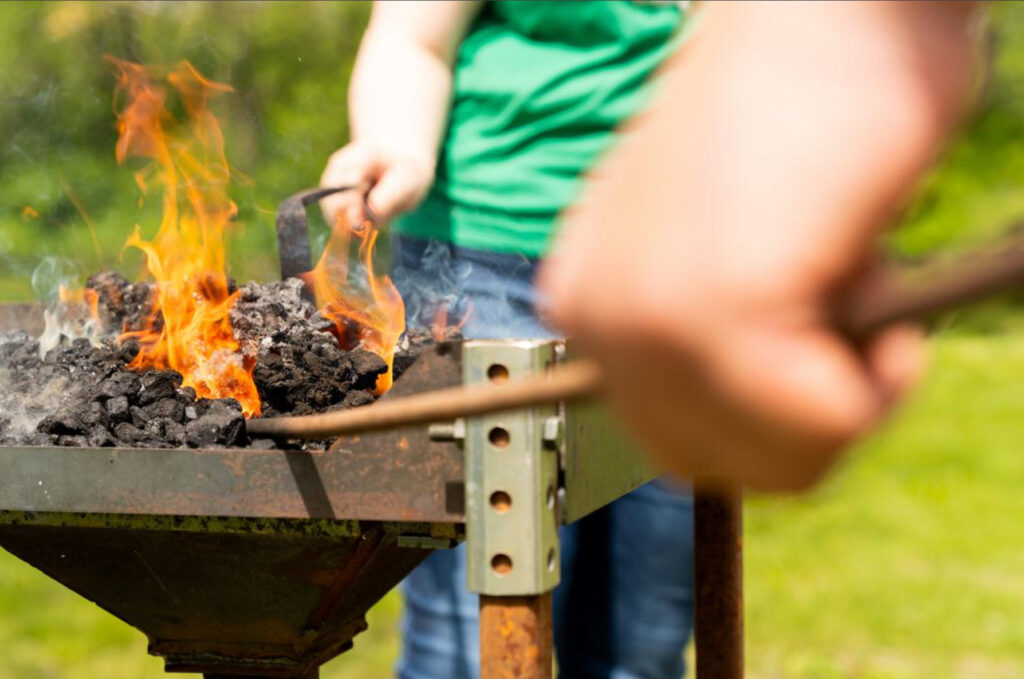
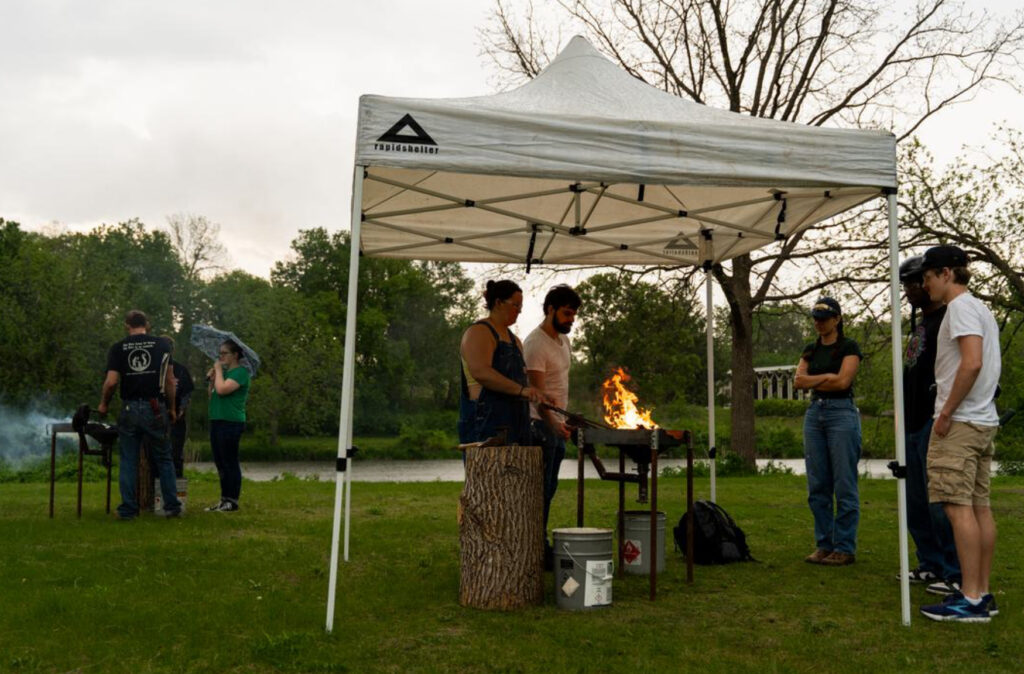
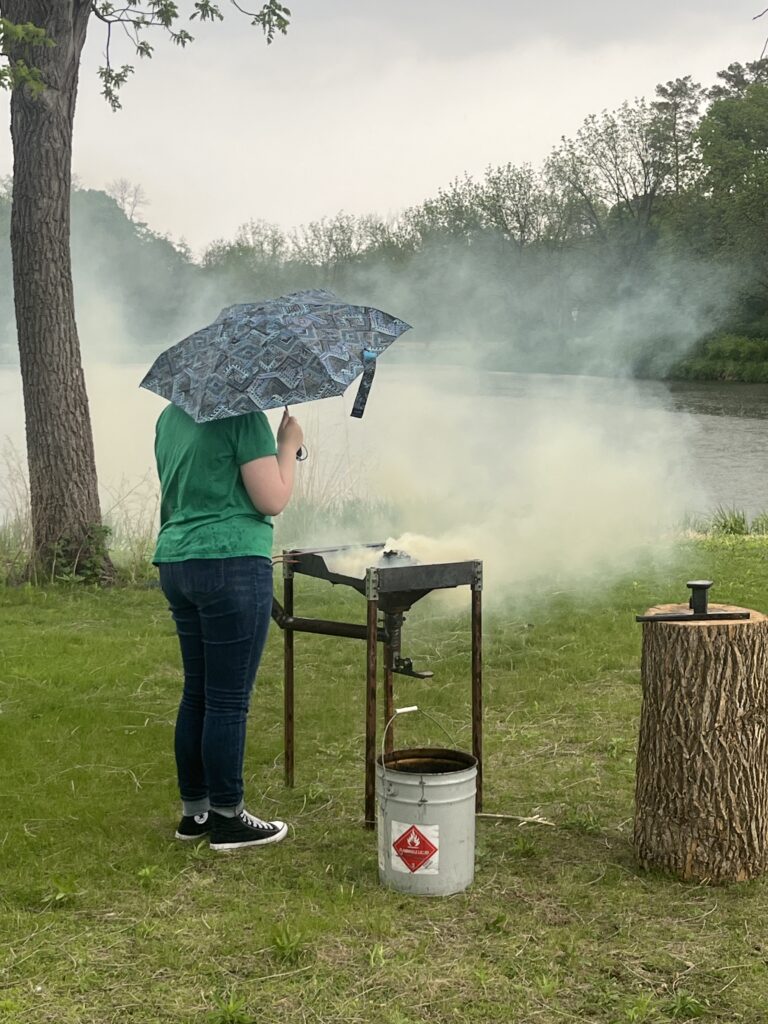
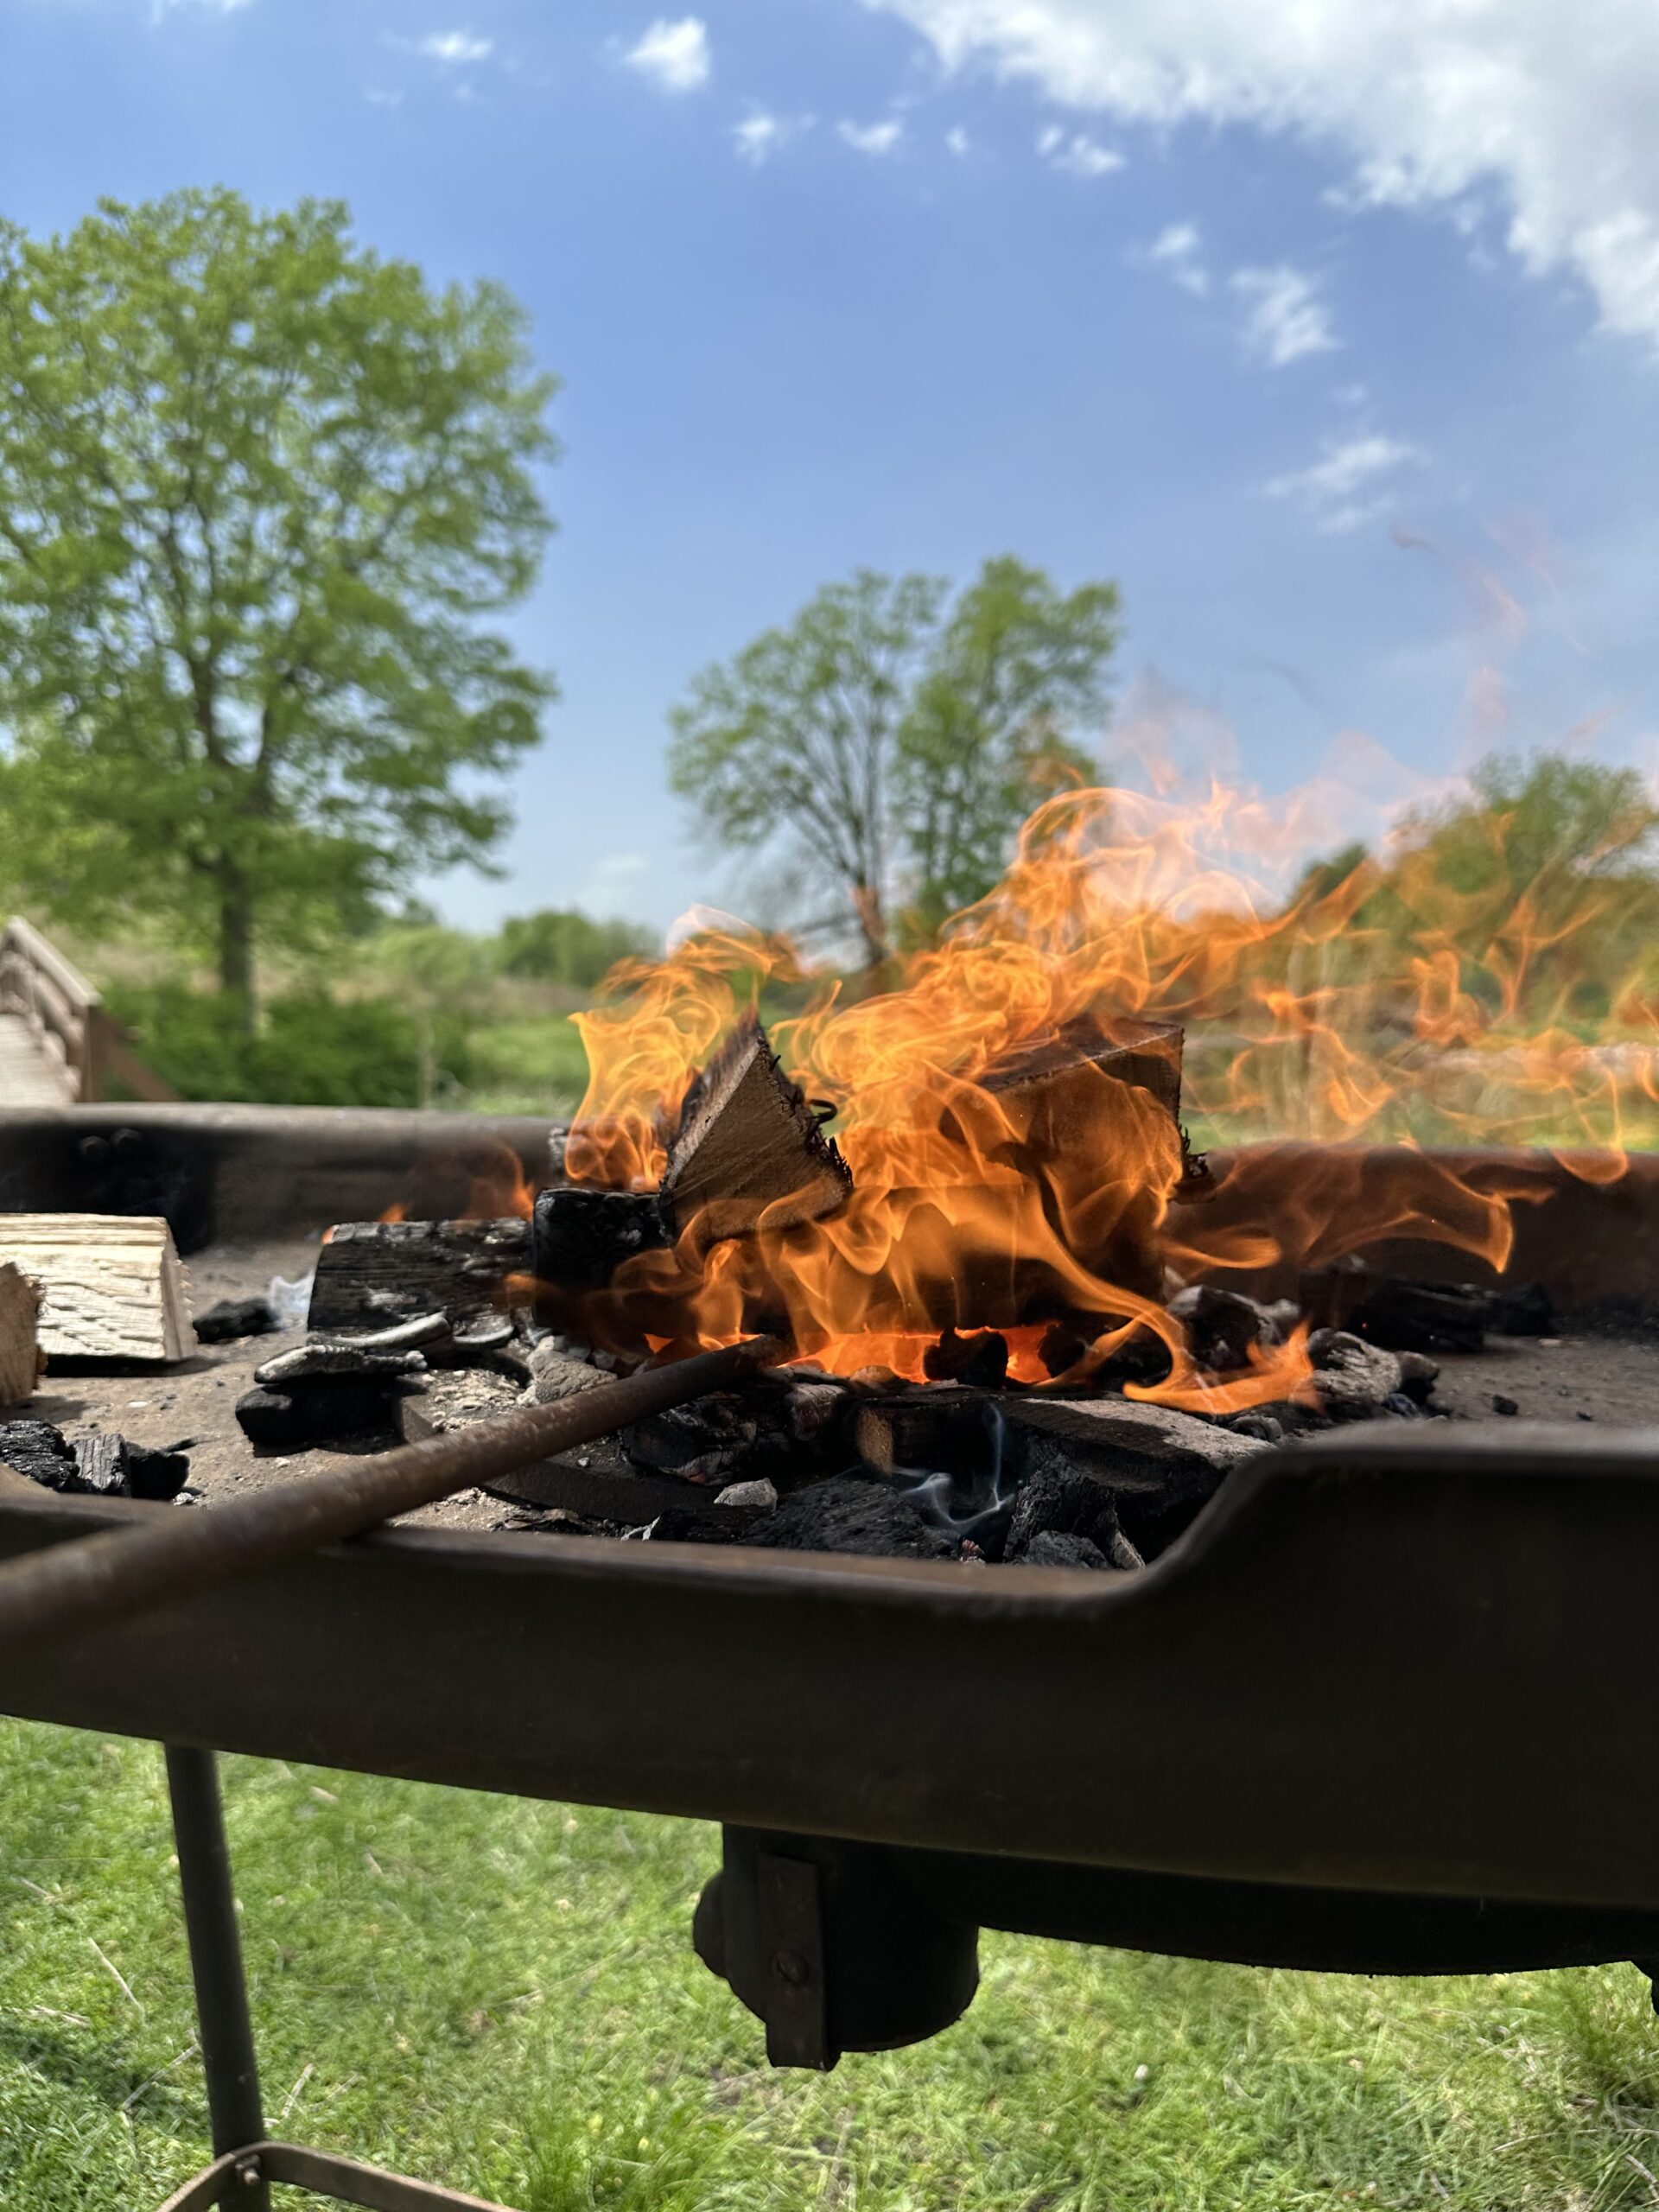
Within each lab group, the nails and roves were made from the same thin iron rod which was heated in the same forge which was fed with the same fuel. The iron rods and the forge set-ups were consistent among all groups, but the fuel differed slightly. Groups C and F used coal as their forge fuel while groups A, B, D, and E used wood and charcoal as their forge fuel. The forges were quite small and relatively portable (as far as forges go), they were driven up in a truck-bed to the lab site and then assembled with bolts and wrenches. The forges, once they were set up, had a top surface about the size of, and a height slightly taller than, a nightstand. In the center of the forge’s top surface was a shallow cavity with a grated bottom which housed the heart of the fire. The grated bottom of the cavity was to allow airflow into the fire which was provided by a hand-crank and tube that was attached to the forge.
Difference In Fuel Types
Wood
There were two primary challenges groups experienced while maintaining a wood-fired furnace. Gathering, splitting, and feeding wood into the fire was a sisyphean task, because of how quickly new wood would turn to coals. On top of that, if the fire itself was not constantly monitored, large pockets could form in the center of the fire when the coal burned away, and no new wood fell in to replace it. This commonly happened if the wood was stacked, and cut thick enough that it would not crumble quickly. More thinly-cut wood, on the contrary, allowed the fire to naturally fill in the gaps in the center, as the logs would crumble quickly. This could still be mitigated when using thicker wood if you were careful about how you placed the wood in the fire, specifically by placing wood directly into the pockets in the fire. Having a densely-packed fire was crucial, as pockets in the fire significantly reduced the heat it could get to, and made it much more difficult to get the metal to the necessary temperature. The difference between a well-maintained and poorly-maintained fire was stark, with metal heating up to over 900 degrees in seconds, as opposed to minutes.
Charcoal
Charcoal burns at a very similar rate to wood, but does not suffer from the same packing issues. Because charcoal is naturally smaller and more broken-up than wood, it did not produce the pockets that caused heating issues with wood fires. That being said, it still required a constant eye to make sure the fire was not running out of fuel. Since we were given charcoal at the start of the lab, we did not factor in the work required to get the charcoal in this state, and the same is true for coal, below. It is likely that it requires some additional overhead to wood, but this would likely be offset by the reduced need for fire maintenance. More experimentation might be necessary to compare the total work involved in each option.
Coal
In contrast to the effort required to maintain the wood and charcoal fires at a high enough temperature, the coal was a forge fuel which was incredibly low maintenance. There only needed to be an occasional rake of the coals into a small pile and an even more infrequent addition of new coal. The reserve coal that was added onto the fire was much finer than the coals which were originally placed in the forge and thus acted as a rapid but fleeting boost to the fire’s intensity. Reserve coal did not need to be added frequently because of how the coal burned at a high temperature for a long time with consistent addition of air from the hand crank. This was extremely convenient for managing the fire, but required constant vigilance to avoid burning up or melting the metal.
Nail and Rove Creation
Ship-nails

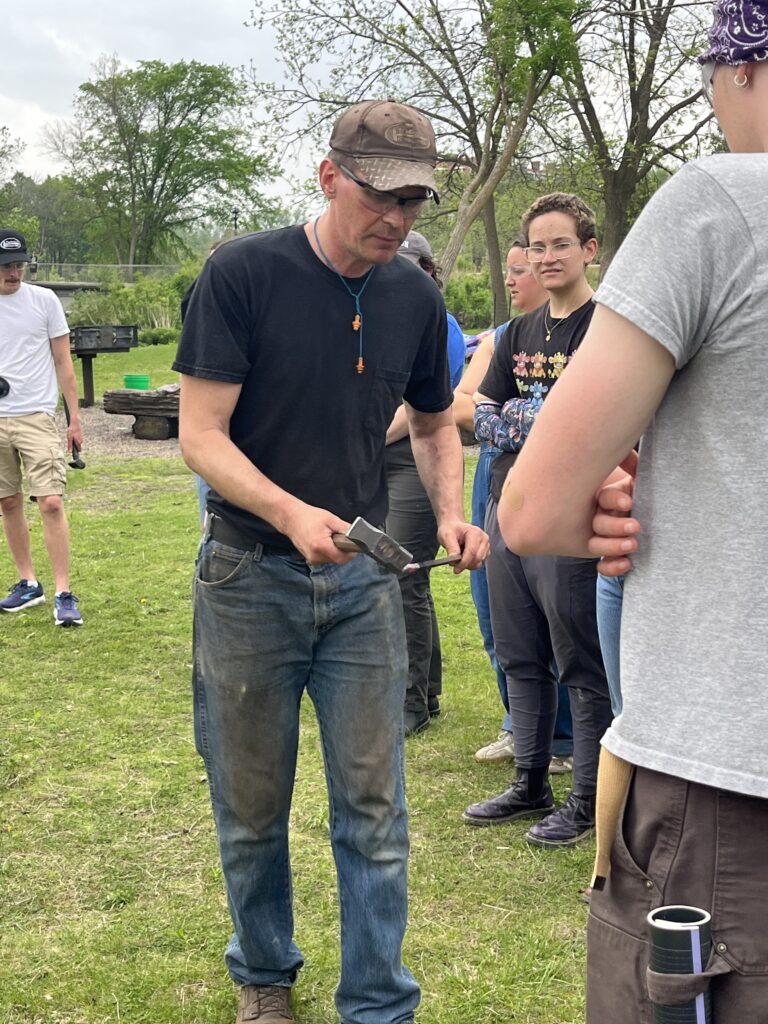
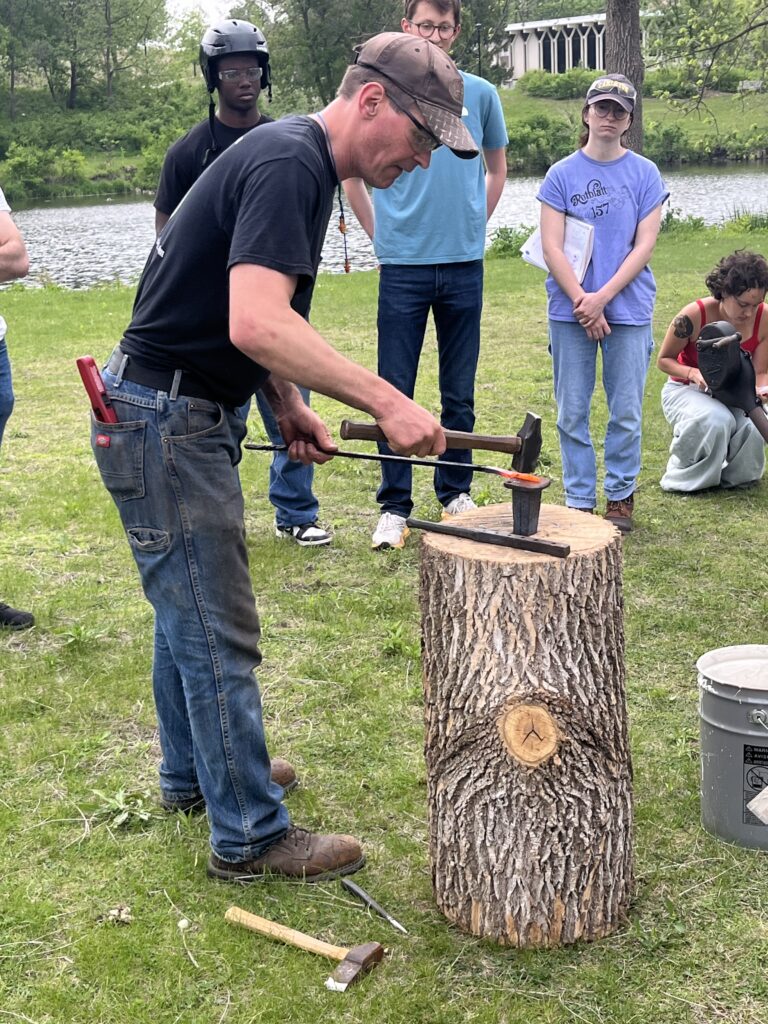
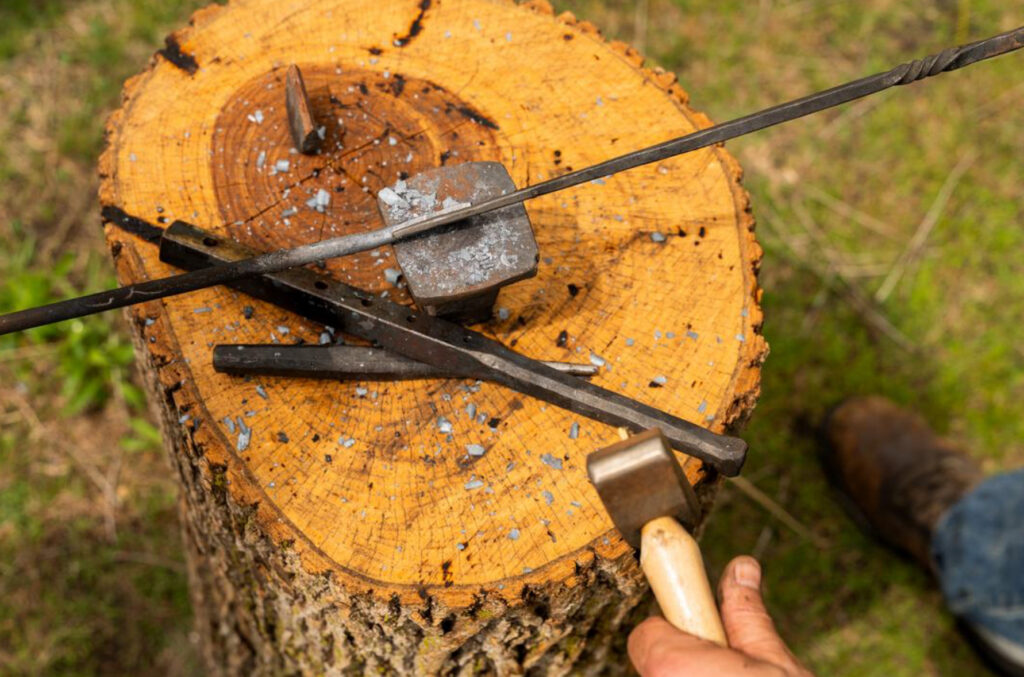
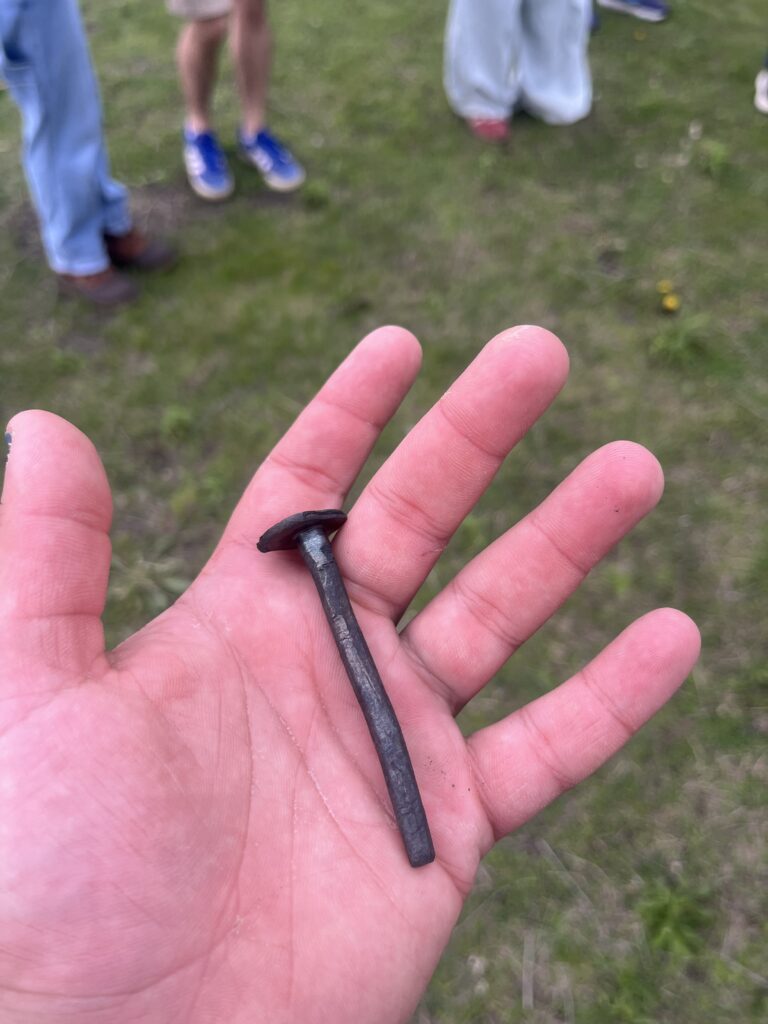
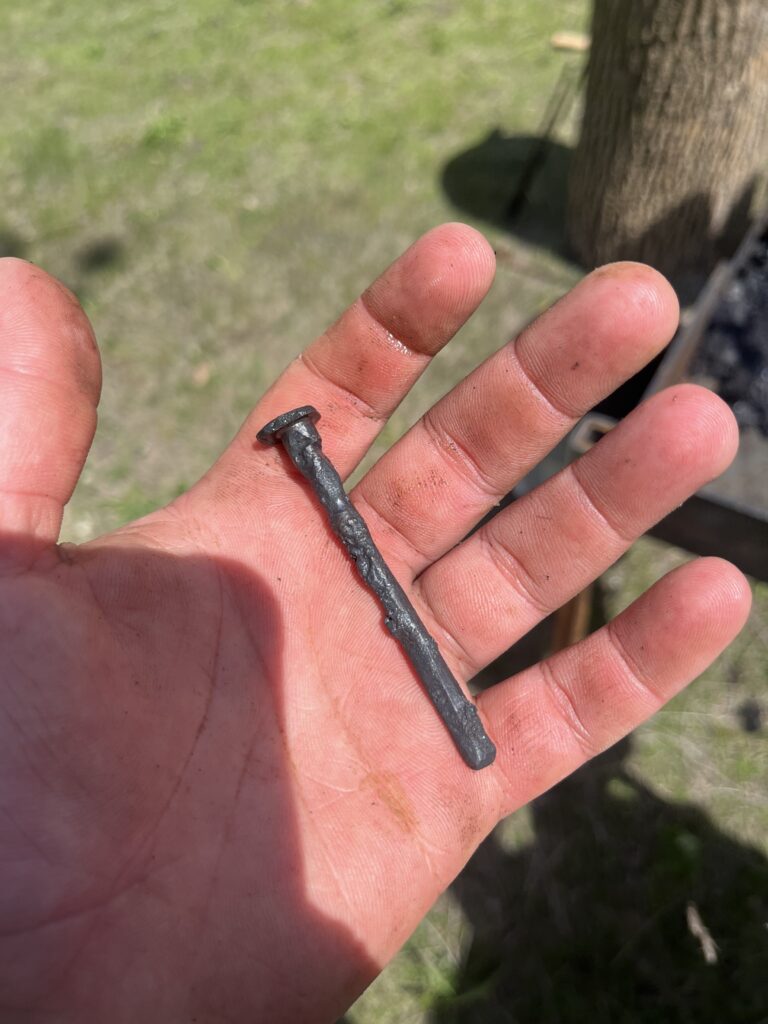
Once the tip of the iron rod had reached a sufficient temperature, the process of hammering a ship-nail started with forming a shoulder from which to make the nail. The shoulder was made by placing the heated iron over the stump anvil and hammering where half of the hammer face fell on iron directly over the anvil and half the hammer face fell on iron that hung off the edge of the anvil. To avoid deformation, the rod was rotated 90 degrees after each hit and then rotated back to the original orientation after the next hit. The shoulder marked where the head of the nail would eventually be, so it had to be made with the desired length of the nail in mind. Once the shoulder had been formed, the next step was to ‘square’ the iron above the shoulder which served to stretch out and thin the forming nail. The iron was squared by striking the heated iron along its length above the shoulder, rotating the rod back and forth 90 degrees to prevent flattening. Only after the nail had been squared could the rounding process begin. Rounding the nail was a similar process to squaring except the heated iron was struck on its corners rather than on the flat surface of the square. Another difference between squaring and rounding was that the rounding of the iron was tuned towards achieving the desired thickness of the nail from the options offered by the header. The size of the nails were calibrated by trying to insert the iron being rounded into a given hole on the header once it had lost most of its heat induced malleability, and the size was determined to be achieved when the nail could fit snuggly up to the shoulder. After the rounded nail had reached the desired size the next step was to specifically heat the area around the shoulder and then use a chisel to cut through the rod just above the shoulder until the chisel almost breaks the shoulder completely off. Then the nail was placed into the hole it was sized for and the heated metal was twisted off at the chisel cut. The detached nail would then be placed into the small hole at the edge of the anvil while still in the header and the heated shoulder was hammered down to form the head of the nail.
Roves
The process to make the roves began the same as the process to create the nails but quickly diverged. First the iron rod had to be heated in the forge fire until it glowed an orange that was just beginning to turn yellow. But instead of creating a shoulder in the rod like in the ship-nail creation process, the heated tip of the rod would then be hammered into a rectangle around 1/8th of an inch thick. For an expert blacksmith this would be done in a single heat, but it took several heats for lab groups to achieve this shape in their rods. Once the rod tip had been flattened into a short rectangle, and enough crookedness had been removed, the flattened part of the rod was heated, placed on the anvil, and then the punch tool was placed in the center of the rectangle section of the rod and then struck with the hammer around 3-4 times consecutively in the same spot before the punch tool was removed and quenched in a bucket of water to prevent the heat of the rod from deforming the punch tool. This would then be repeated until slightly after the rod had lost its heat-induced coloration, which was the sign for the groups to reheat the rod. Once hammering the punch tool produced a significant increase in resistance, the next step was to reheat the rod before placing it back on the anvil upside down so that the protruding indent from hammering the punch tool was facing the sky. The rod was to be placed on the anvil so that the indent was directly over a small hole at the edge of the anvil. This is so that when the indent was hammered the iron could give way and be punched out rather than pressed into the anvil. The resulting circular piece of metal is known as a ‘slug’. After the slug was removed the rod had to be heated (at least) once more and then the rectangular tip of the rod was chiseled off so the punched out hole would be in the center of the newly created rove.
Results
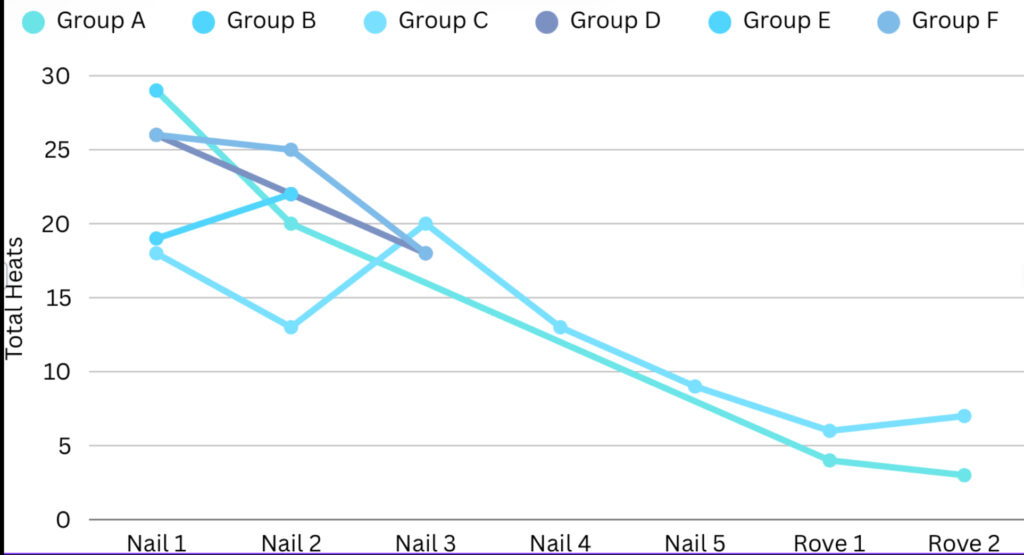
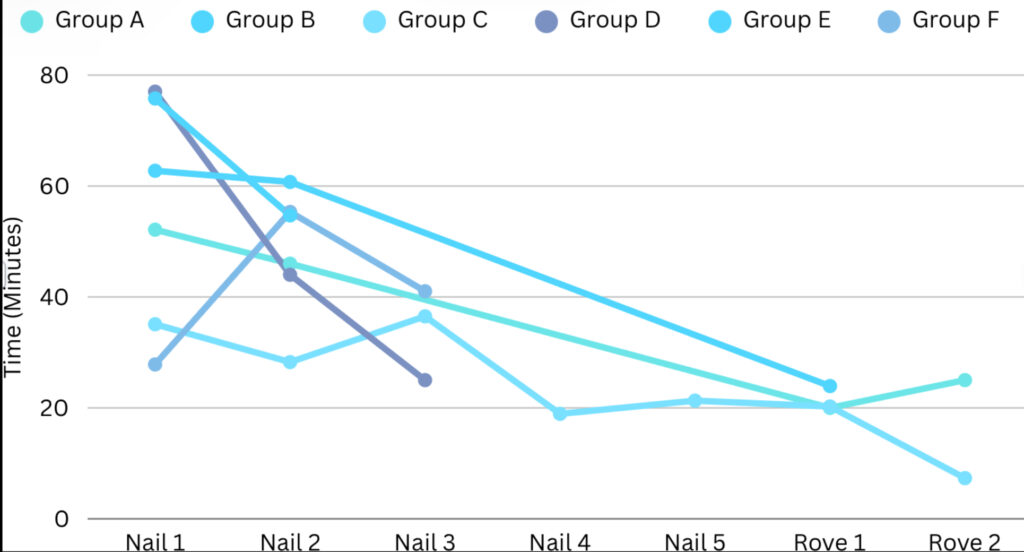
Every group was able to produce at least one nail and one rove, although the time to do so varied a lot between groups. One consistency across groups was that the time to make a nail/rove went down with each iteration. This was likely due to the other groupmates learning about the process and potential failings from the guinea pigs before them. The most productive group was group C, with five nails, and two roves. They were using a coal fire, which likely contributed to a faster firing process, and lower maintenance. Not every group recorded their fire temperature, but for the groups that did, temperatures ranged from 800 to 1000 degrees.

0 thoughts on “Week 7 Lab Summary: Blacksmithing”