
Raine Bernhard, Andrew Fitch, MJ Fielder-Jellsey
Introduction
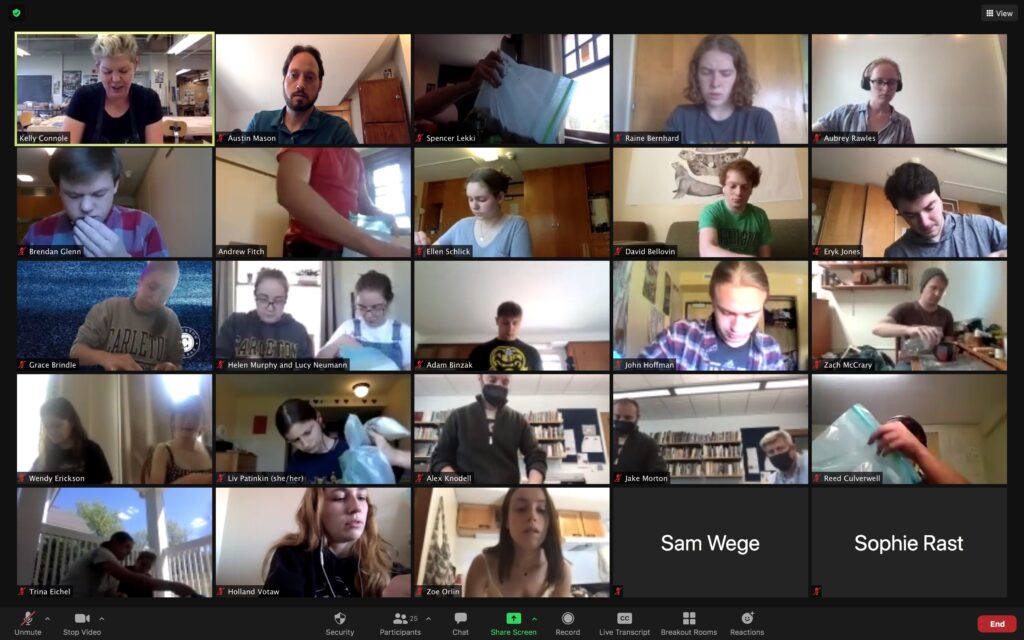
This week in ARCN 222, the focus moved from cordage and the use of plant matter for creation to pottery and the use of clay. On May 12th, 2021, the students tuned in to a Zoom class guided by Kelly Connole, professor in the Studio Art Department at Carleton College, for a lesson on how to make the simplest of pinch pots, starting with clay in its dry form and turning it into small pots through the steps listed below.
The immediate goal of the class with Professor Connole was to make at least one small pinch pot each through the provided instructions, but of course, this lab has a bigger purpose. We were tasked with, through the making of our pots, exploring and experiencing the process of creating pottery from the raw materials provided to aid in our understanding of this week’s readings. In doing this, we not only learned more about the process itself but also about the material. Is this material more forgiving than what we’ve been working with in our labs? Were any steps more difficult than others? Can we tell where being amateurs hinders our outcome? Where do we see technology transfer or something similar, and of what process(es) does this remind us? To answer these questions, students started at the most basic level of the process, with two bags of dry clay (one refined and one unrefined from the arb), a vessel of water, and a bag of grog for tempering, which will be explained below.
Professor Connole provided the refined clay as well as the clay from Carleton’s arboretum and the grog while the students provided the mixing bowl and the water, along with an eagerness to make these pots and learn more about the chaine operatoire of pottery creation. In general, Professor Connole did not have us use precise measurements when making and working with our clay. Instead, we relied on the feel of our clay (how wet/dry it is, if it is cracking, etc.) to make decisions about adding different components to our clay. We also had a lot of freedom regarding what we made with the clay. For example, some people made large pots while others made several smaller bowls. We worked from our rooms, following the instructions to construct our pots. Despite the variety in clay types and final products, all participants followed the same steps outlined by Professor Connole for both clays: we added water (rehydration), we added grog (tempering), we kneaded (wedging), we shaped the pots (forming), some carved their pots (decorating), and then we left them out to dry (drying).
Materials
Participants needed to supply a water source and a vessel for mixing the clay. Additionally, the following materials were provided to each participant:
- Refined clay powder (large ziplock bag): A standard clay powder used by art students at Carleton. The clay powder was very fine and uniform, containing no noticeable rocks or other unwanted inclusions. This clay powder also contained a small amount of grog initially. It was light brown in color and dried to a very light tan.
- Arb clay powder (small ziplock bag): Clay was harvested from the Carleton College arboretum and then dried out and crushed into a powder. It was dug from below the topsoil, at least a foot below ground level. This clay powder contained larger clay particles and was much more coarse than the refined clay. It also contained some non-clay particles like very small rocks that made the powder grittier. It was dark brown in color and dried to a medium brown (its color difference was more striking than the refined clay).
- Grog (small ziplock bag): Fired clay pieces that had been crushed into a sand like material to be used for tempering.

Process
Step 1: Rehydration
Rehydration involved taking dry clay powder and adding water until the clay was workable. The general strategy was to start with only a portion of your total available clay and then slowly add water to that portion. Professor Connole had us use about half of our refined clay to start. Adding the water in small amounts helps to avoid over-hydrating the clay. If the clay did become over hydrated, we could mix in some of the powdered clay we set aside to dry it faster. While Professor Connole was able to identify when she properly hydrated her clay by feel alone, she also told us about a test we could perform. To carry out the test, start by rolling out a small coil of clay (take a piece of clay and then rub it between your hands). Then, wrap the coil around one of your fingers. If the coil cracked or broke, then the clay is too dry and needs more water. If the coil became soggy or fell apart in your hands, the clay is likely too wet.
While this step may seem minor, it had major consequences for the rest of the pottery-forming experience. Multiple groups identified rehydrating the clay as a step where they encountered difficulties. We received the clay as powder, so we had to work on instinct to decide how much water to put in the clay. Additionally, we did not have uniform measuring implements which further complicated the process. Luckily, we found the clay as a material to be forgiving in that if it got too wet, we could wait for it to dry or add more powder. Some groups, however, did find the arb clay to be trickier to rehydrate since it was more prone to falling apart when too much water was used. A few groups also noted that the coil test was particularly helpful in determining when clay was properly hydrated. In their data notes, Group D recorded that “with practice and the use of standardized formulas for moisture (…) in the mixing process this step would be significantly more successful.” People living in early Medieval England would have grown up around the pottery-making process, and thus would have learned better instincts for mixing the clay.

Step 2: Tempering
After we hydrated the clay, we had to temper it by adding the grog. Grog is crucial to the stability of the clay. It stops the pot from shrinking too much and protects it from exploding in the firing process due to heat shock. Grog can be made from numerous things, including sand, remains of other pots, and fibers. We used crushed remains of pots that had already been fired, which had a sandy look and texture. Professor Connole had us estimate two tablespoons of grog to add to the wet clay we made from about half the bag of refined clay. We then took our estimated amount of grog and poured it out either onto a surface or into a bowl. Then, we began to dab it with our wet clay. Each time we dabbed the grog, some of it stuck to our wet clay. We then mixed the grog that stuck into our clay and continued to dab the grog pile until it was all used up. Tempering dried out some peoples’ clays and forced them to add more water. An alternative approach was to temper the clay before rehydrating it. To do this, we had to mix some of their grog into our dry clay powders and then carry out the rehydrating step as normal. Group members were somewhat divided on which method they preferred. Group A noted that “adding grog (either before water or after water) made the clay feel firmer,” giving the clay a bit more structure. Again, we did not have uniform measurements of how much grog each person put in their vessels. Further information on the effects of the tempering will come after the firing process, in Lab 8.

Step 3: Wedging
After tempering, we had to wedge the clay to make it more malleable and workable before forming our pots. To wedge the clay, we kneaded it with a motion similar to the one used to knead bread in Lab 3. Specifically, we flattened the clay out then folded it over itself. We then pressed it flat again with our palms and repeated this process for a few minutes.
Step 4: Forming
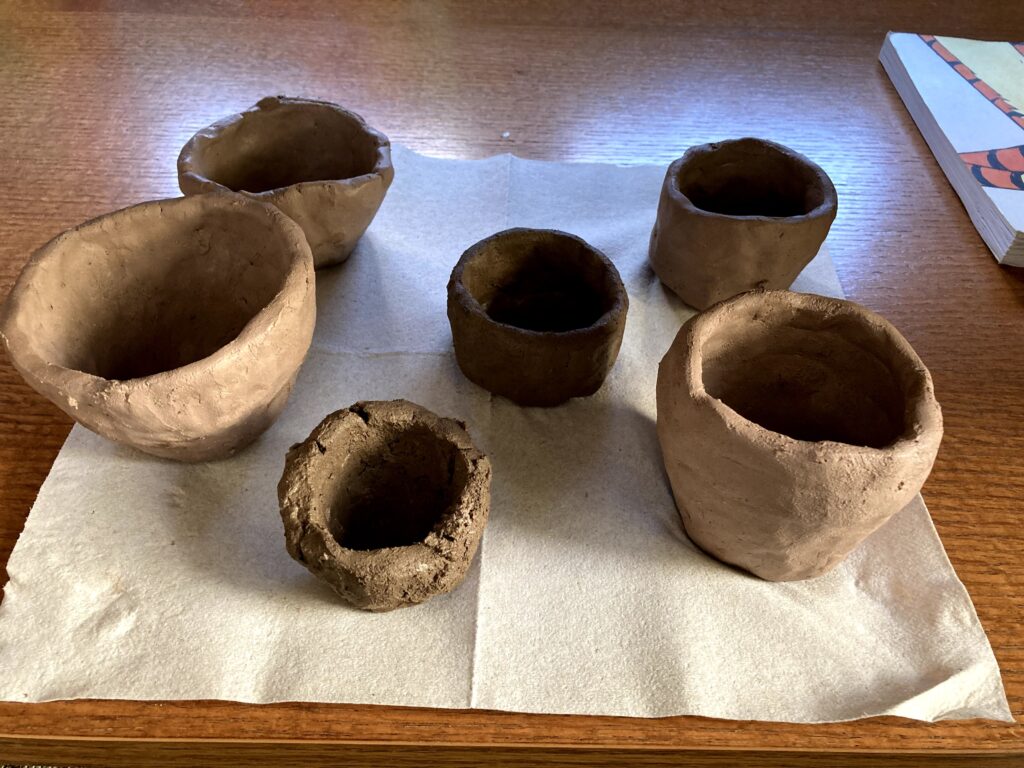
To form the pots, we started by rolling our wet clay into a ball about the size of our fist. Then, we used our thumbs to push an indent into the middle of the ball. We wanted the bottom of the pot to have a quarter of an inch thickness, so we had to be careful not to push in too far. After making the indent, we started pinching the pot. We pinched the clay by placing our thumbs in the indent and our index finger outside of the ball. We then gently pinched while pulling slightly upwards to shape the bowl. We had to move our hands around the pot as we pinched to ensure that the walls stayed a uniform thickness and height. As we pinched, the walls of the pot grew thinner and higher. Professor Connole instructed us to pinch until the walls had about 1/4th inch thickness. After pinching, we smoothed out the rims of the bowls by dipping a finger in water and lightly tracing it over the surface of the rim. If at any point the clay began to crack on the surface, we could add a little water and smooth the crack away. We could also use other surfaces as a rest for the clay while we molded it.
An optional step after making the pinch pot was to add coils to it. The purpose of coils is to alter the shape of the pot or increase its size. To create a coil, we rolled out some wet, tempered clay between our hands until it was long enough to cover the circumference of the rim and about the same thickness as the pots. We then placed the coil on top of the pot, tracing the rim. After placing the coils, Professor Connole instructed us to smooth out the seams so that the pot appeared to be a contiguous body of clay. She mentioned that creases or seams between the coils and the pinch-pot could be potential points of failure during firing.
“Attempted to add two coils, but done too quickly and clay was too wet – collapsed on self and only foundational form was savable”
Group C Member from Data Report
Forming the clay proved to be a challenge for some members of the class. Several people reported having their pots fall apart. Other pots ended up too thick, too thin, or not uniform. Across the groups, adding coils seemed to be the most difficult part. Group B noted that “coiling was difficult because although clay was being added, it often expanded the pots outwards instead of adding height.” Coils could cause issues structurally immediately, resulting in cave-ins, asymmetry of walls, cracks, or too-thin edges. An additional issue could come if the coils were not attached properly, which we will discover more about after the firing (Lab 8).

Step 5: Decorating
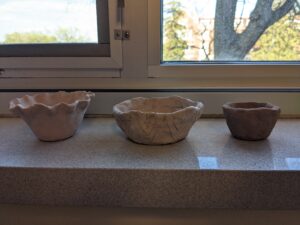
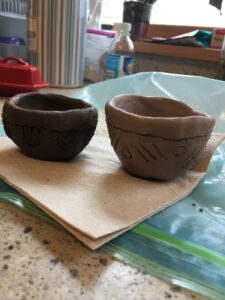
Professor Connole told us that the best time to decorate a pot was several hours after being formed when it is “leather hard.” She recommended using a slightly dulled wooden pencil to engrave the pots. We could also decorate the pots using a stamping technique by pressing objects into the walls. The majority of students decorated their pots with geometric patterns, similar to what people in early Medieval England did.
Groups had varying degrees of success decorating at different parts of the drying process. For instance, one group said they decorated their pot after it reached a leather-hard texture about 4 hours after forming. A different group said one of their pots was too hard after 5 hours and impossible to decorate. Surprisingly, a third group successfully decorated a pot after 24 hours of drying. This last group used stamps to decorate their pot instead of engraving it like most of the other groups. The success of the last group at decorating so late in the drying process may be partly attributed to their method of decoration. This would indicate that stamps work better at later stages in the drying process than engravings, which must be made earlier on when the clay is softer. In general, groups felt that their engravings served no practical purpose and only made the pot more aesthetically pleasing.

Step 6: Drying
To dry our pots, we had to leave them out in an open place for several days. Professor Connole mentioned that placing the pots in airtight containers, like a plastic bag, would make them dry slower. She also taught us that it is possible to rehydrate completely dried pots and start over again by placing them in some water.
Multiple groups noted the color change in the clay as it dried. Both the arb clay and the refined clay showed a gradient when drying with lighter shades at the rim and darker shades towards the base. As time passed the bowls continued to get lighter until they were completely dry. It was also noted that the thinner pots dried quicker than thicker ones.
There was a lot of variety in the amount of time it took for the pots to dry. This variation was likely due to the fact that everyone’s pots were different sizes and people added varying amounts of water in the hydrating step. Some people found that their pots were completely dry after 6 hours, while others said it took over 24 hours. One group even found that their arb clay may have taken 5 days to dry out. Despite this variation, it generally seemed to hold that the refined clay dried out faster than the arb clay. Additionally, the pots shrank slightly as they dried. Group B estimated that their pots lost about half inch in circumference during the drying process. One group noted that as the pots dried, imperfections that were not noticeable when forming became visible.
Comparisons Between Working the Refined Clay and the Arb Clay
All groups seemed to agree that the arb clay was more difficult to work with than the refined clay. In addition to being grainer and containing larger particles, groups also found it to be less stable and more prone to collapsing. The arb clay’s coarseness made it difficult to feel when it was properly hydrated. The many irregularities in the arb clay made decorating challenging as well since larger chunks or grains of material sometimes fell off. Some groups also found that the arb clay was generally extremely messy to work with. Lastly, since the arb clay dried out slower than the refined clay, accidentally over-hydrating the arb clay was much more costly since it would take longer for it to dry out and be workable again.
The refined clay, on the other hand, was described by one group as “smooth and workable.” Groups found that it held its form much better when manipulated and was also less likely to crack. Interestingly, a couple groups noted that they preferred the darker color of the arb clay over the lighter/redder color of the processed clay. The fact that arb clay was more difficult to use is also interesting because arb clay is much more similar to the types of clay people would have used in early Medieval England (EME).
Overall Reflections
We found clay as a medium to be very forgiving, which particularly helped counteract our inexperience. The material could always be saved or the pot could be fixed. Even if the clay shattered in the kiln it could still be repurposed as grog. In their lab notes, Group F noted that “If there were major structural issues, we could always scrap the attempt and restart.” However, the clay could not be rushed. If you added too much water, you had to wait for the clay to dry. The forgiving nature of clay contrasts starkly with other labs where mistakes, like over cooking the cheese, would have been devastating. It is possible that the relatively low stakes associated with forming clay would have given people the confidence to try to innovate, experiment, and develop new techniques.
Additionally, multiple groups observed the messiness of the clay and the difficulty of multitasking while making pottery. As opposed to spinning in particular, pottery was a task that demanded your full attention. However, people in EME probably did not need to make pottery as often as spin wool for cloth.
This was one of our only labs done in a Zoom environment, which changed the nature of learning from Professor Connole. It was difficult to listen, watch, and try to make our own pottery at the same time. Learning these skills over Zoom was incredibly different to what people in EME would have done, where they would have been around this process from childhood.
The interesting thing we’ve seen recurring in these labs, especially in this one about working with the clay, is that as you work with it, you start to develop an understanding for the material and the process. Clay was one of the easier materials we have worked with, as mentioned above, but it still possessed a learning curve for how to know when it was too dry, if you needed more grog, if you were applying too much pressure, and more. However, even after just an hour working with it, there was a newfound confidence in our abilities to work with this material, which is something we saw in the bread making, woolworking, and cordage labs in particular – as you work with the material, you learn to understand it and its process of moving from raw materials to finished, consumable products.
Group Data Reports
-
Week 7 Lab Group Data

Introduction: All lab groups met with Carleton ceramics professor Kelly Connole for a pottery-making workshop. Each individual had two types of clay – manufactured, “perfect” clay and unprocessed clay collected from the Carleton Arboretum. Starting as a powder, this was mixed with water to create a workable clay, with water or powder each being added……
-
Lab 7: Group D Pottery Data
Group D: Wendy Erickson, Brendan Glenn, Zach McCrary, MJ Fielder-Jellsey, additionally my housemate Astrid Malter and I did the lab activities using the same zoom screen Location: All lab activity was completed over zoom in separate spaces Instructor: Kelly Cannole Within this lab, we attempted to gain an understanding of the differing properties and components……
-
Lab 7: Clay and Pottery-Making Data

Lab Group F: Grace, Adam, David, Raine (recorder) Date: Wednesday, May 12, 2021 Location: Carleton College, over Zoom (in individual rooms) Because we each completed this process individually, without being able to fully see what each other person was doing or communicate very well (due to the clay on our hands), and additionally because we……
-
Week 7 Lab Data – Group A
This week in lab, we learned how to prepare clay and form pinch pots under the guidance and instruction of Kelly Connole, a ceramics professor at Carleton College. Each student was provided with a bag of purified commercial clay powder, a bag of clay powder from the arboretum, and a bag of grog/temper. We also……
-
Group B Lab Data – Week 7

This week, the class completed the first lab in the pottery unit: preparing clay and forming small pinch pots or vessels. Kelly Connole, a Carleton ceramics professor, joined the class over video call to instruct us on both the materials and techniques we would be using. Prior to class, each student received three materials: powdered……
-
Lab Data E Week 7
It is hard to give a complete lab report for my group as this lab was more of an individual journey than usual, but I will report on my experience with the clay and what I gathered from both the zoom and class today. The rough measurements that Kelly gave us were difficult to go……
0 thoughts on “Week 7 Lab Summary: Clay and Pottery-Making”