
Astrid Malter, David Bellovin, Ellen Schlick

Introduction
Over the past week, the class has been working on our final lab: building a mortuary house from natural materials. Although this lab can stand alone as a unit, we would not have been able to accomplish the build without what we had learned in previous weeks. For example, the woodland management walk with Nancy Braker introduced us to the place where we would be gathering materials and we learned how to weave during the wool and fiber weeks. We also used the cordage produced during the fiber lab and the pork shoulder bones from the cremation. With these skills and materials, the class was able to undertake the challenge of creating a functional structure out of foraged materials.
Our mortuary house was an experimental reconstruction of Building Feature 32 from Area Two, Cemetery One in Apple Down, Sussex. Researchers have hypothesized based on the remaining post holes that this now largely bare site was once a four post timber mortuary house constructed over cremation deposits. Using this information and Austin’s understanding of the structure, we tried to replicate the footprint and dimensions of Building Feature 32 with materials and methods accurate to the early medieval time period. Many of the steps like building wattle walls and tatching the roof would be used for domestic structures at the time, linking our mortuary house for the dead to the homes of the living. Below is a summary of the building experience that is divided into three sections: gathering materials from the arboretum, building the components of the house, and finishing the structure. The class was split into two larger groups during each of these processes (one focuses on the walls and the other on the framing and roof), so the summary is similarly subdivided.
Gathering Materials: Wednesday 5/26/21
Wattle Gathering

Groups assigned to collect wattle materials aimed to bring back 36-40 small trees, ideally 1 inch in diameter and 4-6 feet long. Four groups spread out along a path in the lower arboretum to look for the trees. Most of the usable trees were at least 10 feet off the main path. Willow trees were the most desirable, but not the most plentiful, so the groups cut down other species as well. Due to the limited amount of cutting tools, some group members scouted ahead and tied neon ribbon onto desirable trees to leave markers for the people with the tools. The clippers were more efficient than the saws for cutting down the trees although less historically accurate. Trees used for stakes were harder to find—these needed to be 2 inches in diameter and 3-4 feet tall. Stakes were often found underneath fallen branches and trees. The groups had to factor in walking fifteen minutes back to the construction site so the collection process shifted towards getting as many trees as possible rather than looking for the straightest and best trunks. The groups finished the day with an average of 5 stakes and 30 weavers which meant that a group needed to be sent back for more during the next class period.
Post Collection

The other two groups were in charge of collecting materials for the structure of the house. They went to the brush pile to get four posts that needed to be four feet long and six inches in diameter as well as sixteen other pieces of wood that could be slightly longer and thicker. They were paying close attention to the quality of the wood, trying to find timber that was not rotten or curved. In the end, the groups collected nine post options for the four corner posts of the house and twenty-two other pieces of wood that could be used for the frame and roofing. The posts were later picked up by car at the brush pile and transported to the building site, a modern advantage that saved time and energy.
Building the Components: Friday 5/28/21 & Monday 5/31/21
Wattle Walls
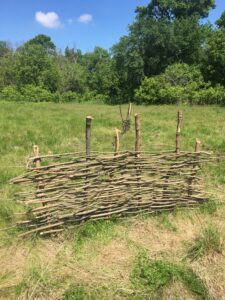
Before hammering in the stakes and weaving the wattle, the wall groups had to neaten up their poles by trimming the branches off. The bill hook was the most efficient tool, though the clippers worked very well when one person held and rotated the tree while another person clipped. To make the stakes, someone had to saw them down to the appropriate length and saw at an angle to make a sharp point. The stakes were intended to be hammered 6 inches into the ground but none of the groups could manage this. Each stake was placed about 7-12 inches apart. The long walls used 7 stakes and the shorter walls used 5.
Weaving the wattle poles through the stakes was described as “satisfying” and “surprising.” The willow branches were the most flexible and wrapped easily around the stakes. It was necessary to hammer the stakes again a few times as the pressure of the weaving forced some of the stakes apart. The two long walls were longer than needed so we sawed a few inches off of each side so that they would fit under the frame. After the walls were constructed, they were pulled out of the ground and transferred to the house frame where, if measured correctly, they slid into place. All of the walls ended up fitting with some adjustment and more sawing of the excess wood on the sides of the outer stakes.

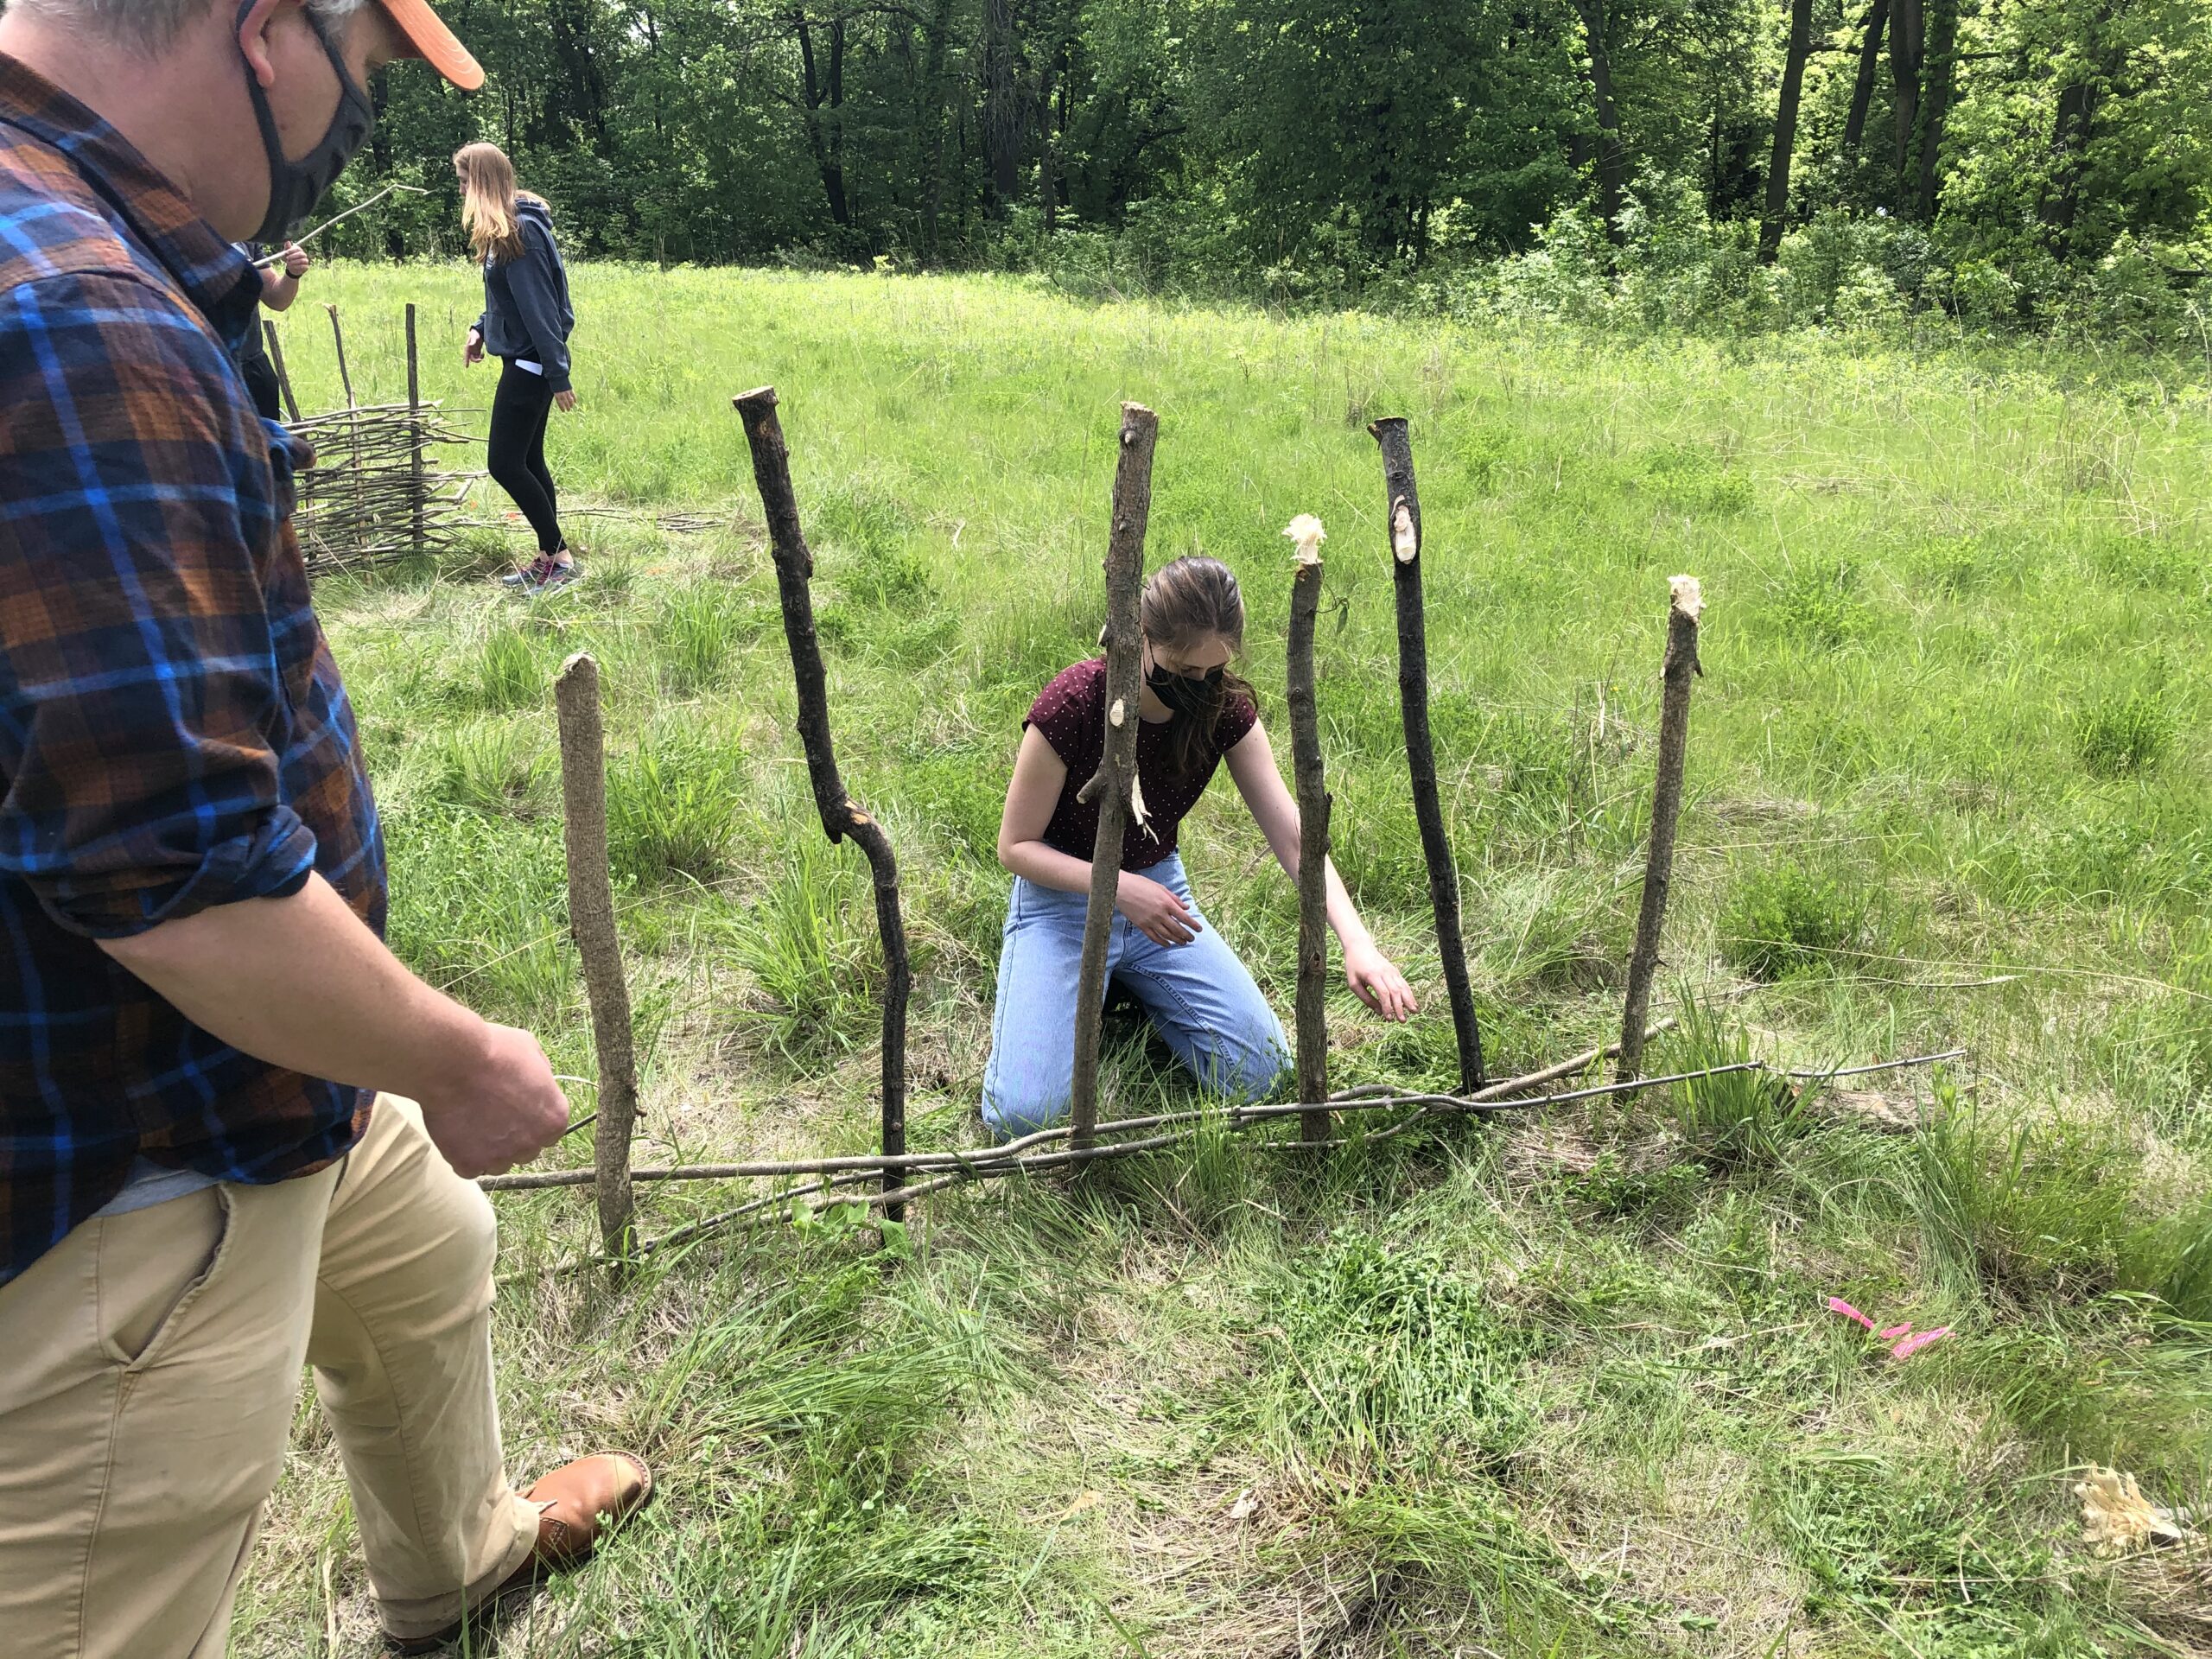
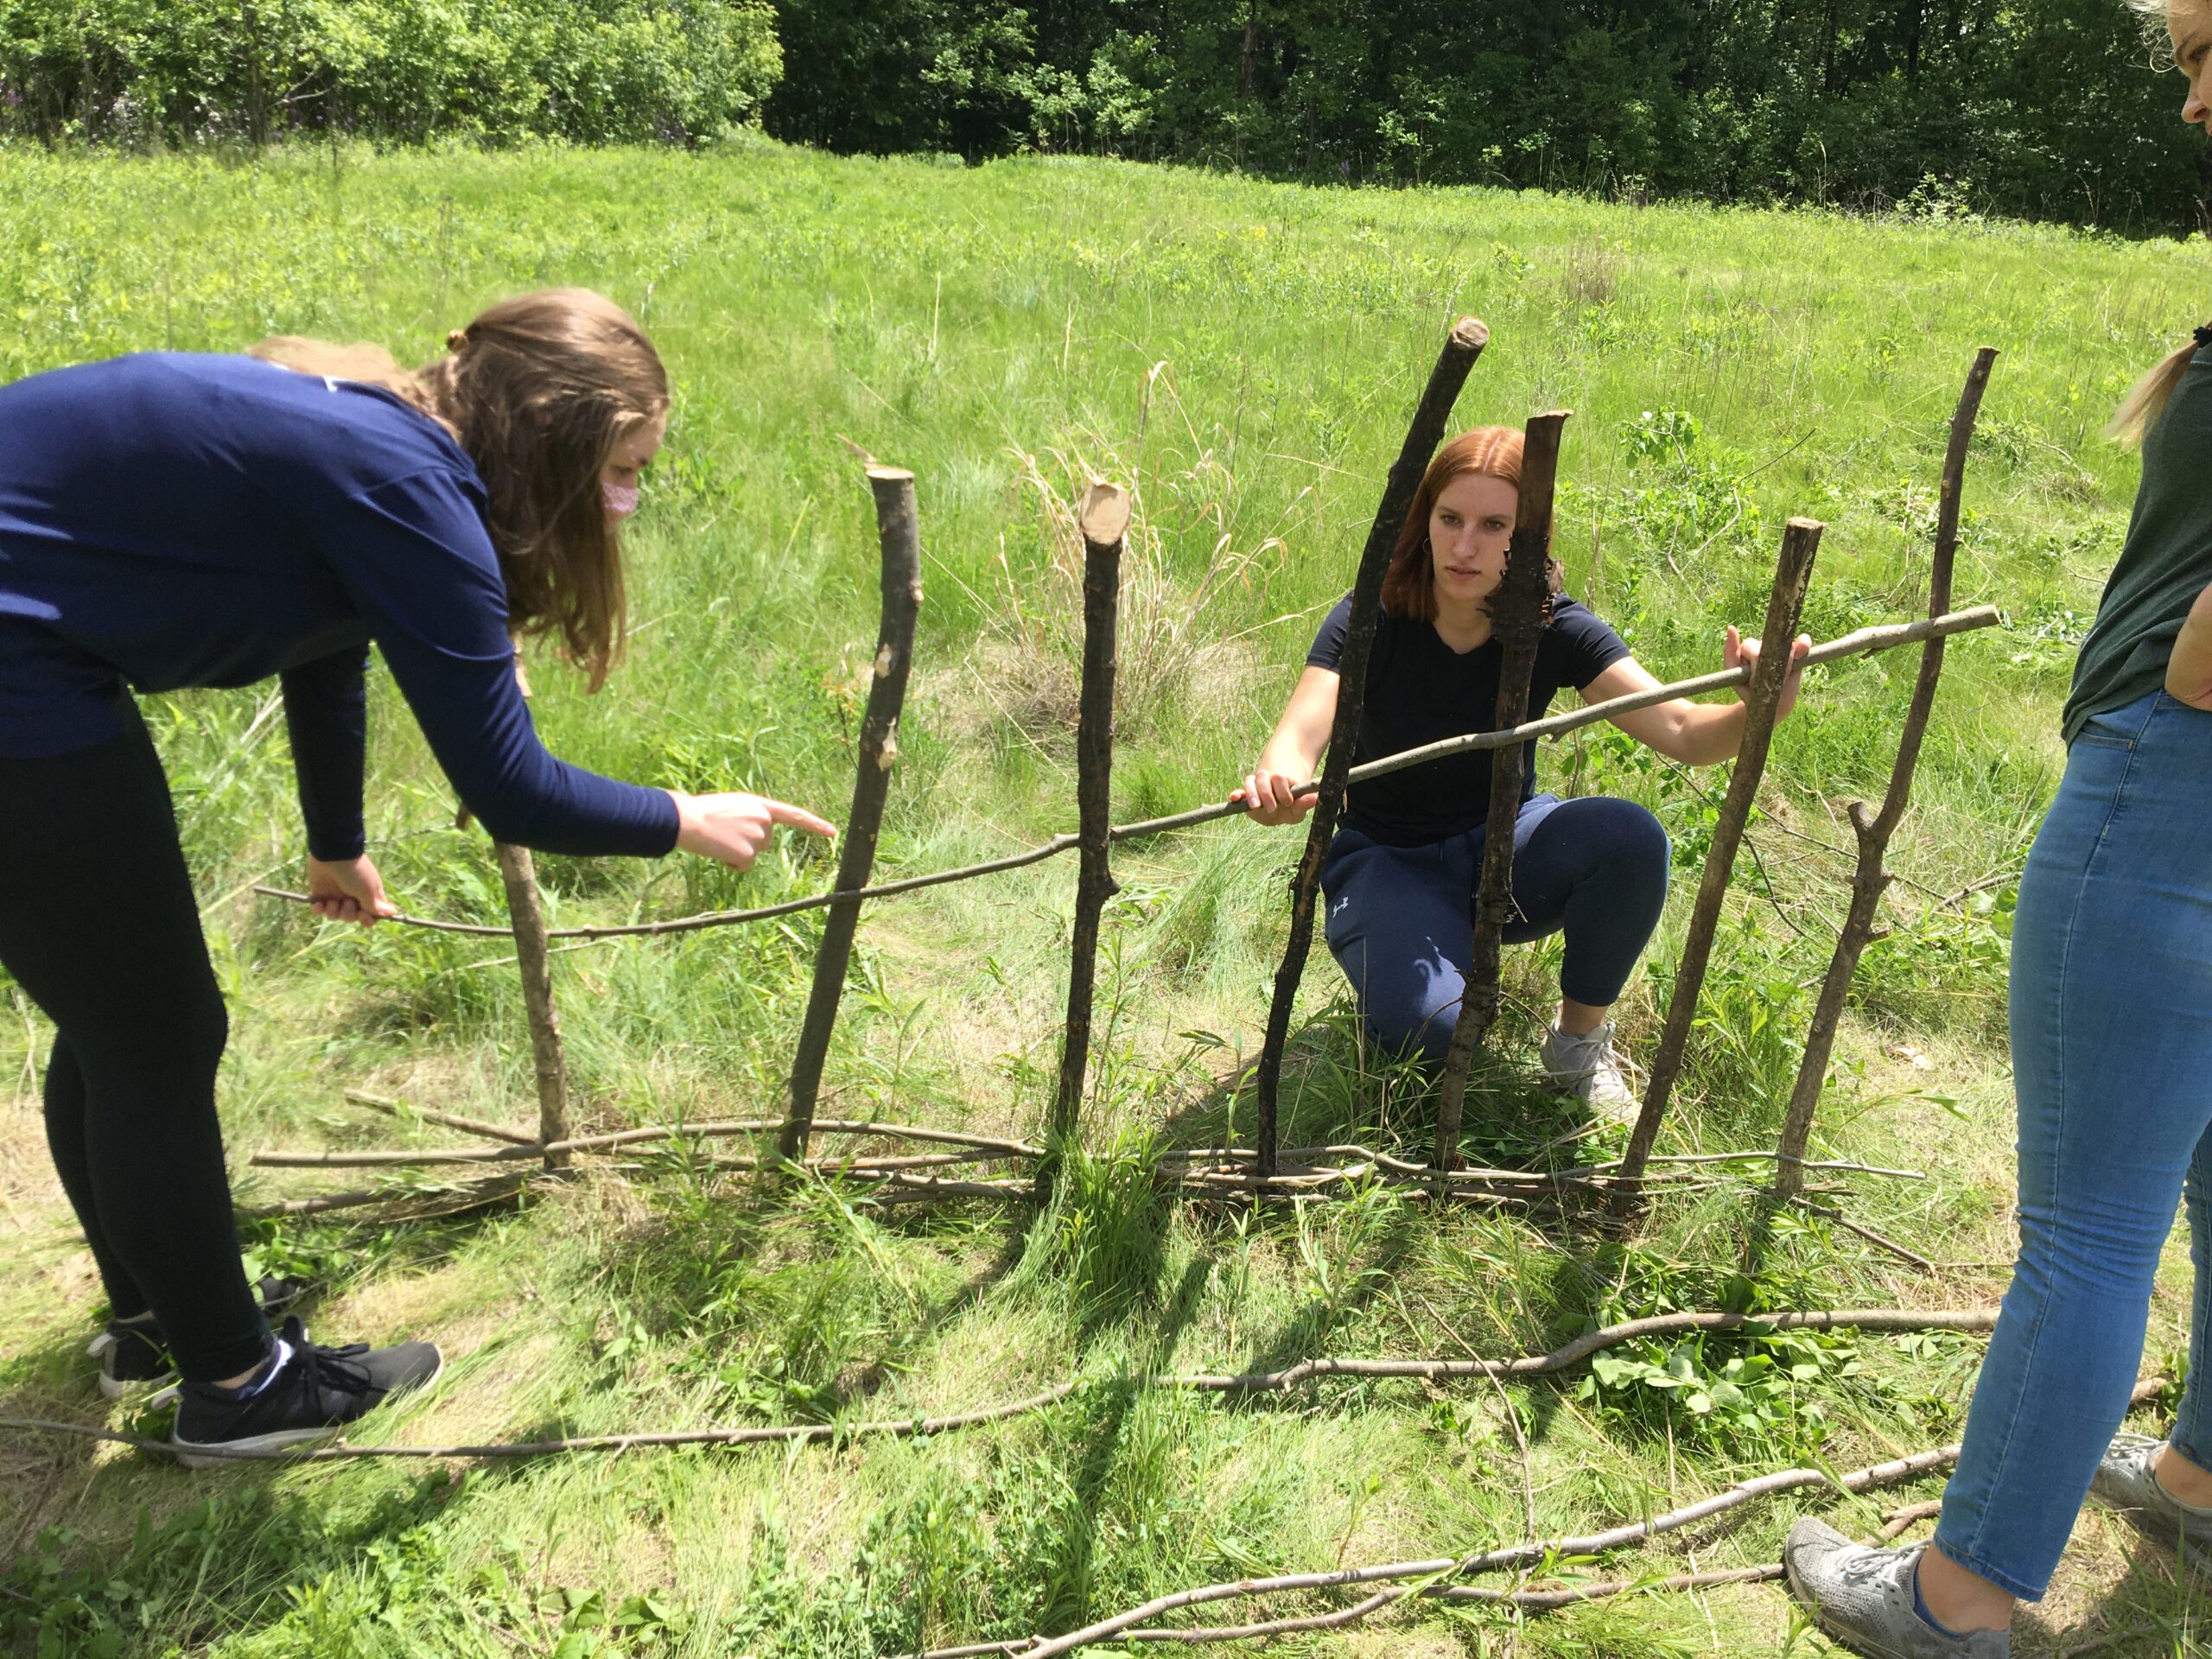
Digging and Framing
The groups that collected the framing posts started to build the foundation of the mortuary house. They started by outlining in the soil a 4 x 5 foot base that matched the dimensions of Building Feature 32 from Apple Down. They dug about a foot down in the corners and inserted the timbers. More sticks were tied around the pillars to create a frame that the walls could eventually lock into. There was also a hole in the center of the structure for the urn and remains. The groups also had the foresight to dig some of the grass out of the center of the rectangle and save it for roofing material. Finally, the roof rafters, six pieces of four foot timber, were placed at ninety degree angles in pairs of two. The groups succeeded in creating an angle that would allow the height of the rafters (1.5 feet) to be about half the height of the wall (3 feet). To prepare for thatching, the groups wove branches into the roof for support.


Finishing the Structure: Wednesday 6/2/21
Daubing
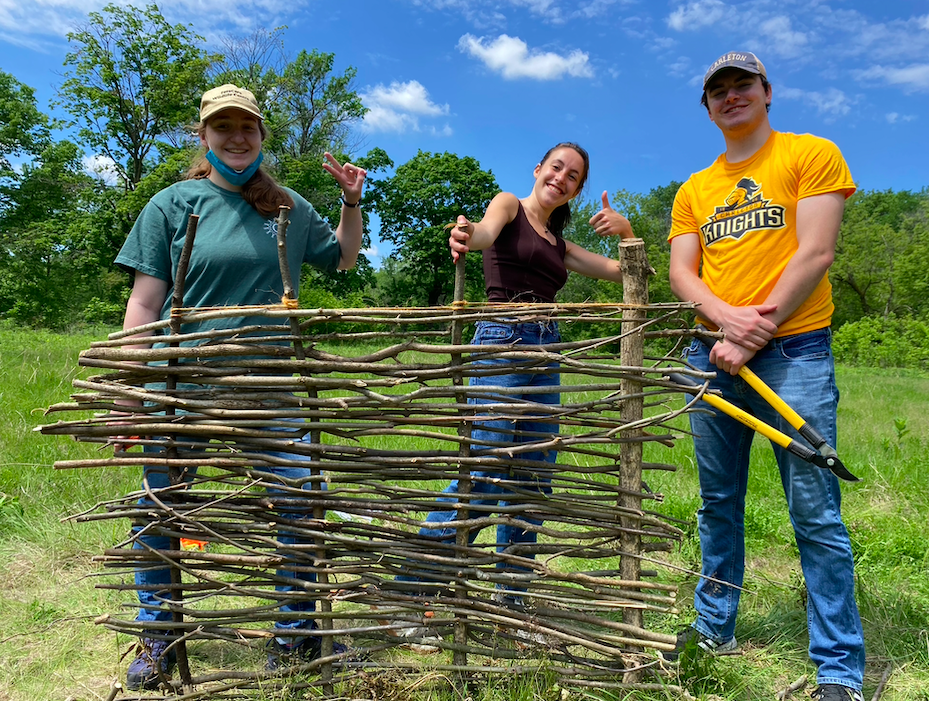
The lab groups that had constructed wattle walls now had the task of daubing them with a mud and straw mixture. They collected their mud from the Cannon river. During the first round of mud collection, most groups chose spots that were too watery or sandy to create a clay-like consistency. Learning from past mistakes, they choose to take mud from drier spots that were farther away from the river on the next trips or simply drain the excess water off of the tarp. The mud was mixed with straw to give it some texture and thickness for application. This mixing was done mostly with bare hands, but we also had the option of using our feet. Finally, the mud mixture was applied to the wattle walls to fill in the gaps in the weave. Group C estimated that they used about 60 liters of mud to cover their 1.6 m2 wall, although less could probably be used if the wattle was more tightly condensed. Each group had a slightly different mud texture, so the results varied. Overall, it appears that as long as the mixture was not too wet, it held onto the wood well and did not peel off of the sides of the house.

The daubing process involved a fair amount of trial and error, considering how simple the concept of applying mud to a surface is. Group F started with a mixture that contained much more sand than mud, which meant it did not stick to the wall as well. The daubing groups also had to experiment with how much straw to add, a process made harder by the fact that there was no clear way to tell if different amounts of straw made a difference. For example, when a patch of daub fell off the wall, it was not clear if that had happened because the daub was too wet, or didn’t have enough straw, or if the wattle wall simply made that area hard to daub. In the end, the practice of daubing became more and more instinctual. Even if the group members could not say explicitly what ratios of straw, mud, and water were needed for good daub, they learned to feel how good a mixture was, and how to apply it well.
Roofing: Thatch and Turf
Half of the roof was laid with the patches of turf that were reserved while digging the footprint of the structure. This was not only functional, but made use of the materials that could have been discarded if we weren’t being resourceful. The other half was made from bundles of short-cut straw about 4 inches in diameter. Longer stalks would have been more ideal because they would have created thicker layers. The best way to attach the thatch with the materials we had was to use bendy, foot-long sticks as wooden “staples” to hold them in place. The sticks were recycled from the branches we had trimmed off the wattle poles in the previous classes. In less than an hour, one side of the roof was entirely covered in straw bundles. It took five rows of eight to ten bundles to fill in the area. The roof was both stronger and more aesthetically pleasing than we had imagined.


Conclusion
While having constructed the mortuary house, itself, was a rewarding culmination of the term, this lab also was useful for considering the major themes of this course such as craft production and the role of society or community in the chaîne opératoire. We also were fully engaged with the natural world in this lab, and, although we had to use some modern tools and twine, focused on experiencing the build as they would have in early medieval England. This was the lab with the most emphasis on working together; without dividing the labor and working both within and across groups, we would not have finished the house on time. The relationships we built with our lab groups and classmates over the past ten weeks both supported and grew through the process of building the house. Applying our experiences of building the house to those of early medieval English people supports the idea that these rituals merged the realms of the living and the dead. While the work was done because of death, it brought together living family and community members. This lab also has implications for the importance of experiential history in understanding ancient and medieval lives and routines. Without actually building the structure, this finding about community would not have been considered. Finally, creating the mortuary house allowed the class to participate in ongoing research and scholarship. We are able to finish the term knowing that our experiments with how much straw is needed in daubing, what material is best for roofing, and if the structure would even stand at all, will be put into the field of experimental archaeology.


Great work team!